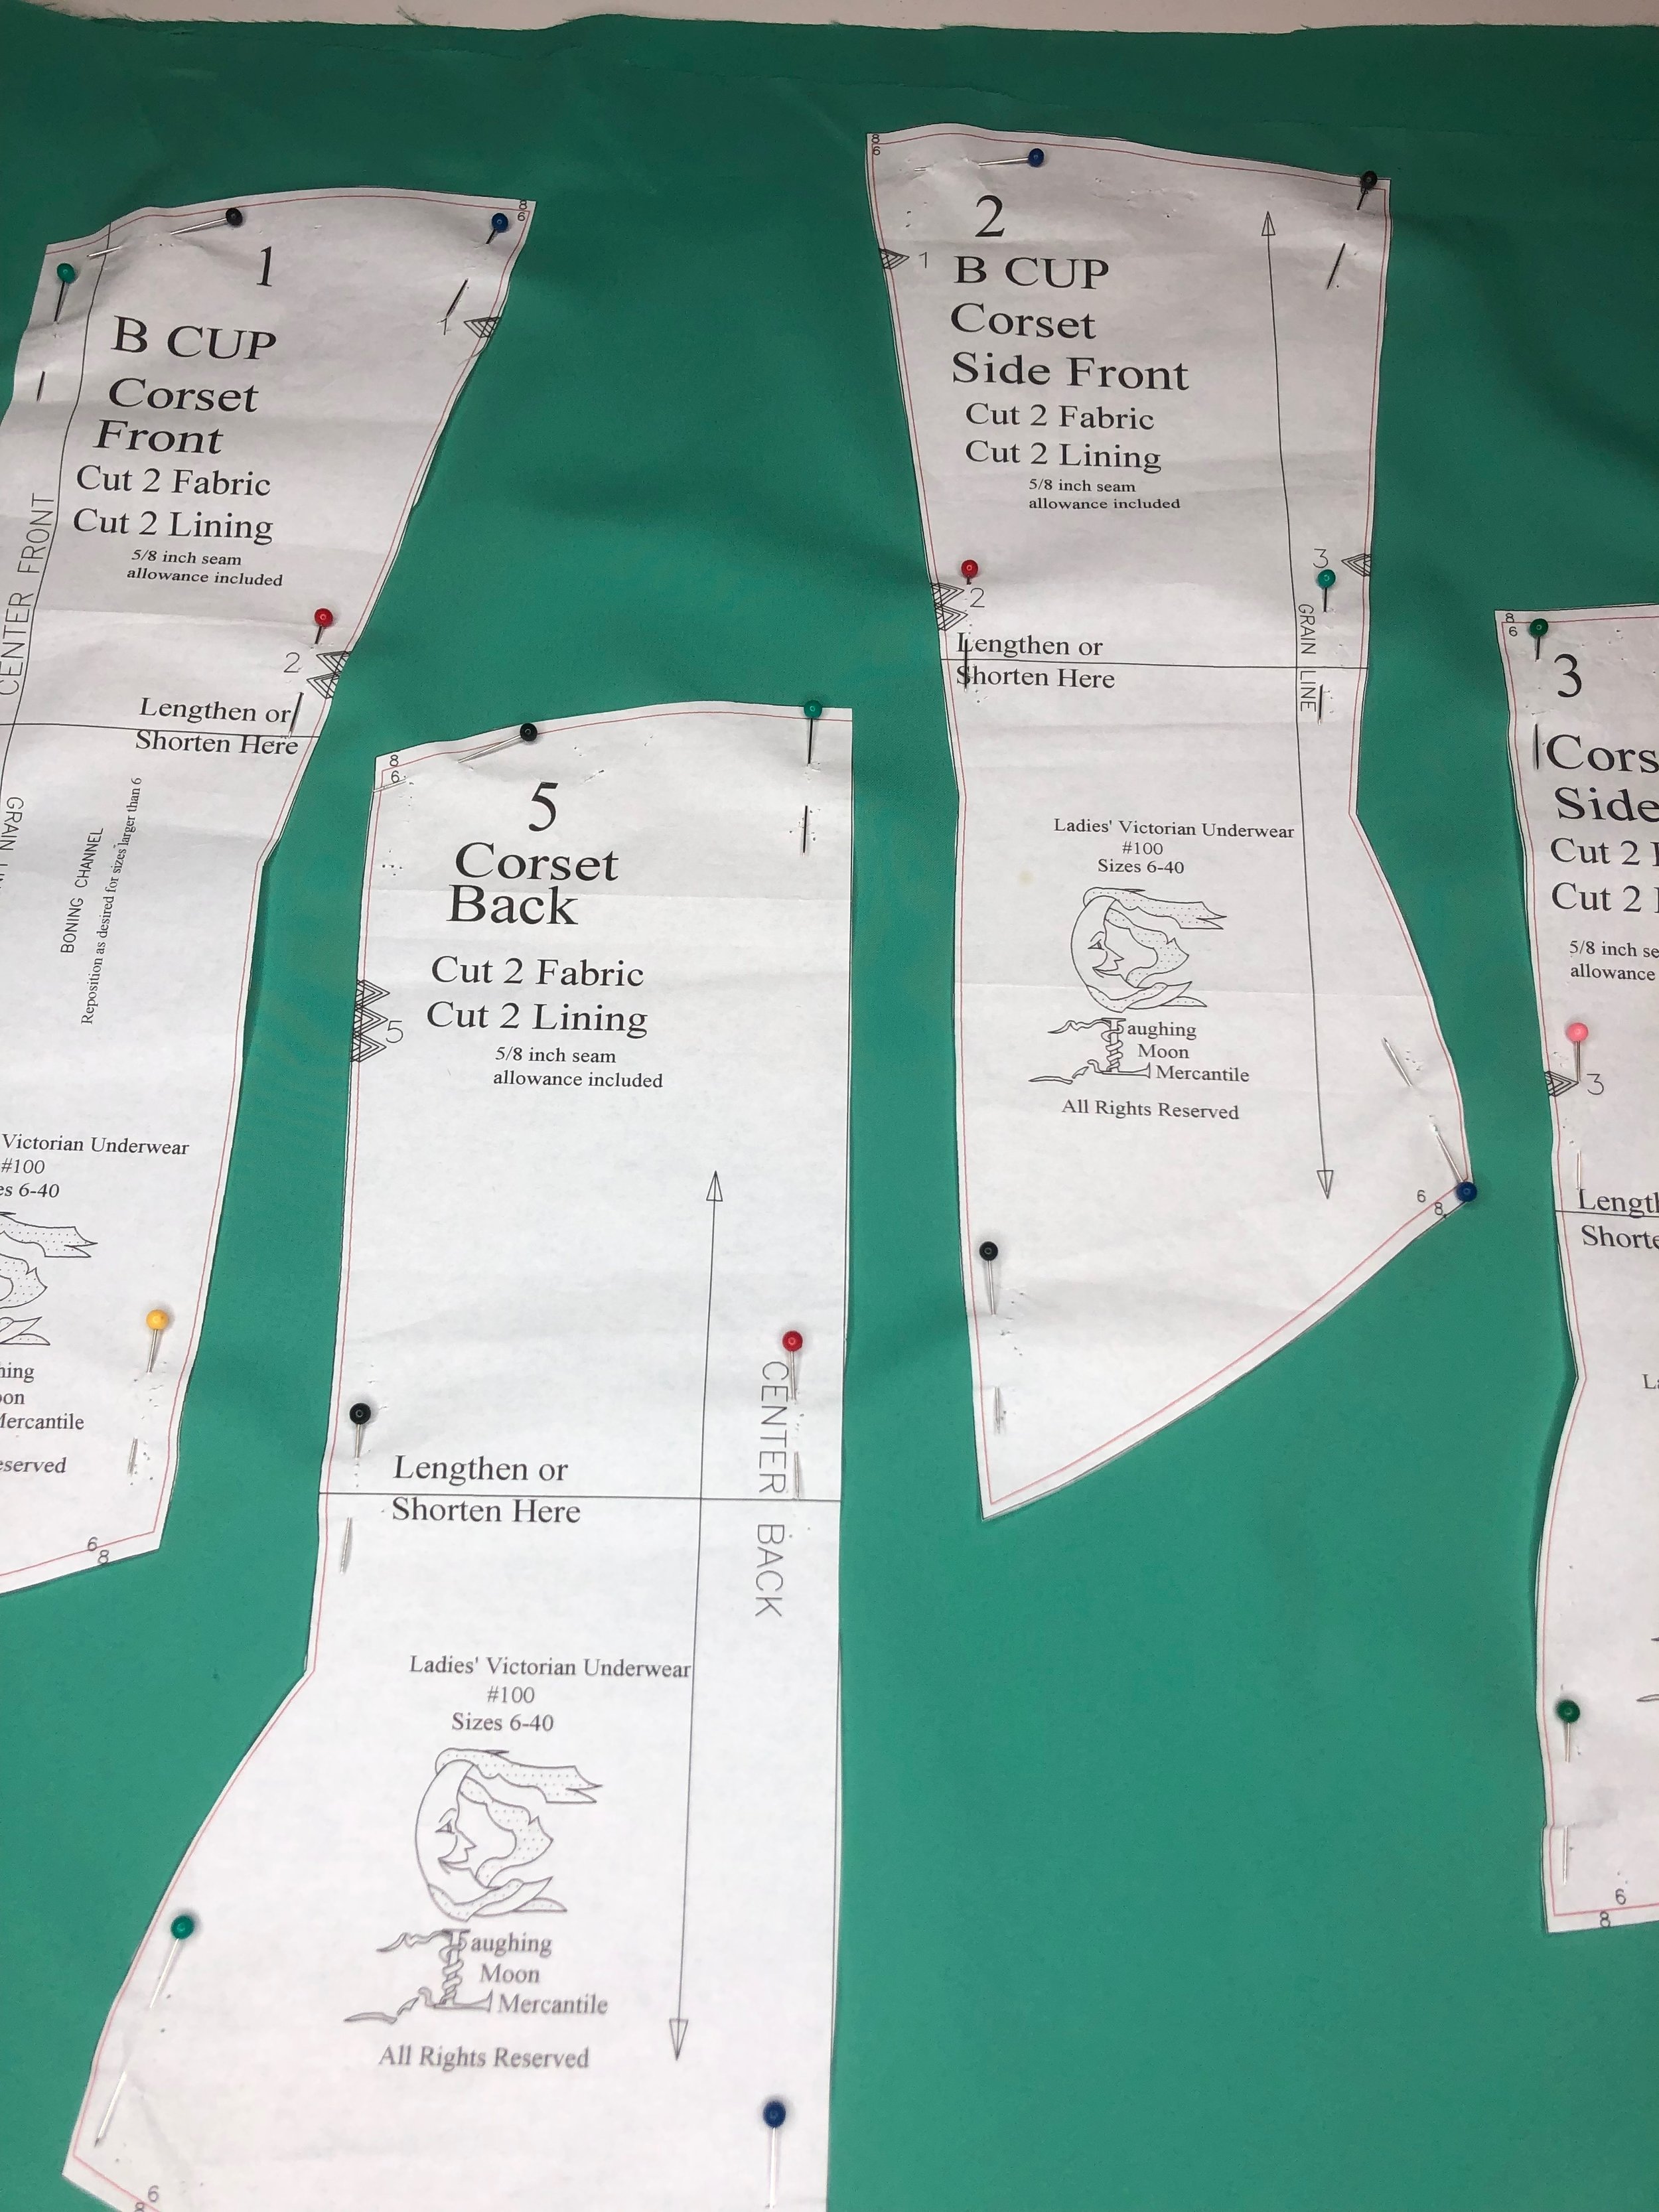
Welcome to my blog, I often get asked about what corset pattern I use and I’m finally making a blog post about it. I love the Laughing Moon Pattern #100 I’ve used it for myself and my customers multiple times.
Like every pattern you should always start with a mock up, since I’ve used this pattern on several occasions I am going to skip that part for the purpose of this blog and get right into cutting my fabric.
I used a cotton print for the lining, a cotton blend for the interling and a light weight satin for the fashion fabric all of these fabrics were pulled from my stash.

I also cut a layer of fusible interfacing and ironed it onto the cotton lining.

Then I basted the interlining fabric to the satin on all of the sides to make it stronger.

At this point I marked the darts on each panel with a water soluble marker.
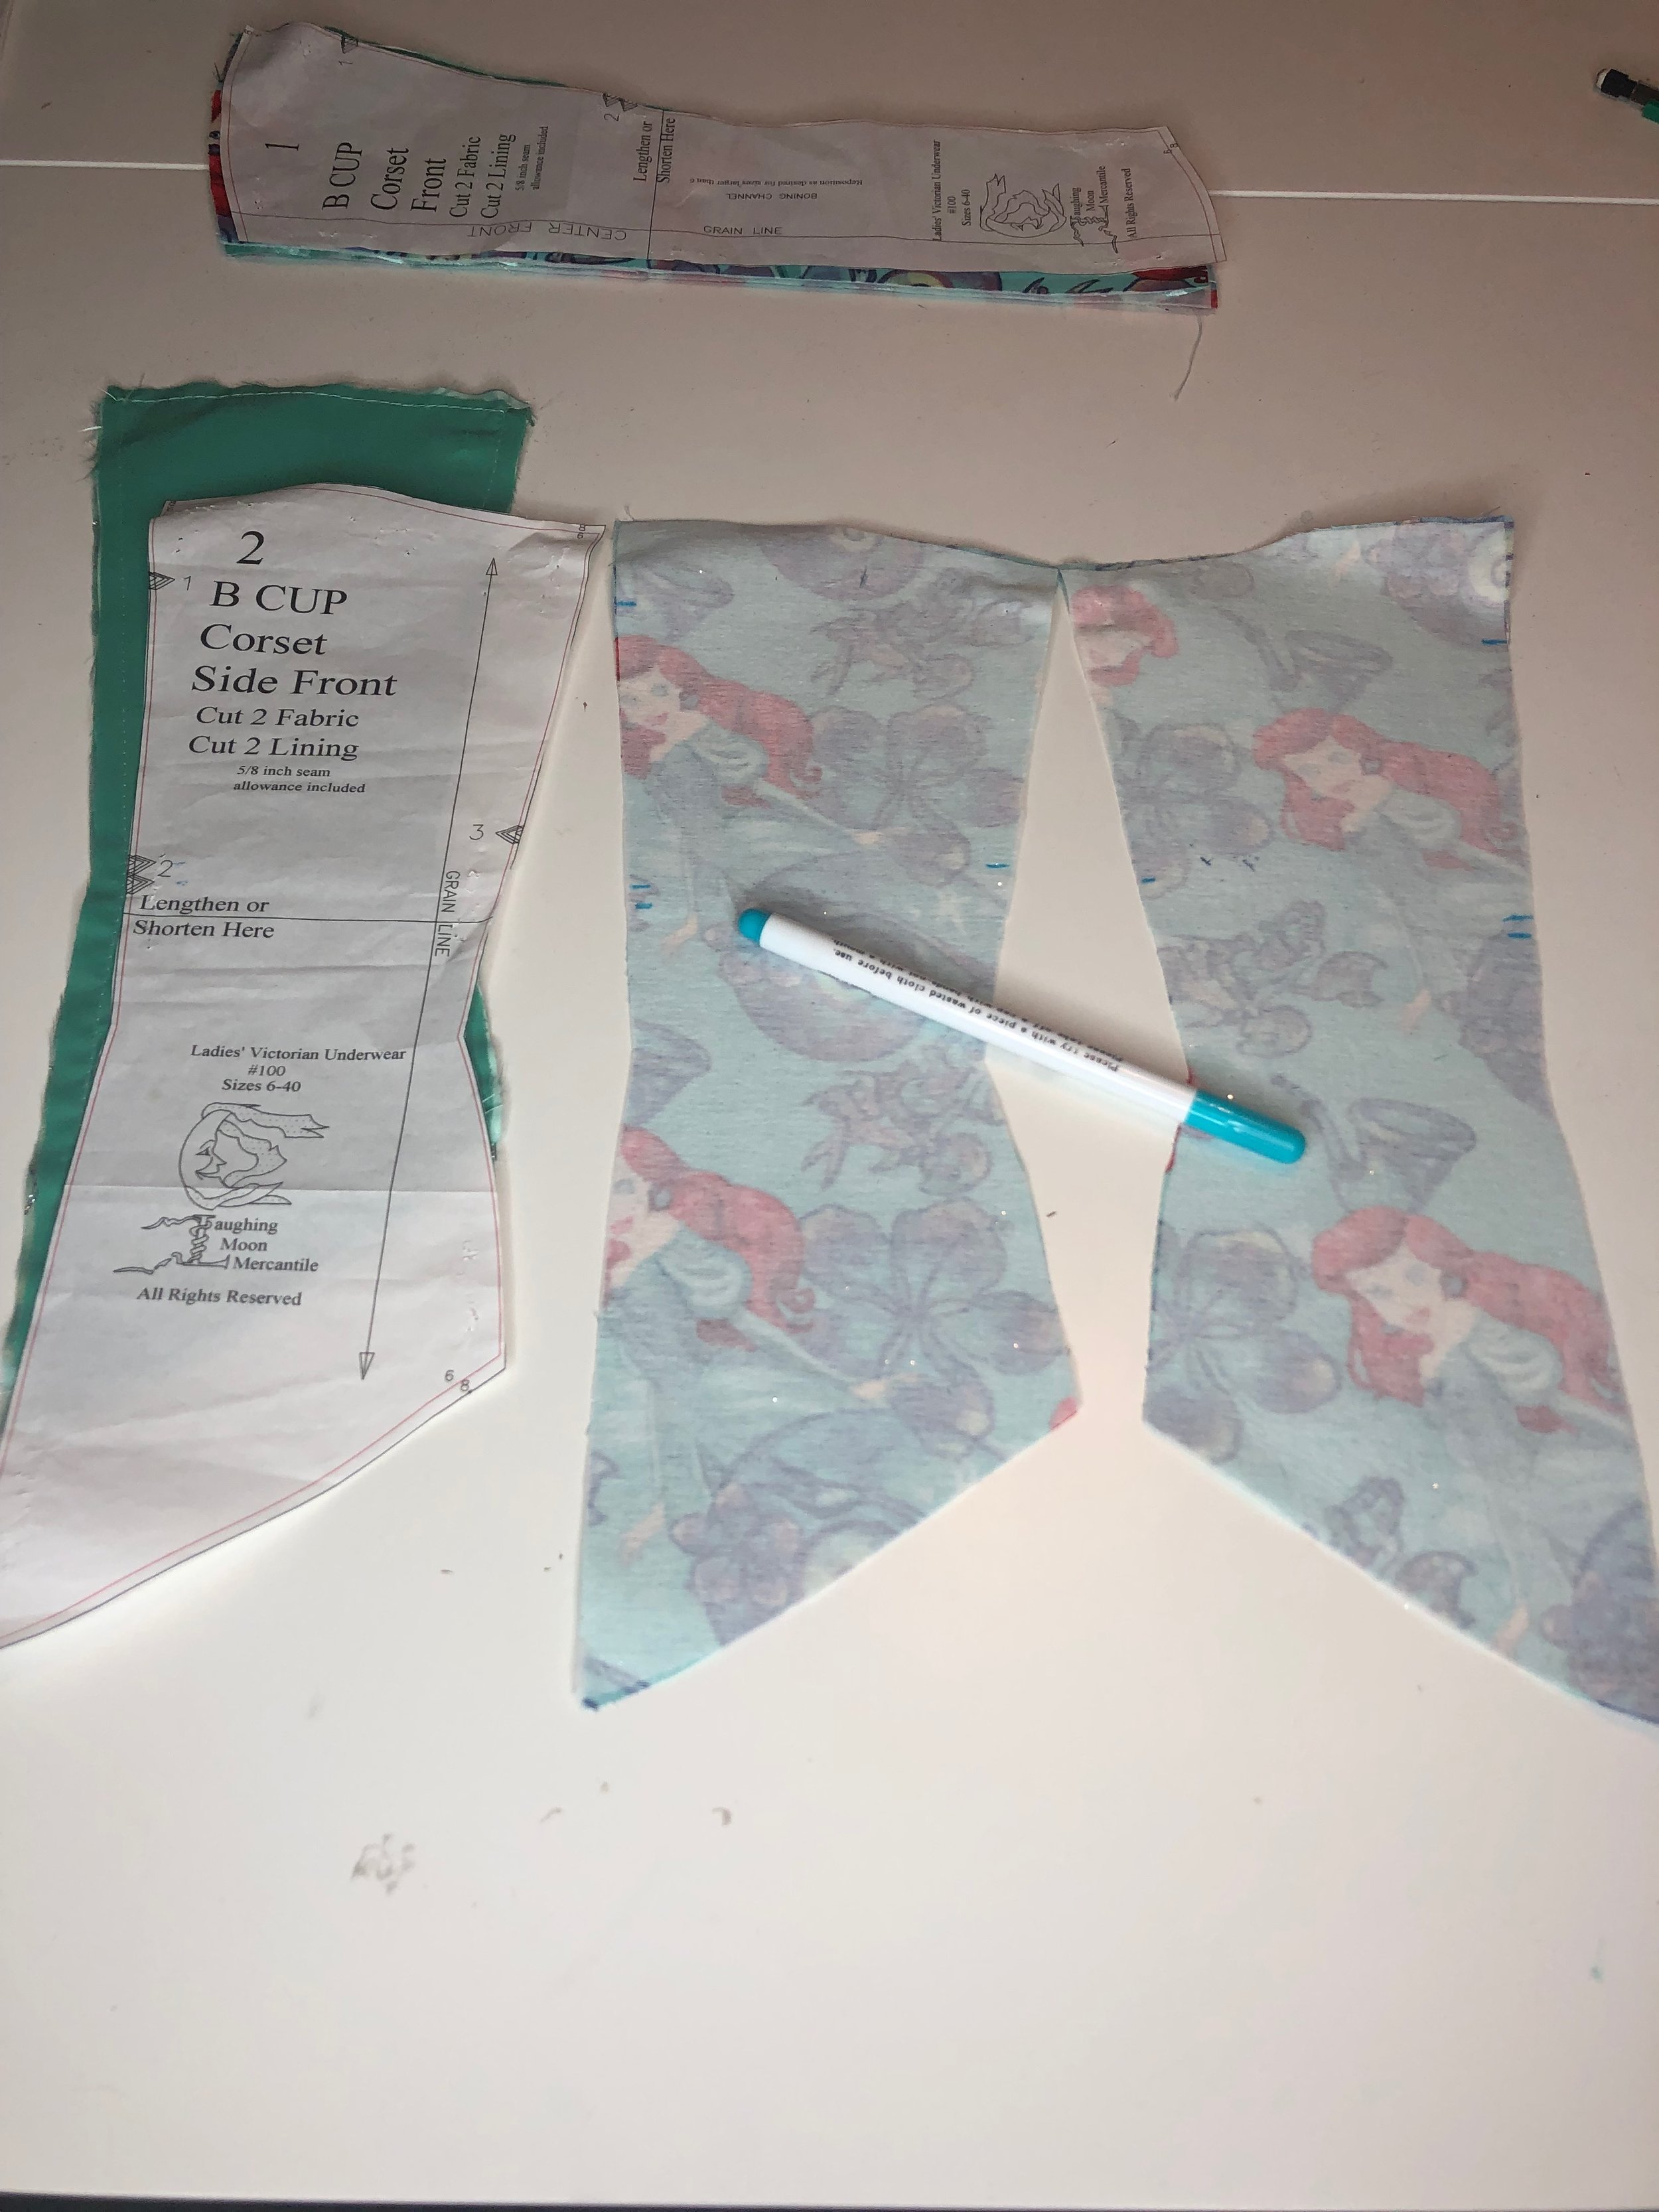
Now it’s time to sew the panels together with right sides together and on a 5/8th inch seam allowance.

Then I press all the seams open in order for the corset to lay flat.


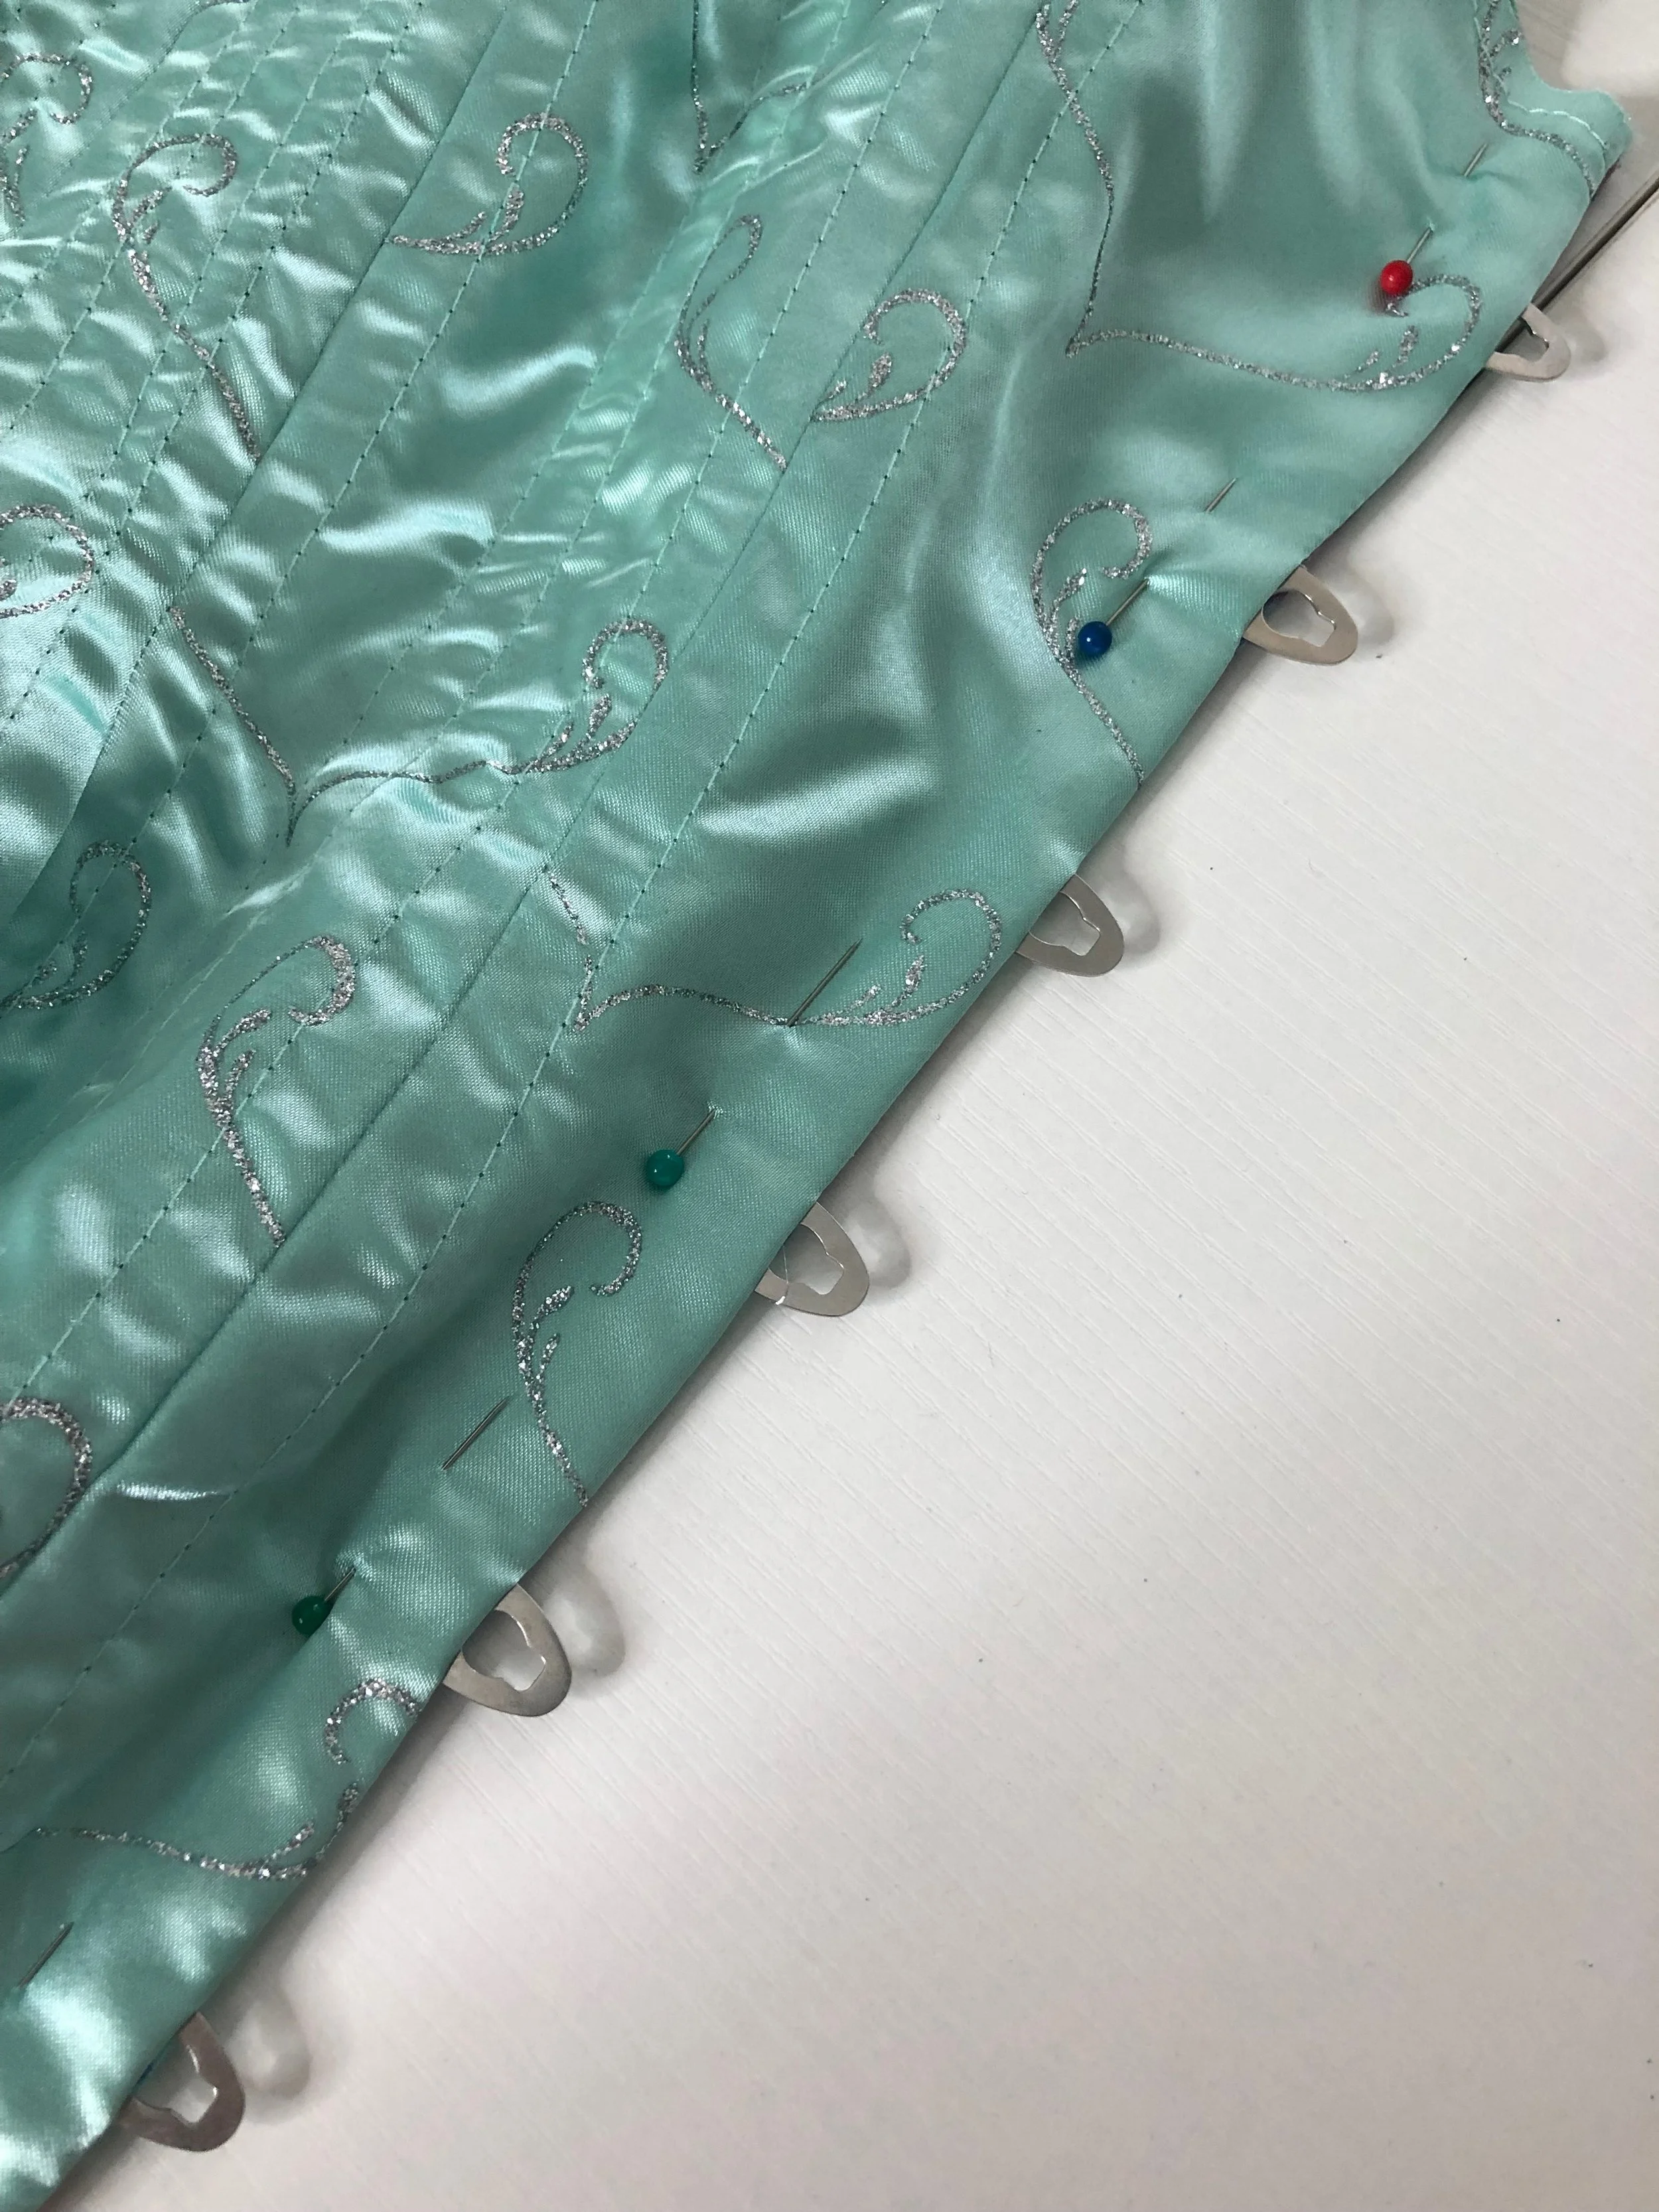
I pinned the seams on the fashion fabric down to make boning channels and added three pieces of bias tape for the extra boning channels.

I sew them down.

Next I started making bias binding by cutting 1 3/4in strips on the bias of the cotton blend fabric.

Then I pressed the binding in half and in quarters.

Now for the boning, I measure each piece and cut it an inch smaller than the channel. Then I did the ends of the spiral steel into plastidip, allow it to sit for 30 minutes and dip it a second time. Two times are good but 3-4 are even better.

Now I installed the busk, I did this before I added the boning into their channel because that’s just easier for me. So I started by marking the busk on the inside of the lining fabric with right sides together.

I stitched the pieced together on the line and added the busk, pinning super close to the metal bar of the busk.
Now I sew the busk into place with my zipper foot.

I marked the second half.

Use an awl to poke the holes for the busk piece.

Once all the holes are punched then I pinned along the busk line and using the zipper foot I sewed the busk in place.

Now I can add the steel boning and bast along all the edges.

Now it’s time to add the bias binding.

Then I stitched in the ditch to stich down the bias binding, I normally hand stitch it in the back but I know stitching in the ditch is faster. My major issue with it was that I was going way too fast and not catching the back part of the binding. Needless to say this was my BEST busk installation and my worst bias application making it overall a mediocre corset.

Now time for the grommet installation.
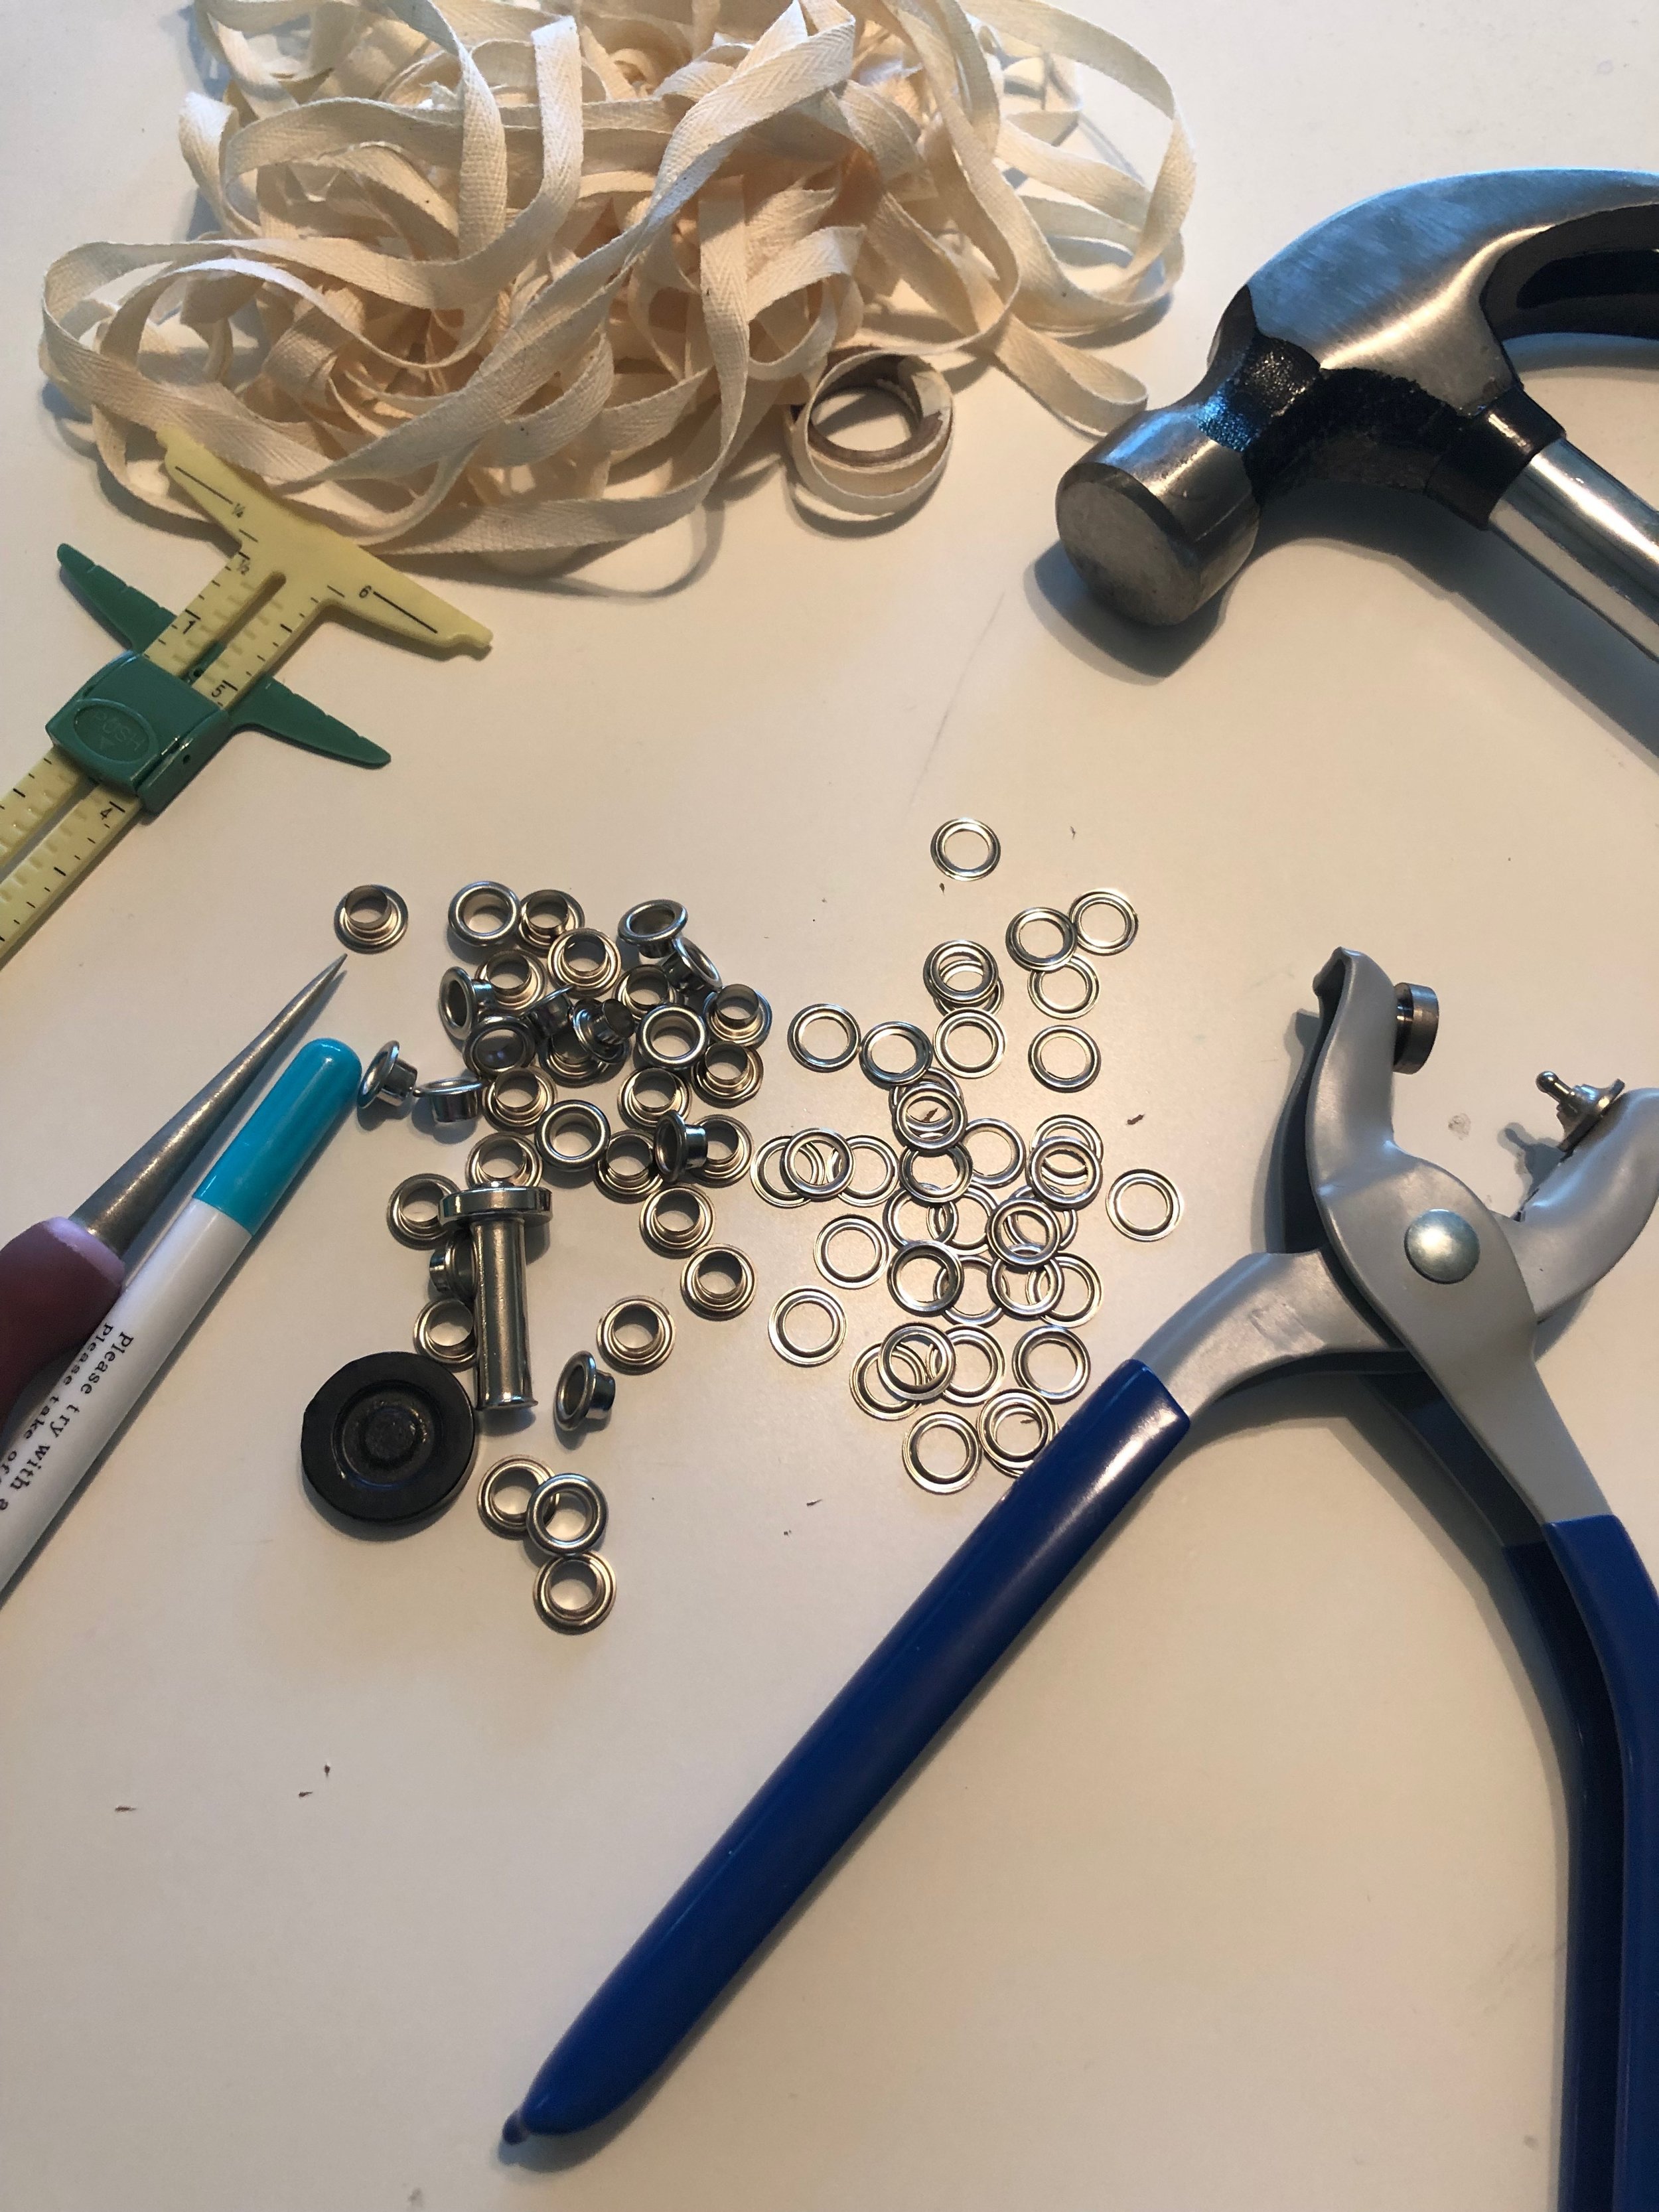
Measure and Mark the grommet placement. I start 1 inch from the top and then do them 1.5 inches in between each.

I hole punch, use the awl and then set the grommet with the tool and a hammer (a mallet works better but I misplaced mine so for the purpose of this corset I used a hammer).


Adding grommets is the final step to making the corset but I realized after I was done that there should have been a piece of boning put in the back seam between the edge of the fabric and the grommets to help stabilize the grommets.
It’s not the worst thing in the world but it will definitely help to have it there.
Here’s the completed corset.


Thank you again for reading!