Making an 1850's cage crinoline/hoop skirt

Quick Edit: For those interested in video content on making a Cage Crinoline here is my video on making it:

Welcome to a new blog, this time I will be talking about my 1850’s hoop skirt or also known as a caged crinoline. I don’t talk very much about my fiance on here but I am making us 1850’s ensembles for Homebrew Con at the end of June. We are speakers and we are doing a skit/panel on the history of the Imperial Stout otherwise known as the Russian Imperial Stout, although it’s origins come from England but I digress.

We will be hosting our panel as time travelers and acting as though we spent some time in the 1850’s to learn about the origin on the Imperial Stout, in our panel we will be serving home brewed Imperial Stout and we will be dressed as the working class would in the 1850’s. I’ll be in a cotton dress with a hoop and he will be in knicker bockers and a grey cotton shirt.

When I was documenting this process I initially was planning to make a step by step photo documentation to help people use the pattern. I was super successful until I got to the hooping wire and then I just stopped documenting all together because of the space the piece took up in my studio and going between the cutting table, ground and sewing machine began to get difficult. So I will start this blog off with the step by step documentation I did at the beginning and then once I get to the hooping wire section I will talk about the issues I overcame and how I over came them but there wont be any photos of that segment.

To start out I used Truly Victorian 142 for this piece. On their website they actually link you to where you can buy all the materials for these and that makes it super helpful when constructing your first one. I purchased hooping wire in bulk for multiple projects, as well as hoop casing and I used scrap cotton for the bag and cincher. I am desperately trying to go through my scrap fabric so I will be talking about fabric scraps quite a bit in the summer months.

IMG_4044.JPG

So let’s just jump right into the instructions for this and how to get started on this piece. If you plan to wear this over a corset consider making it the size in which your waist is cinched in the corset. I went with the size D for a 26” waist because I plan to wear this in and out of corset and when it came down to it, the 26” waist fits me cinched down to 24” so it’ll work for several sizes.

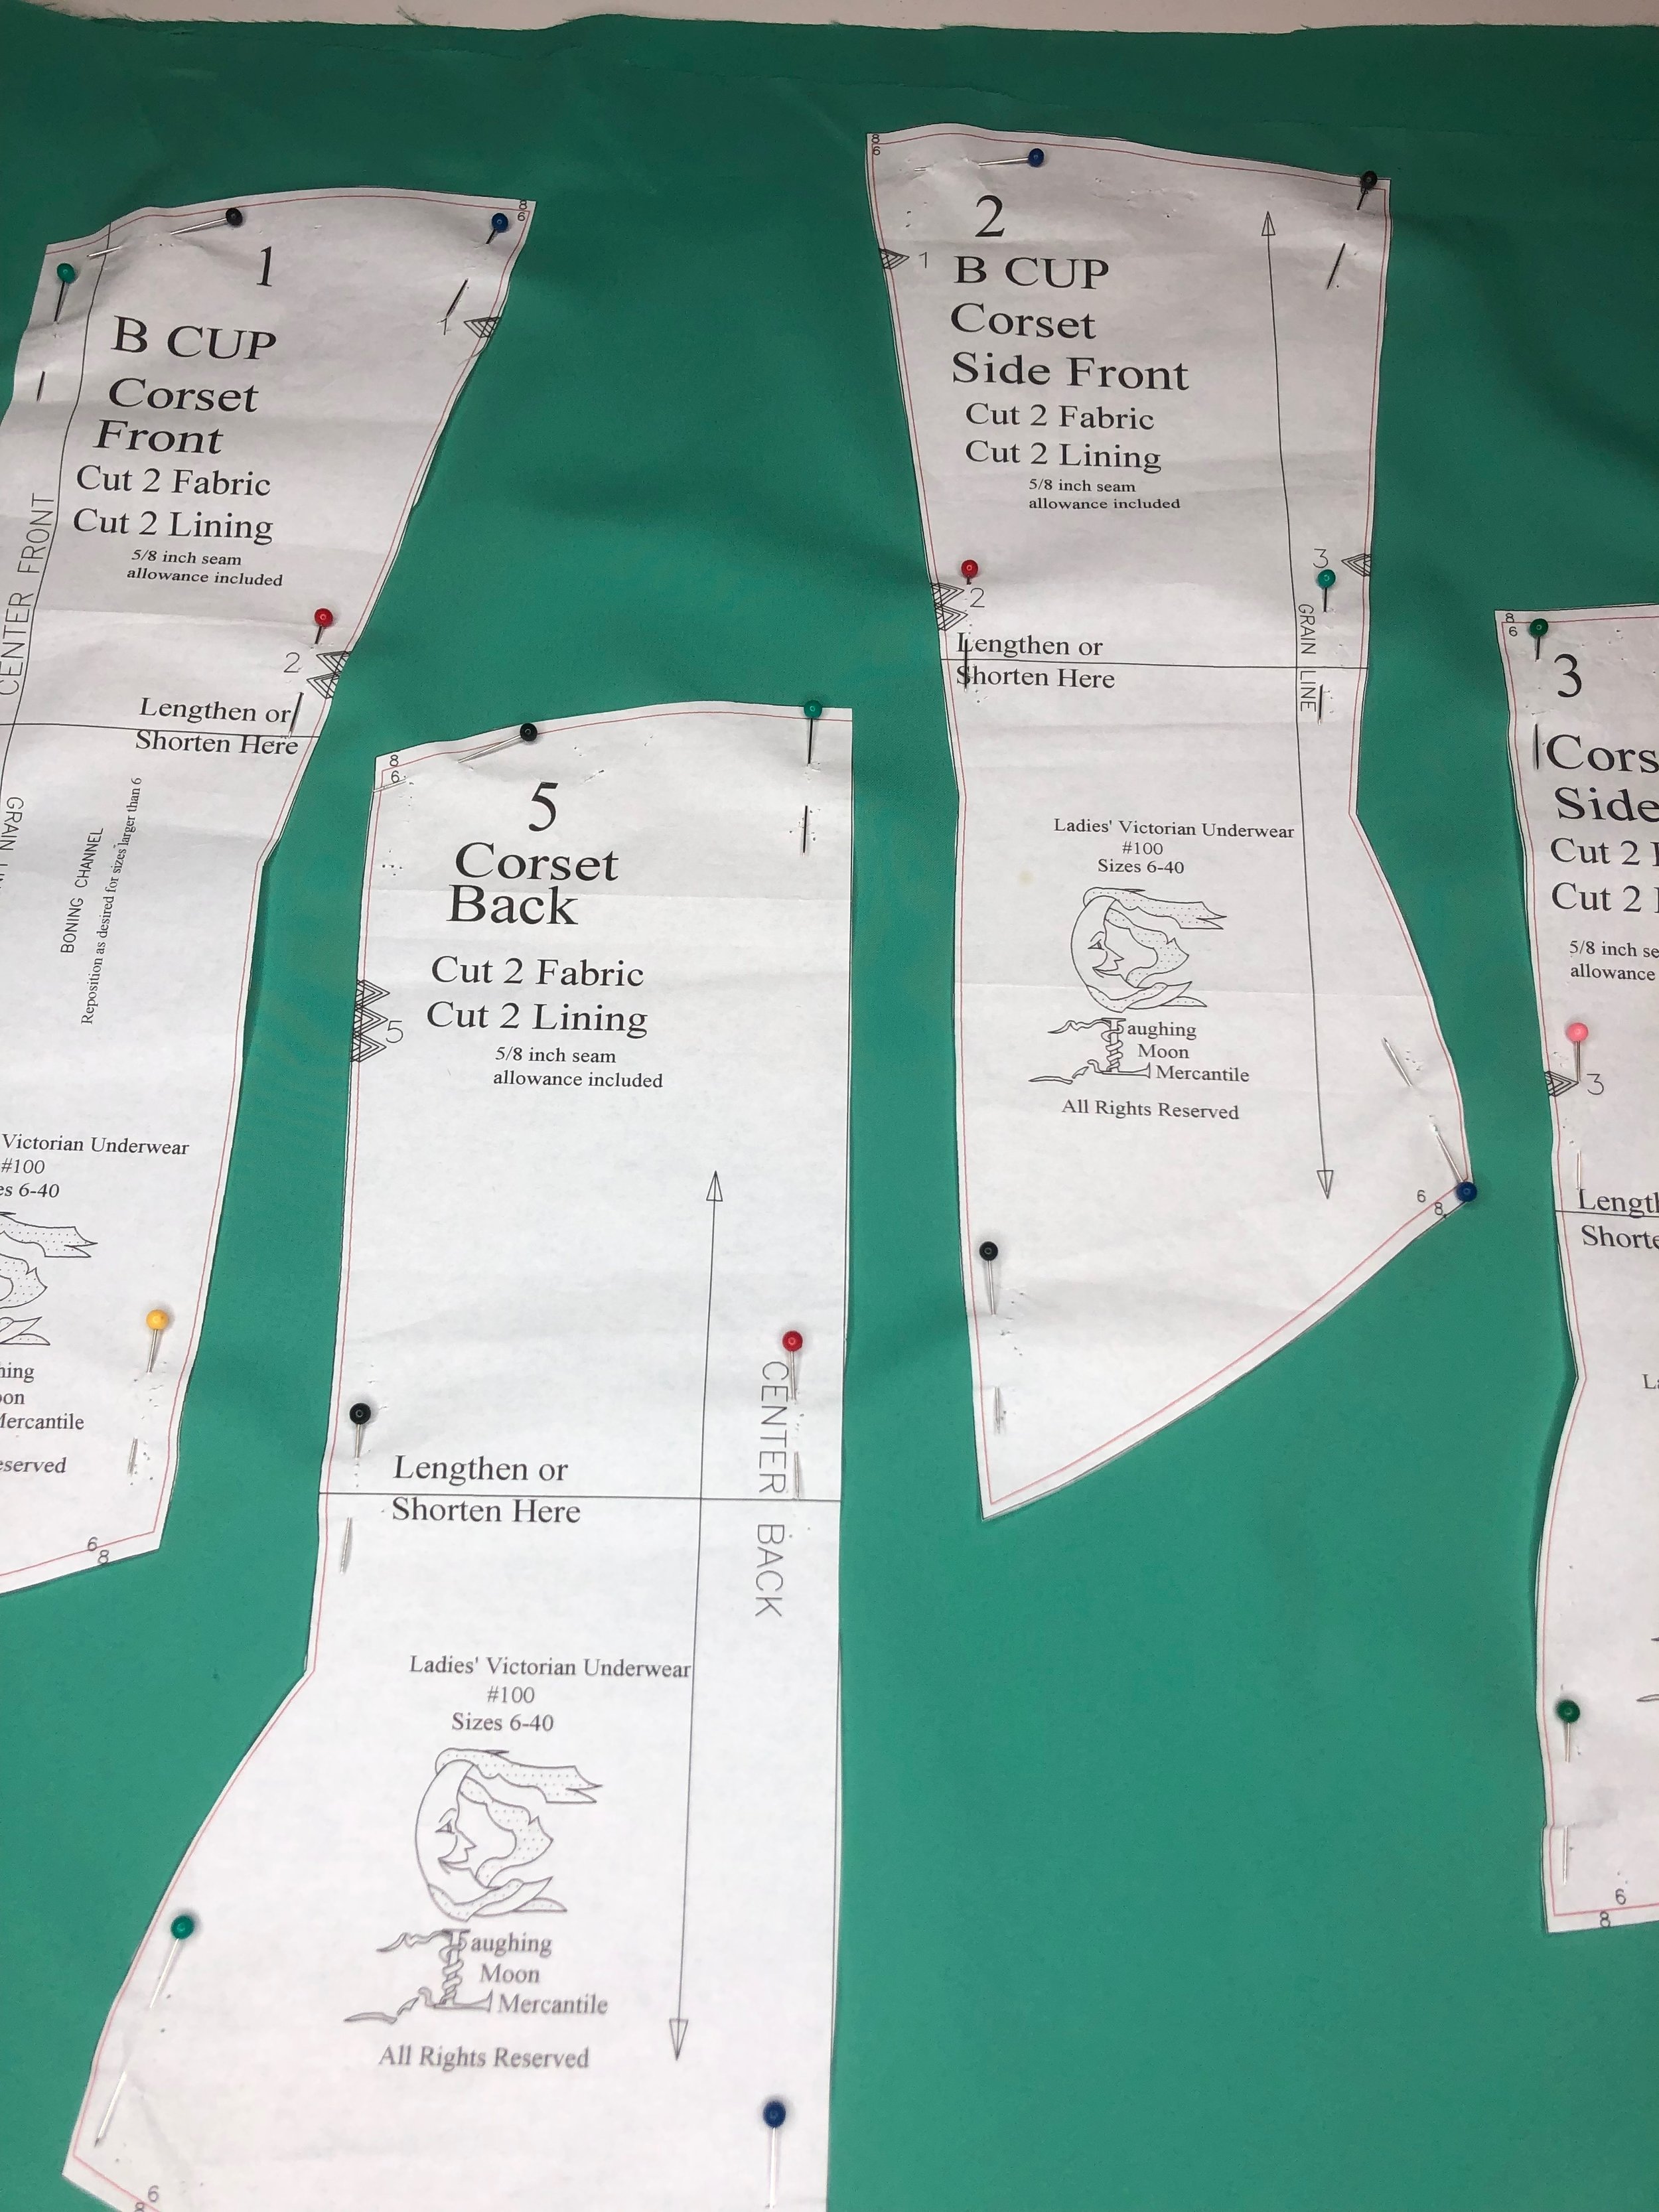
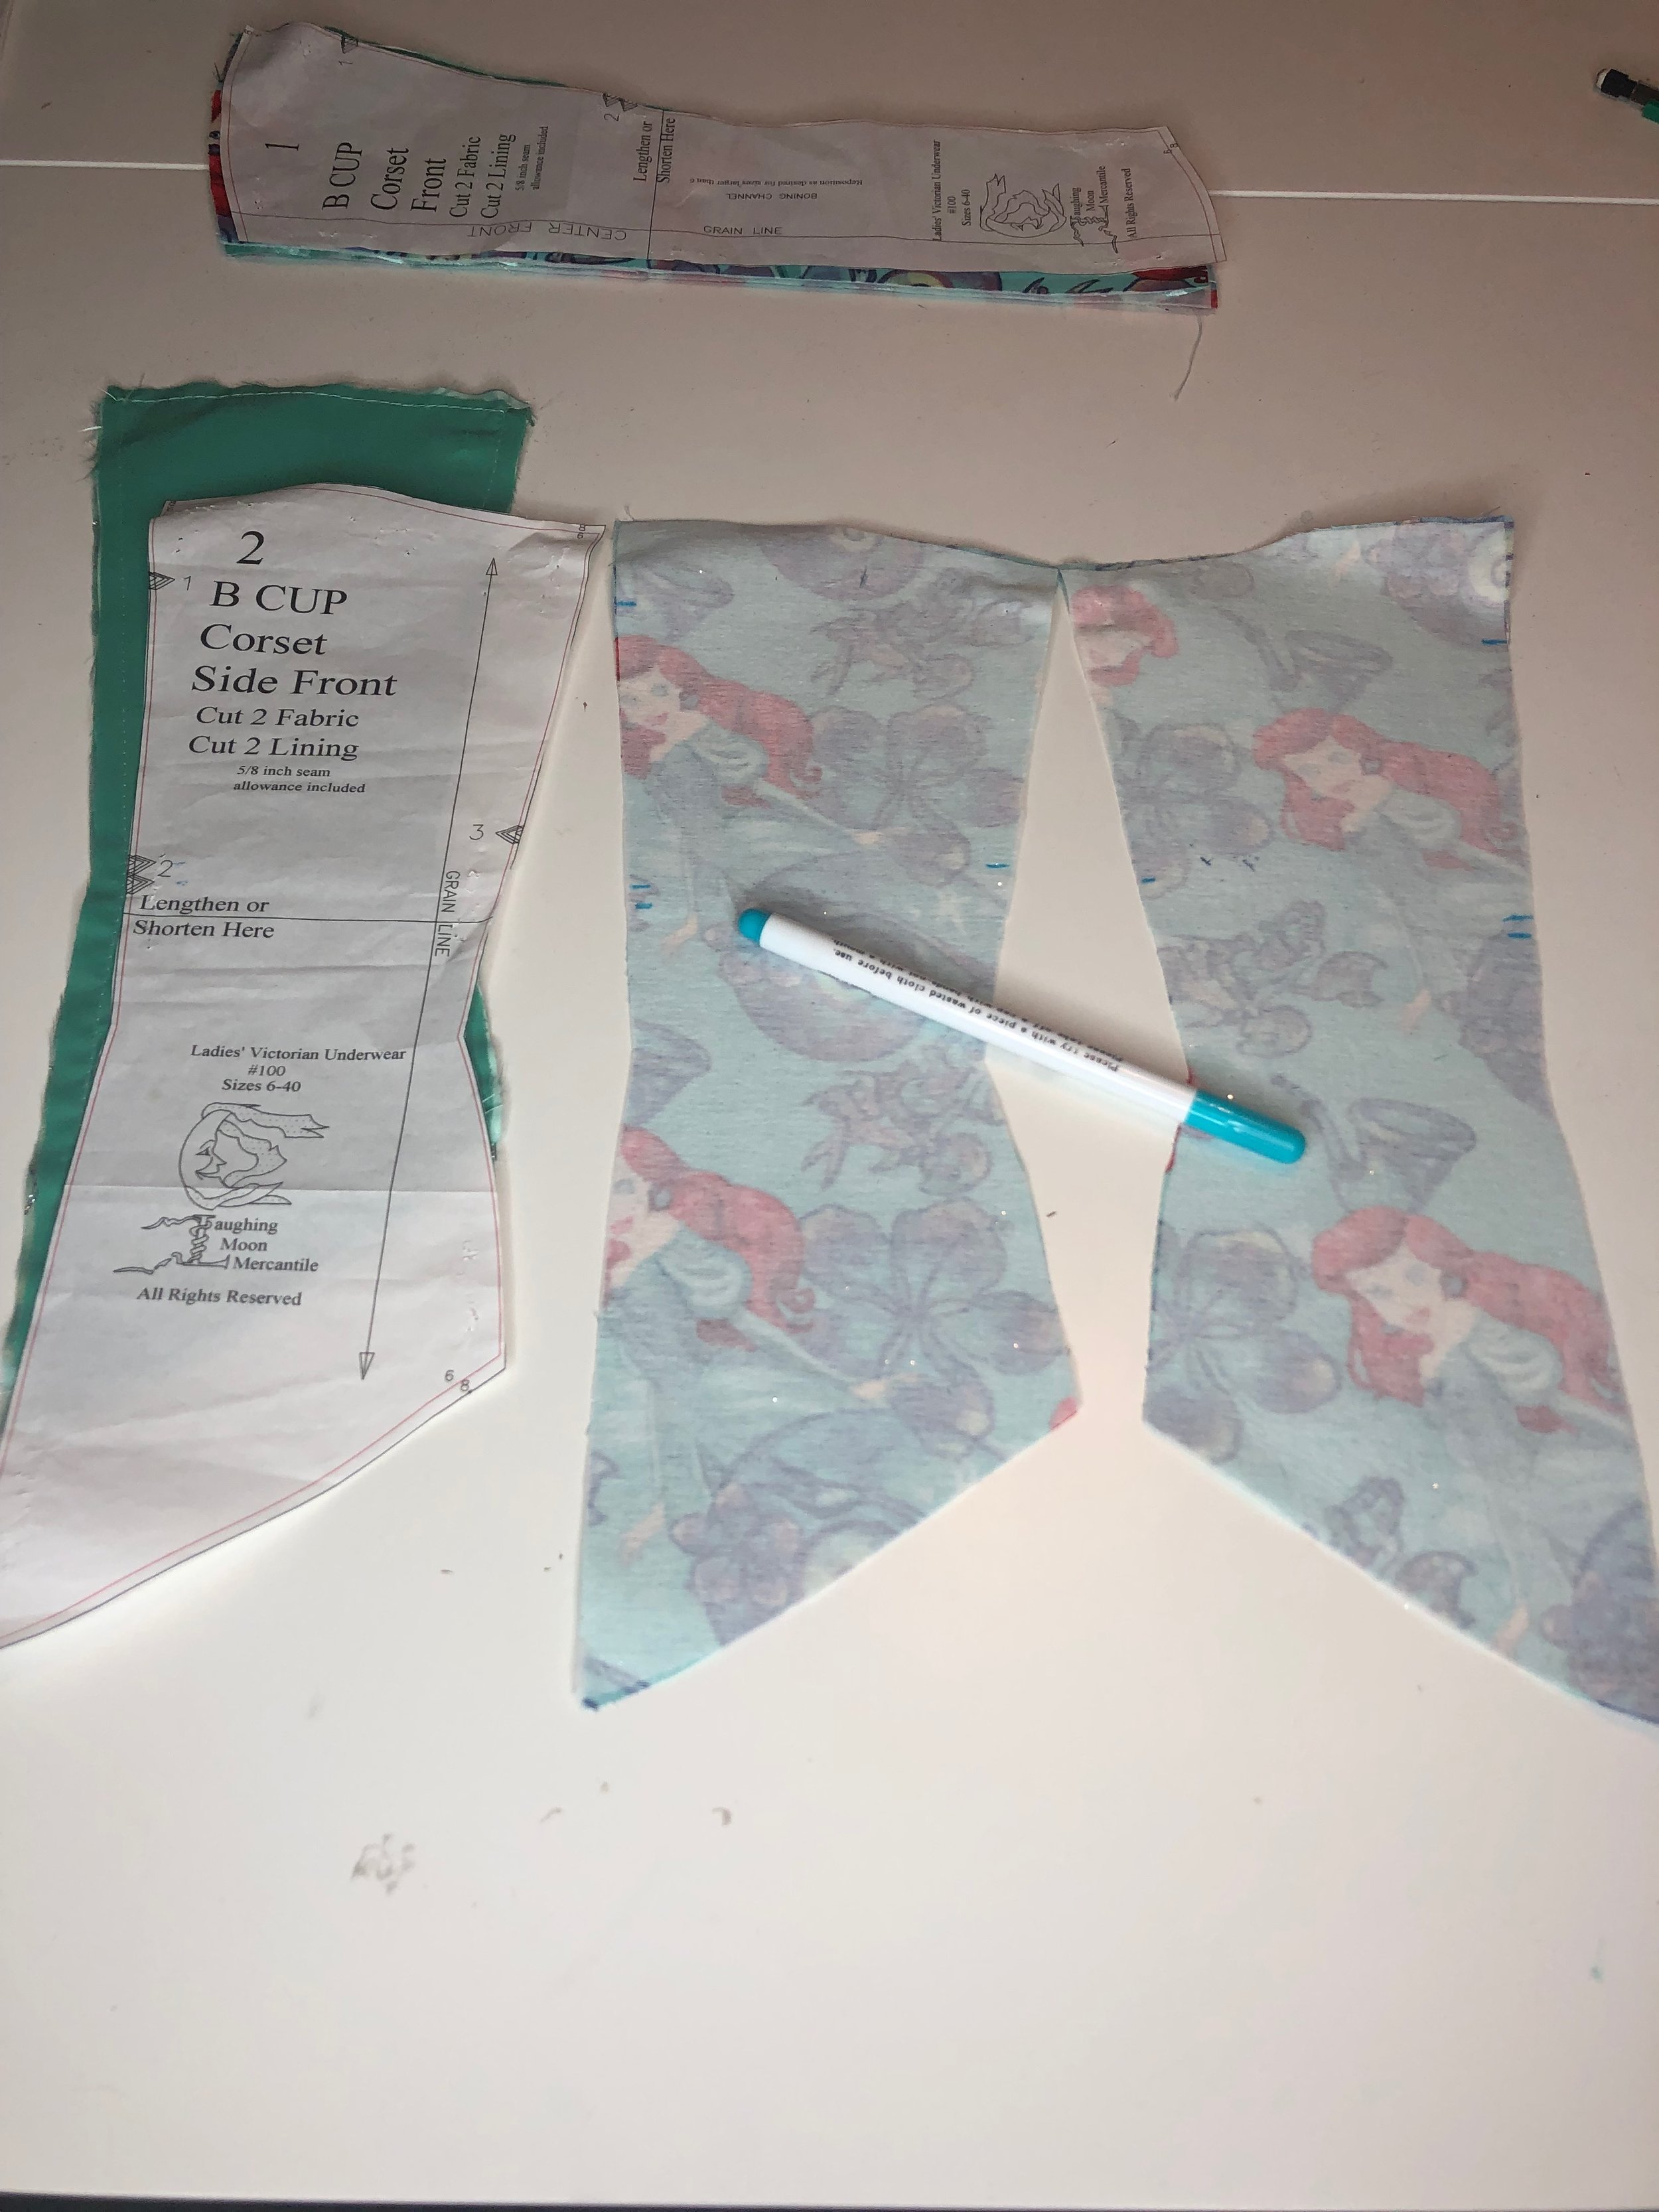
The first two steps are obviously to cut the pattern pieces out and then cut the fabric out. I choose to cut all my pattern pieces to the largest size and then mark my size on the fabric. This way I can use the pattern again for clients. Also, these patterns range from $13 to $21 and it’s kind of a waste of money to buy them again for clients since the pattern paper these come on are very durable and could easily be used over and over again. So let’s save some trees friends.

IMG_4046.JPG

From here on out, all of the quote sections are the instructions and then after the quotes if necessary I will add commentary and share the photo of doing the step.

“Step 1: Cut out 3 of bag on fold, and 4 of each cincher piece.”

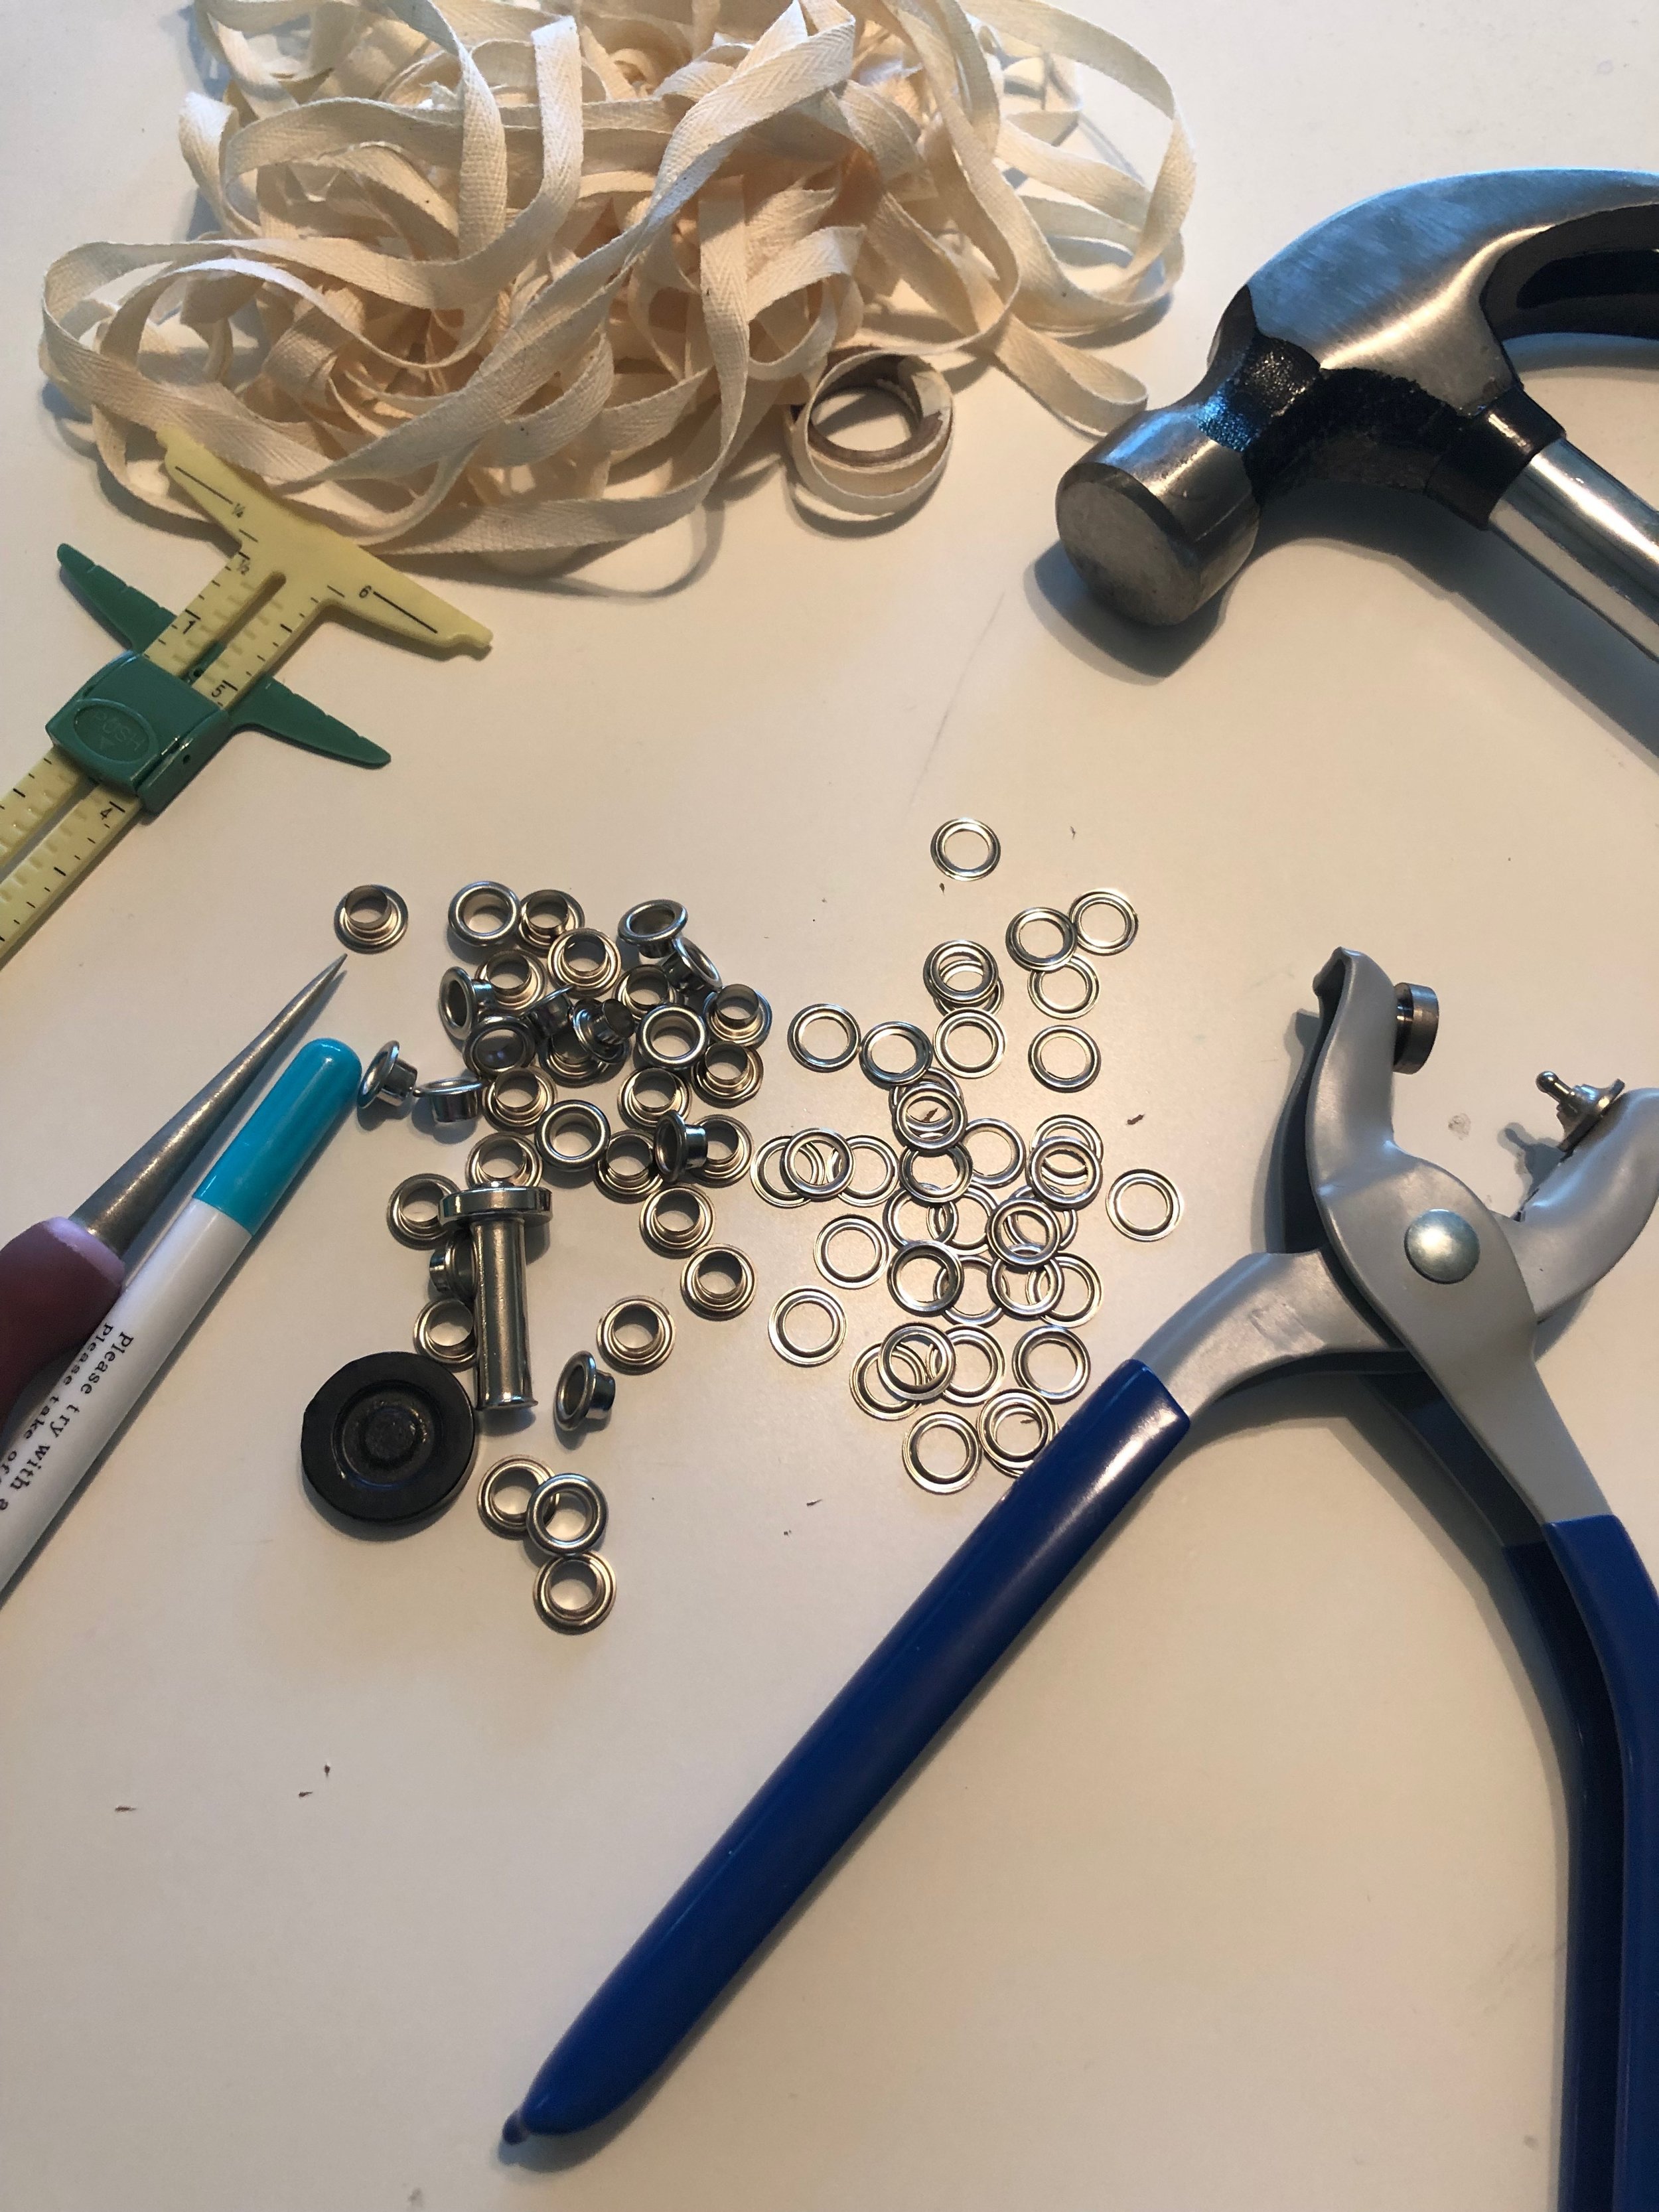
I also took this time to cut out the twill tape.

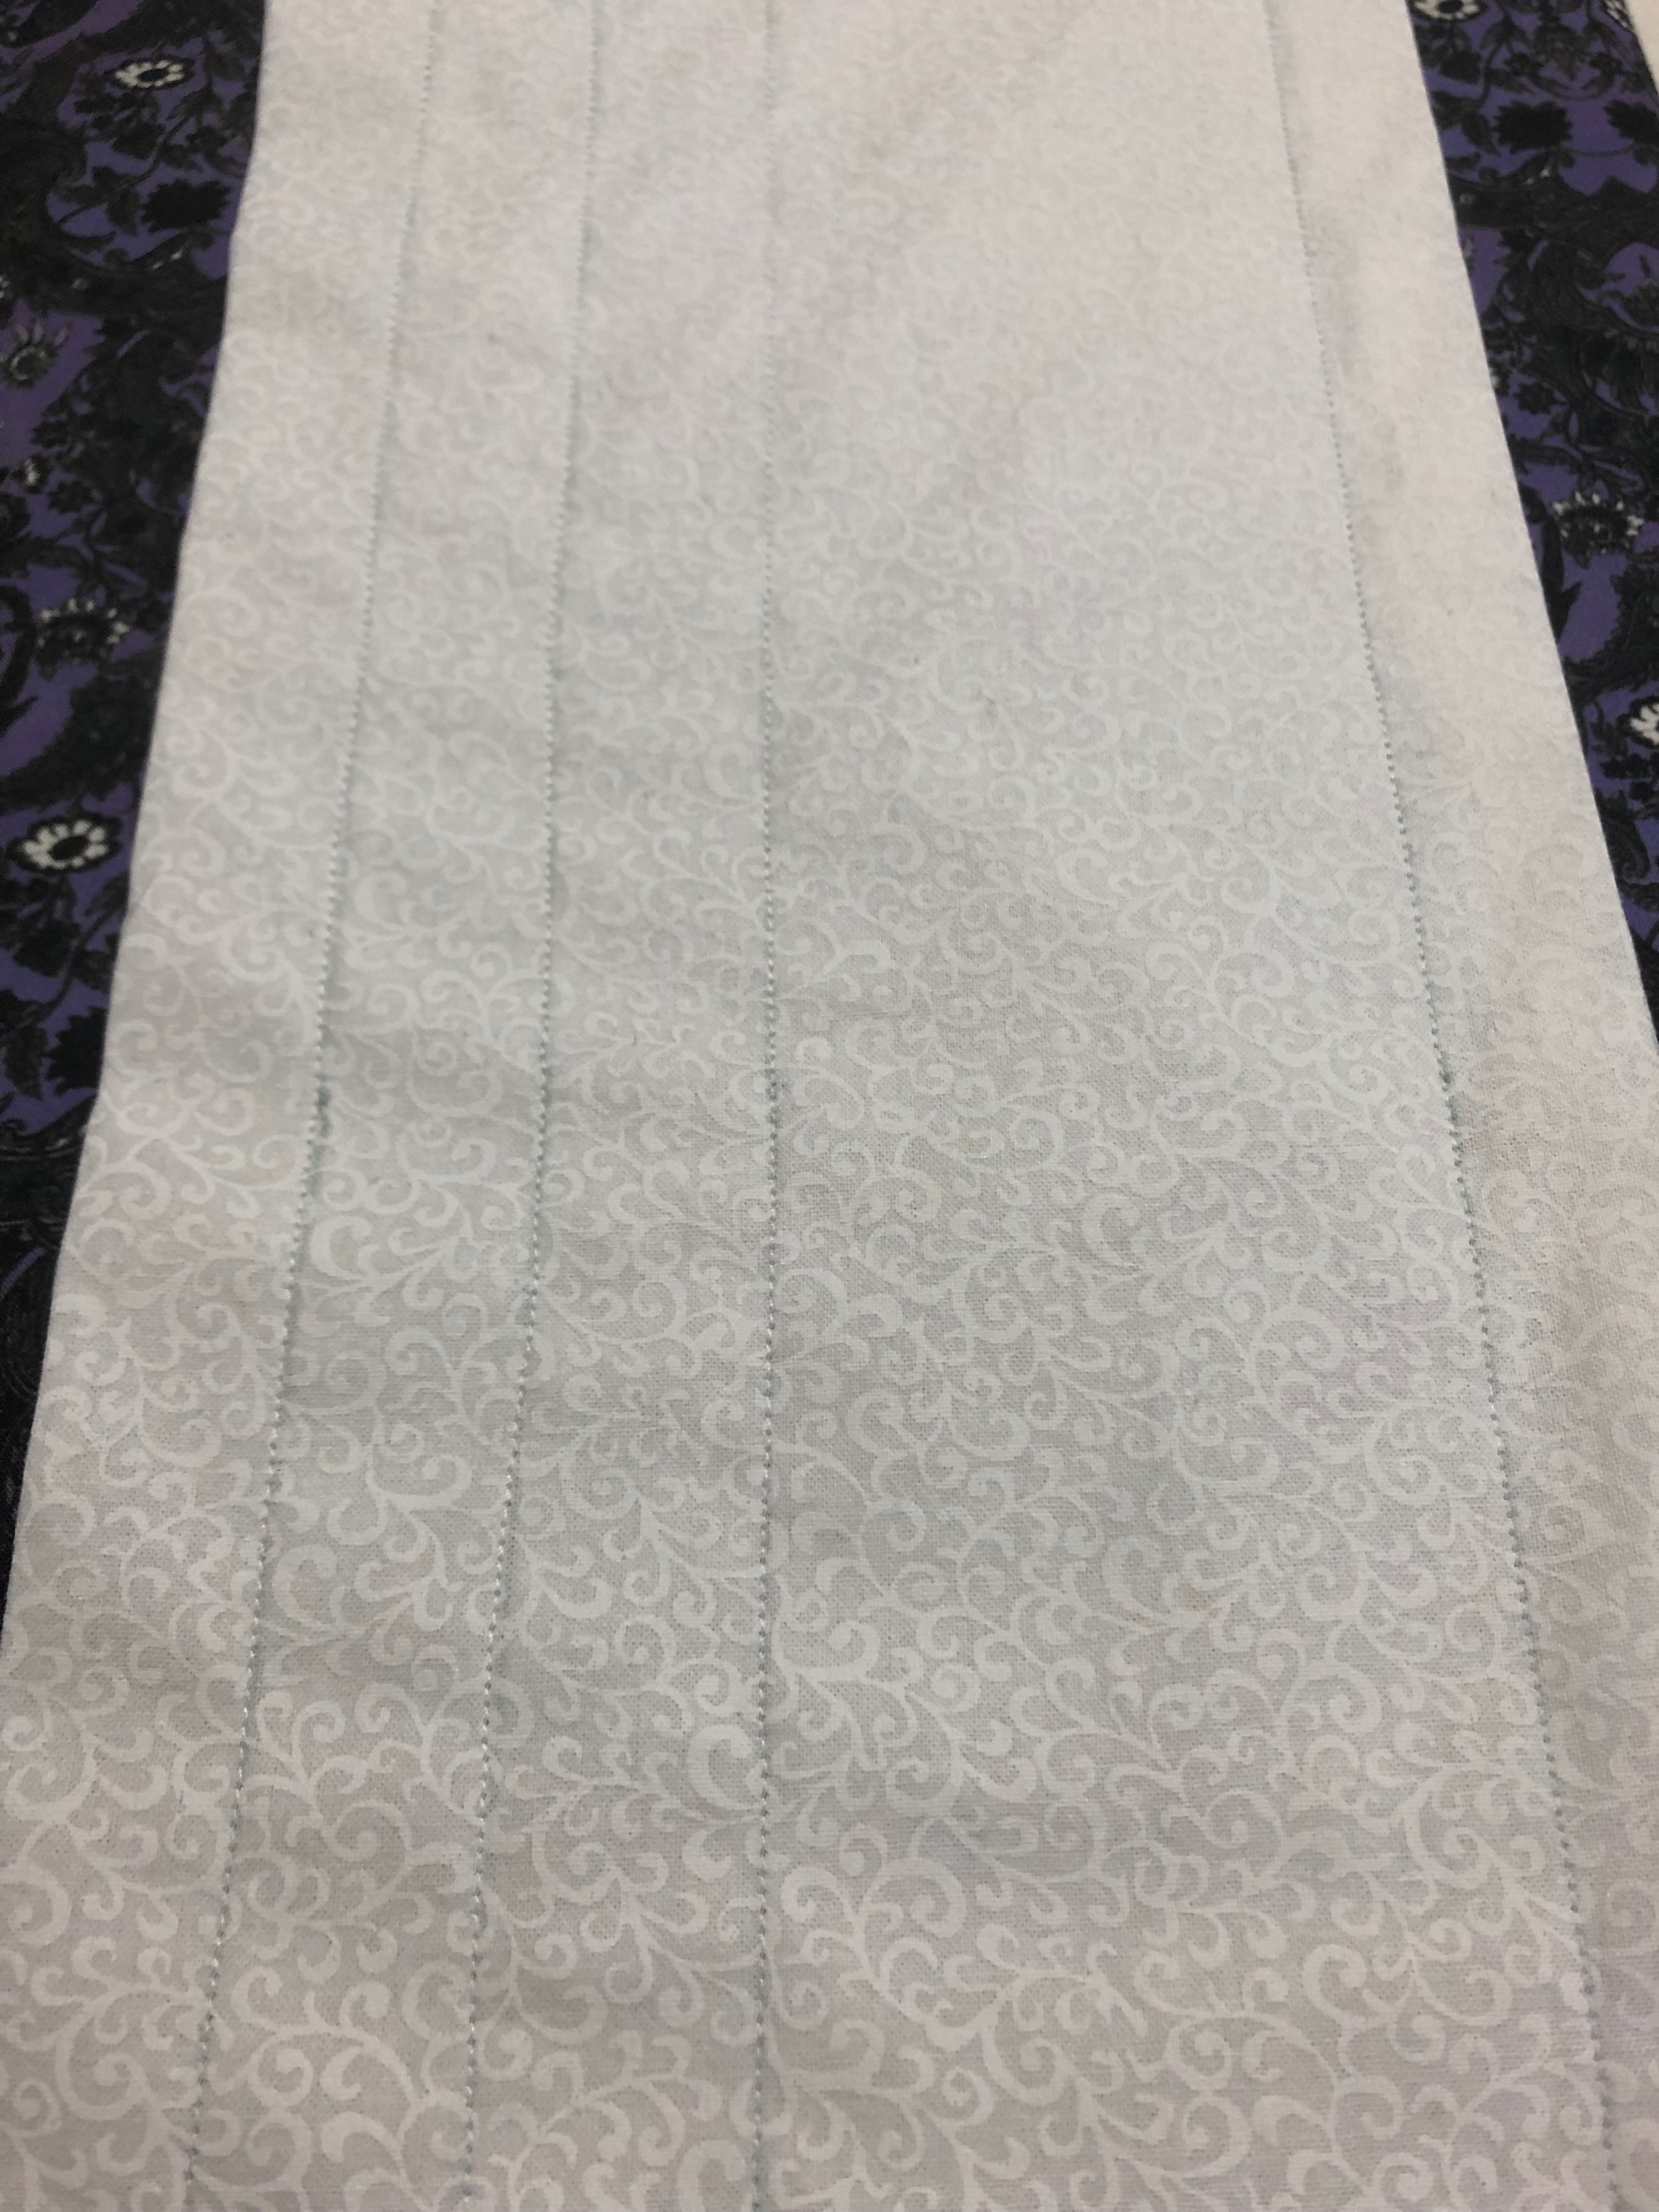
“Step 2: Mark the stitching lines for the bone channels on the bag as shown on pattern pieces, onto the correct side of the fabric.”

I took this time to just mark everything.

IMG_4047.JPG

“Step 3: Make the bag.”

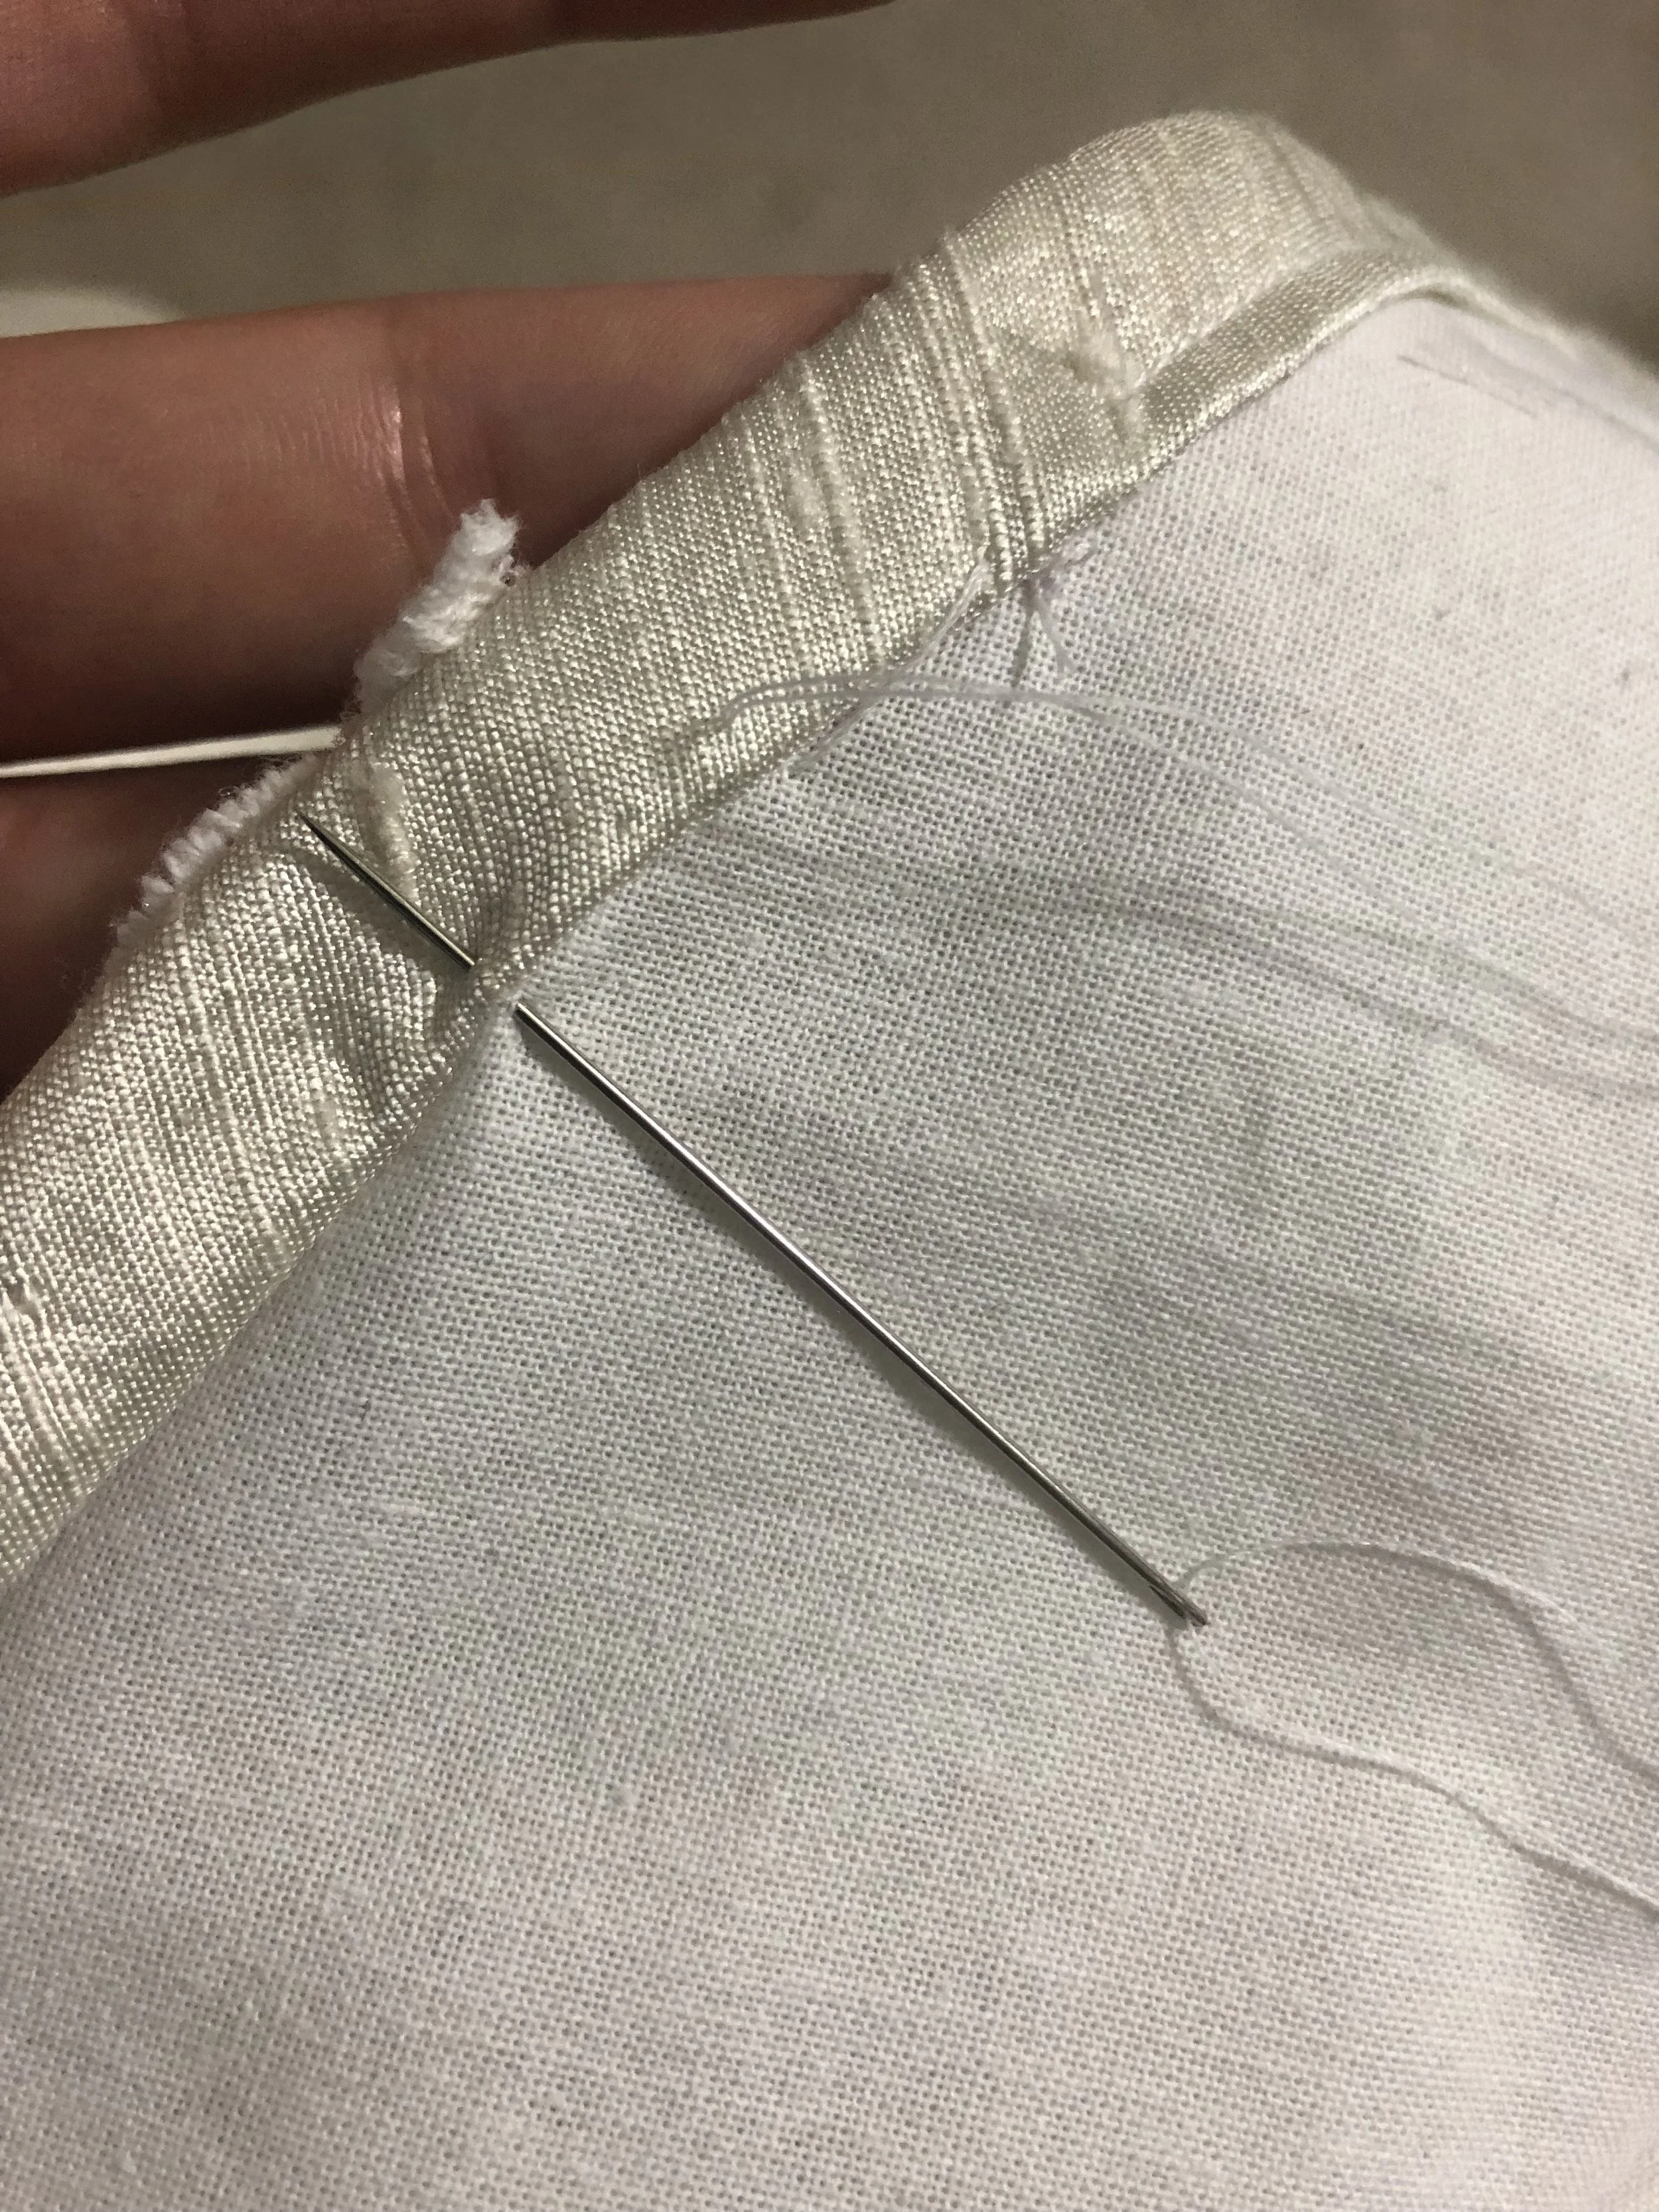
“Step 3a: Sew all the Bag sections together along side edges, making one long piece. Do not sew into a circle yet. Make sure the marks for the stitching lines are on the correct side of fabric.”

I actually had all the markings for the bag on the “wrong” side of the fabric since I was sewing white fabric I could see the lines through the fabric and that was really helpful for me.

“Step 3b: Press seam allowances to one side and zig-zag over allowance to keep it flat. This will help the bones slide into the bag channels easier.”

This step is a game changer for me, I have never been instructed to do this before and I am so glad I learned this because it’s something that I personally will use in the future.

IMG_4048.JPG

“Step 3c: Fold the bag sections in half, right sides together, so the fold becomes the bottom edge, and the raw edges the top.”

I also pressed it, I know that’s obnoxious because it gets flipped but I wanted to press it, so I did.

IMG_4050.JPG

“Step 3d: Sew along the top edge, leaving 6” on each end unsewn.”

“Step 3e: Turn the bag right right side out and press.”

I know I always say this but pressing is just so important, so do it, or else.

IMG_4051.JPG

“Step 3f: Match the ends of the bag, right sides together and seam the ends together. Press. Flip seam to inside of bag. This seam will be the center front of the bag.”

This part get’s a bit tricky to press the inside of the seam but I used my pressing ham and had no issues getting the entire seam pressed open.

IMG_4052.JPG

“Step 3g: Stitch along each boning channel line, as marked. Make sure to leave an 8” gap in the stitching at the center front to be able to insert the hoop wire.”

I actually left the entire 6” gap on each side. I remember with the elliptical hoop inserting the wire was really hard because the gap didn’t feel wide enough so I just did it this was and it worked really well for me.

IMG_4053.JPG

Before moving onto the next step I took the liberty to adding a pretty little lace trim to the bottom of the bag. This is by all means not historically accurate but I loved the trim so I added it and again I needed to get rid of stuff in my stash and what better way to do so.

IMG_4054.JPG

“Step 3h: Starting at center back and working towards the front on either side place a mark 1/2” from center, and then each additional mark as shown in the chart. This will mark the placement of where the ribbons will attach to the bag.”

So apparently I took less photo’s than I remembered but after marking the bag and the twill tape placement I actually stitched it down.

“Step 4: Ribbon/tapes”

Instead of going over all the instructions in this section I’m just going to say that I followed the markings and stitched the ribbon on in the manor I thought they went and after reading this section it just confirmed my placement and the steps I took to add these.

So moving onto “Step 5: Make the waist cincher.”

Before getting too much into it, the images given with the pattern were rather confusing and contradicted the instructions so I used the instructions for this part and ignored the drawings that came with it because the didn’t help at all.

“Step 5a: Sew the center backs together along the center back seam, correct sides together, making 2 sets: one for the outside and one for the lining. Clip and press.”

I should also not that I stitched these all on 1/2” seam allowances and that I did not clip any of these and it turned out fine. I did in fact press everything though, because you should. I’ll also note that the fabric I used for the cincher is a different printed white calico than the one I used for the bag but considering they were undergarments I wasn’t too concerned with the fabric not matching.

“Step 5b: Sew side backs to center backs, correct sides together. Clip and press seams.”

This is where their diagrams don’t line up, side backs go to center back and side front goes to center front.

IMG_4056.jpg

“Step 5c: Sew side Fronts to Side backs, correct sides together. Clip and press.”

IMG_4057.jpg

“Step 5d: Sew fronts to side fronts, correct sides together. Clip and press.”

At this point I also pressed everything another time to make sure those seams were flat.

IMG_4058.jpg

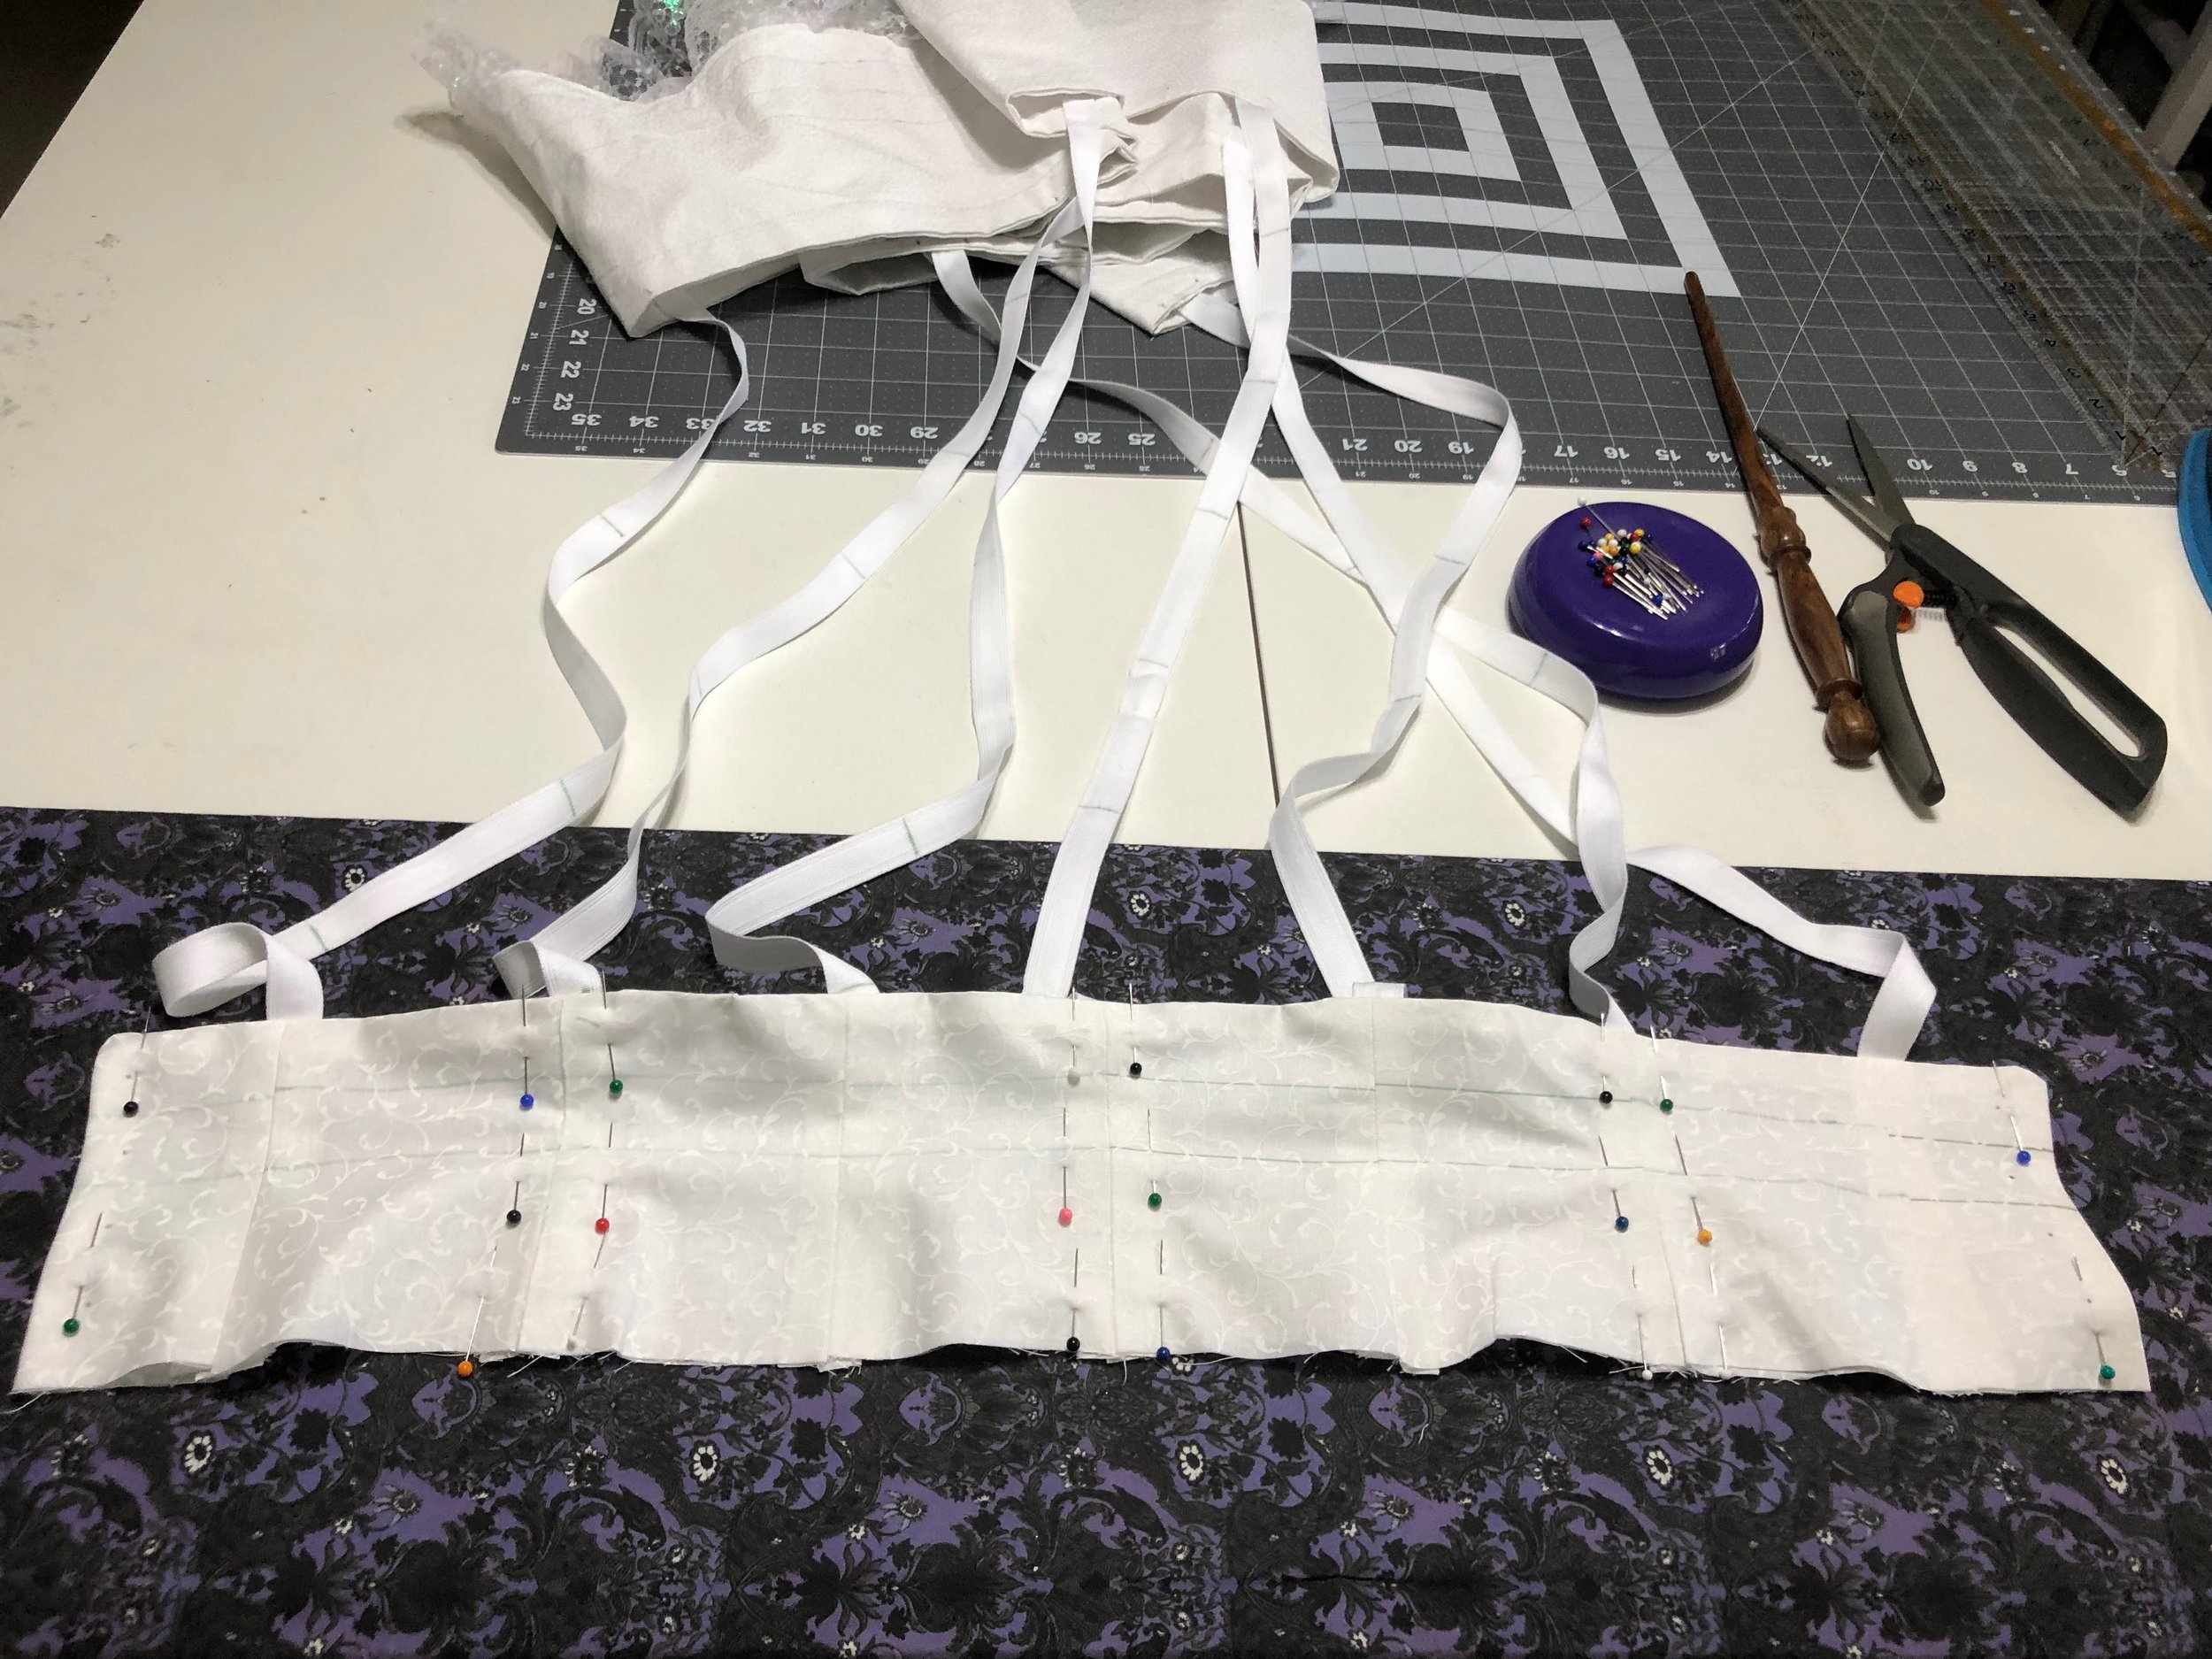
“Step 5e: Match the two sets together, outside layer and lining layer, with correct sides together. Place the top ends of the support tapes in-between the two layers, matching the top end of the ribbon to the edge of the fabric. The Center back tape should be centered on the center back seam. The side back tape should be centered on the back/side back seam. The side front tape should be centered on the side front/side back seam. The front tape should be centered on the front/side seam.”

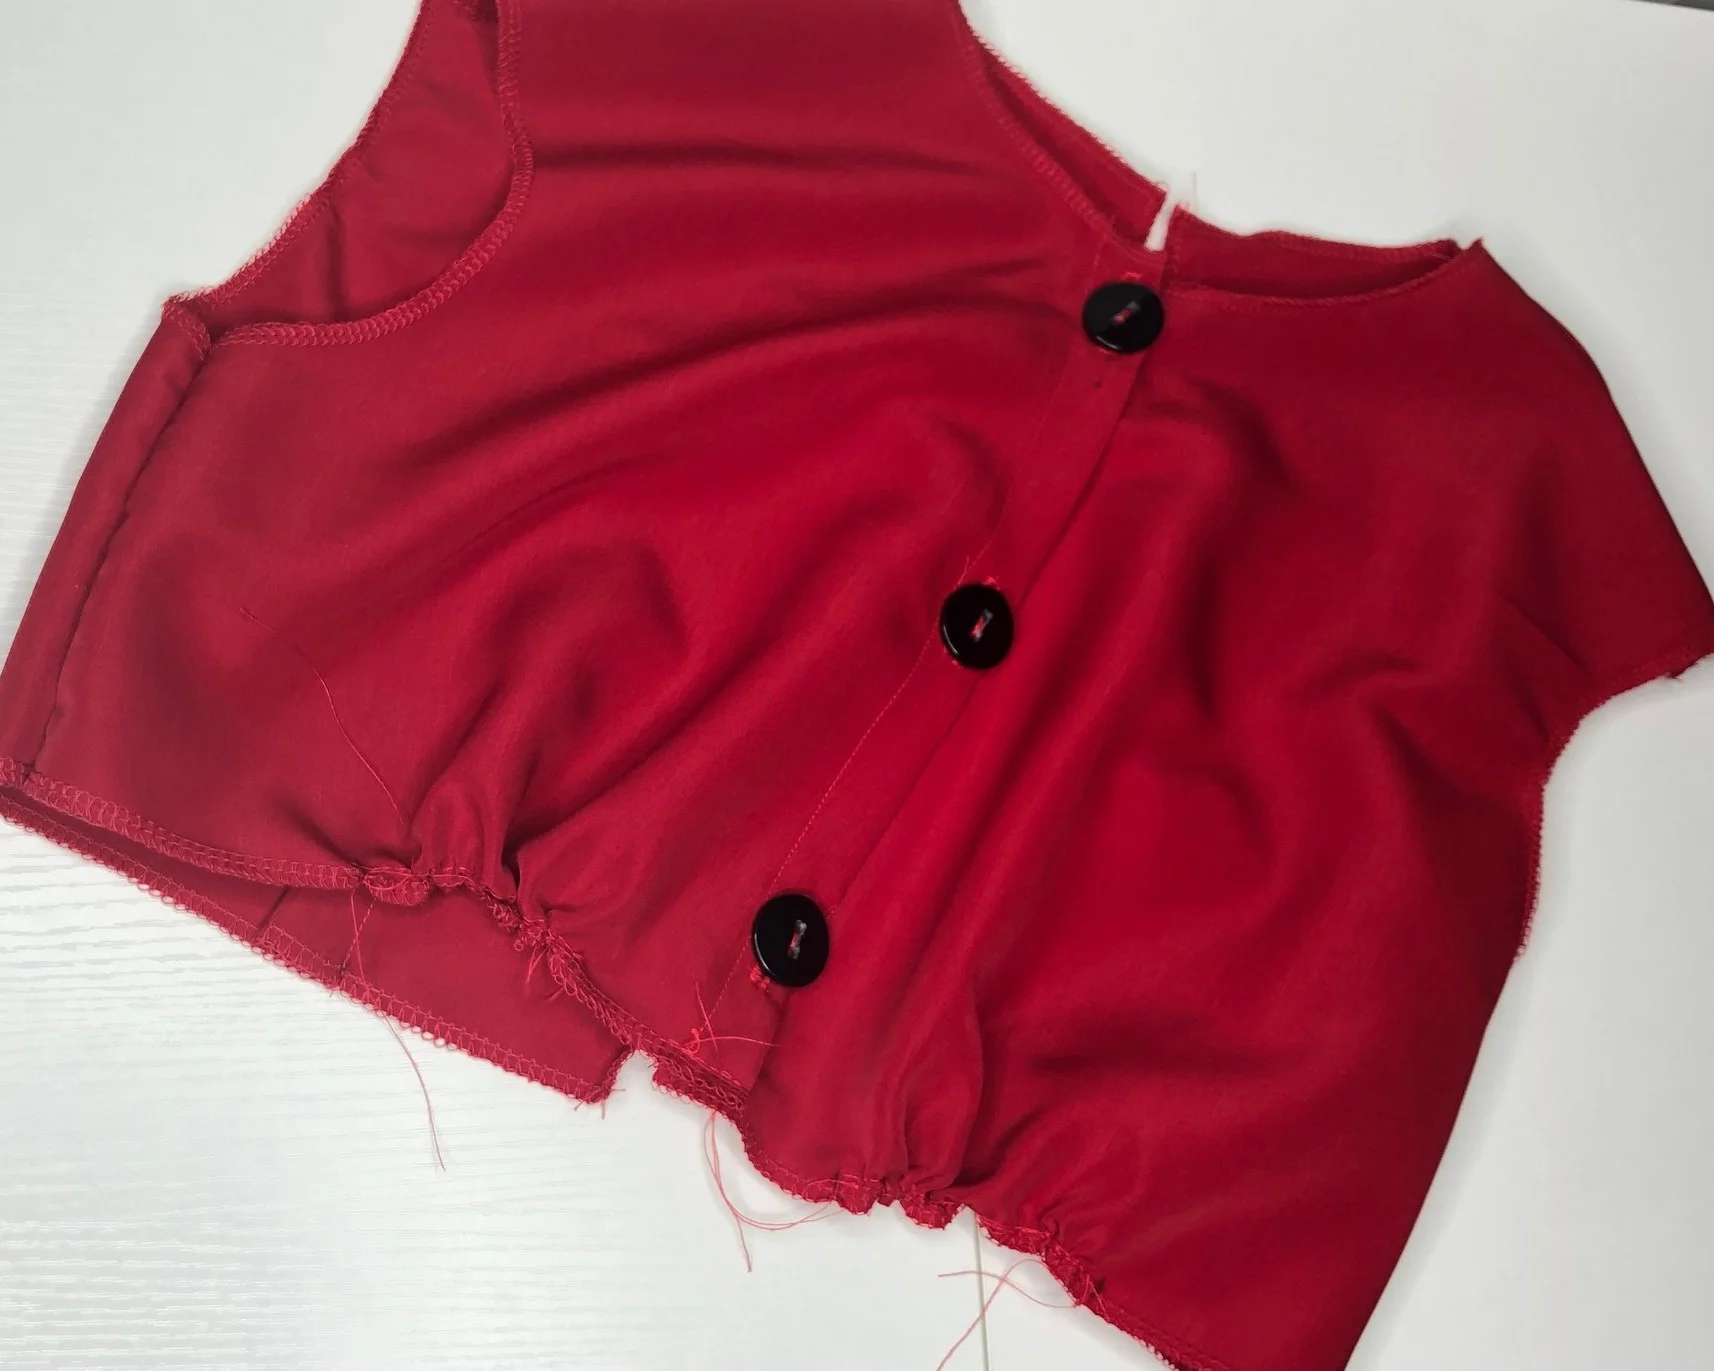
The placement of each tape was pretty easy but I had major issues figuring out the placement of the tape in relation to the sandwich pieces. So hopefully this image will show you how I did it and help with that confusion.

IMG_4059.JPG

“Step 5f: Sew across the bottom edge of the cincher, and each center front end, with 1/2” seam allowance.”

Sewing this part actually attached the ribbon onto the cincher and once you fold it over and press it you will see how the bottom edge attaches the ribbon to it.

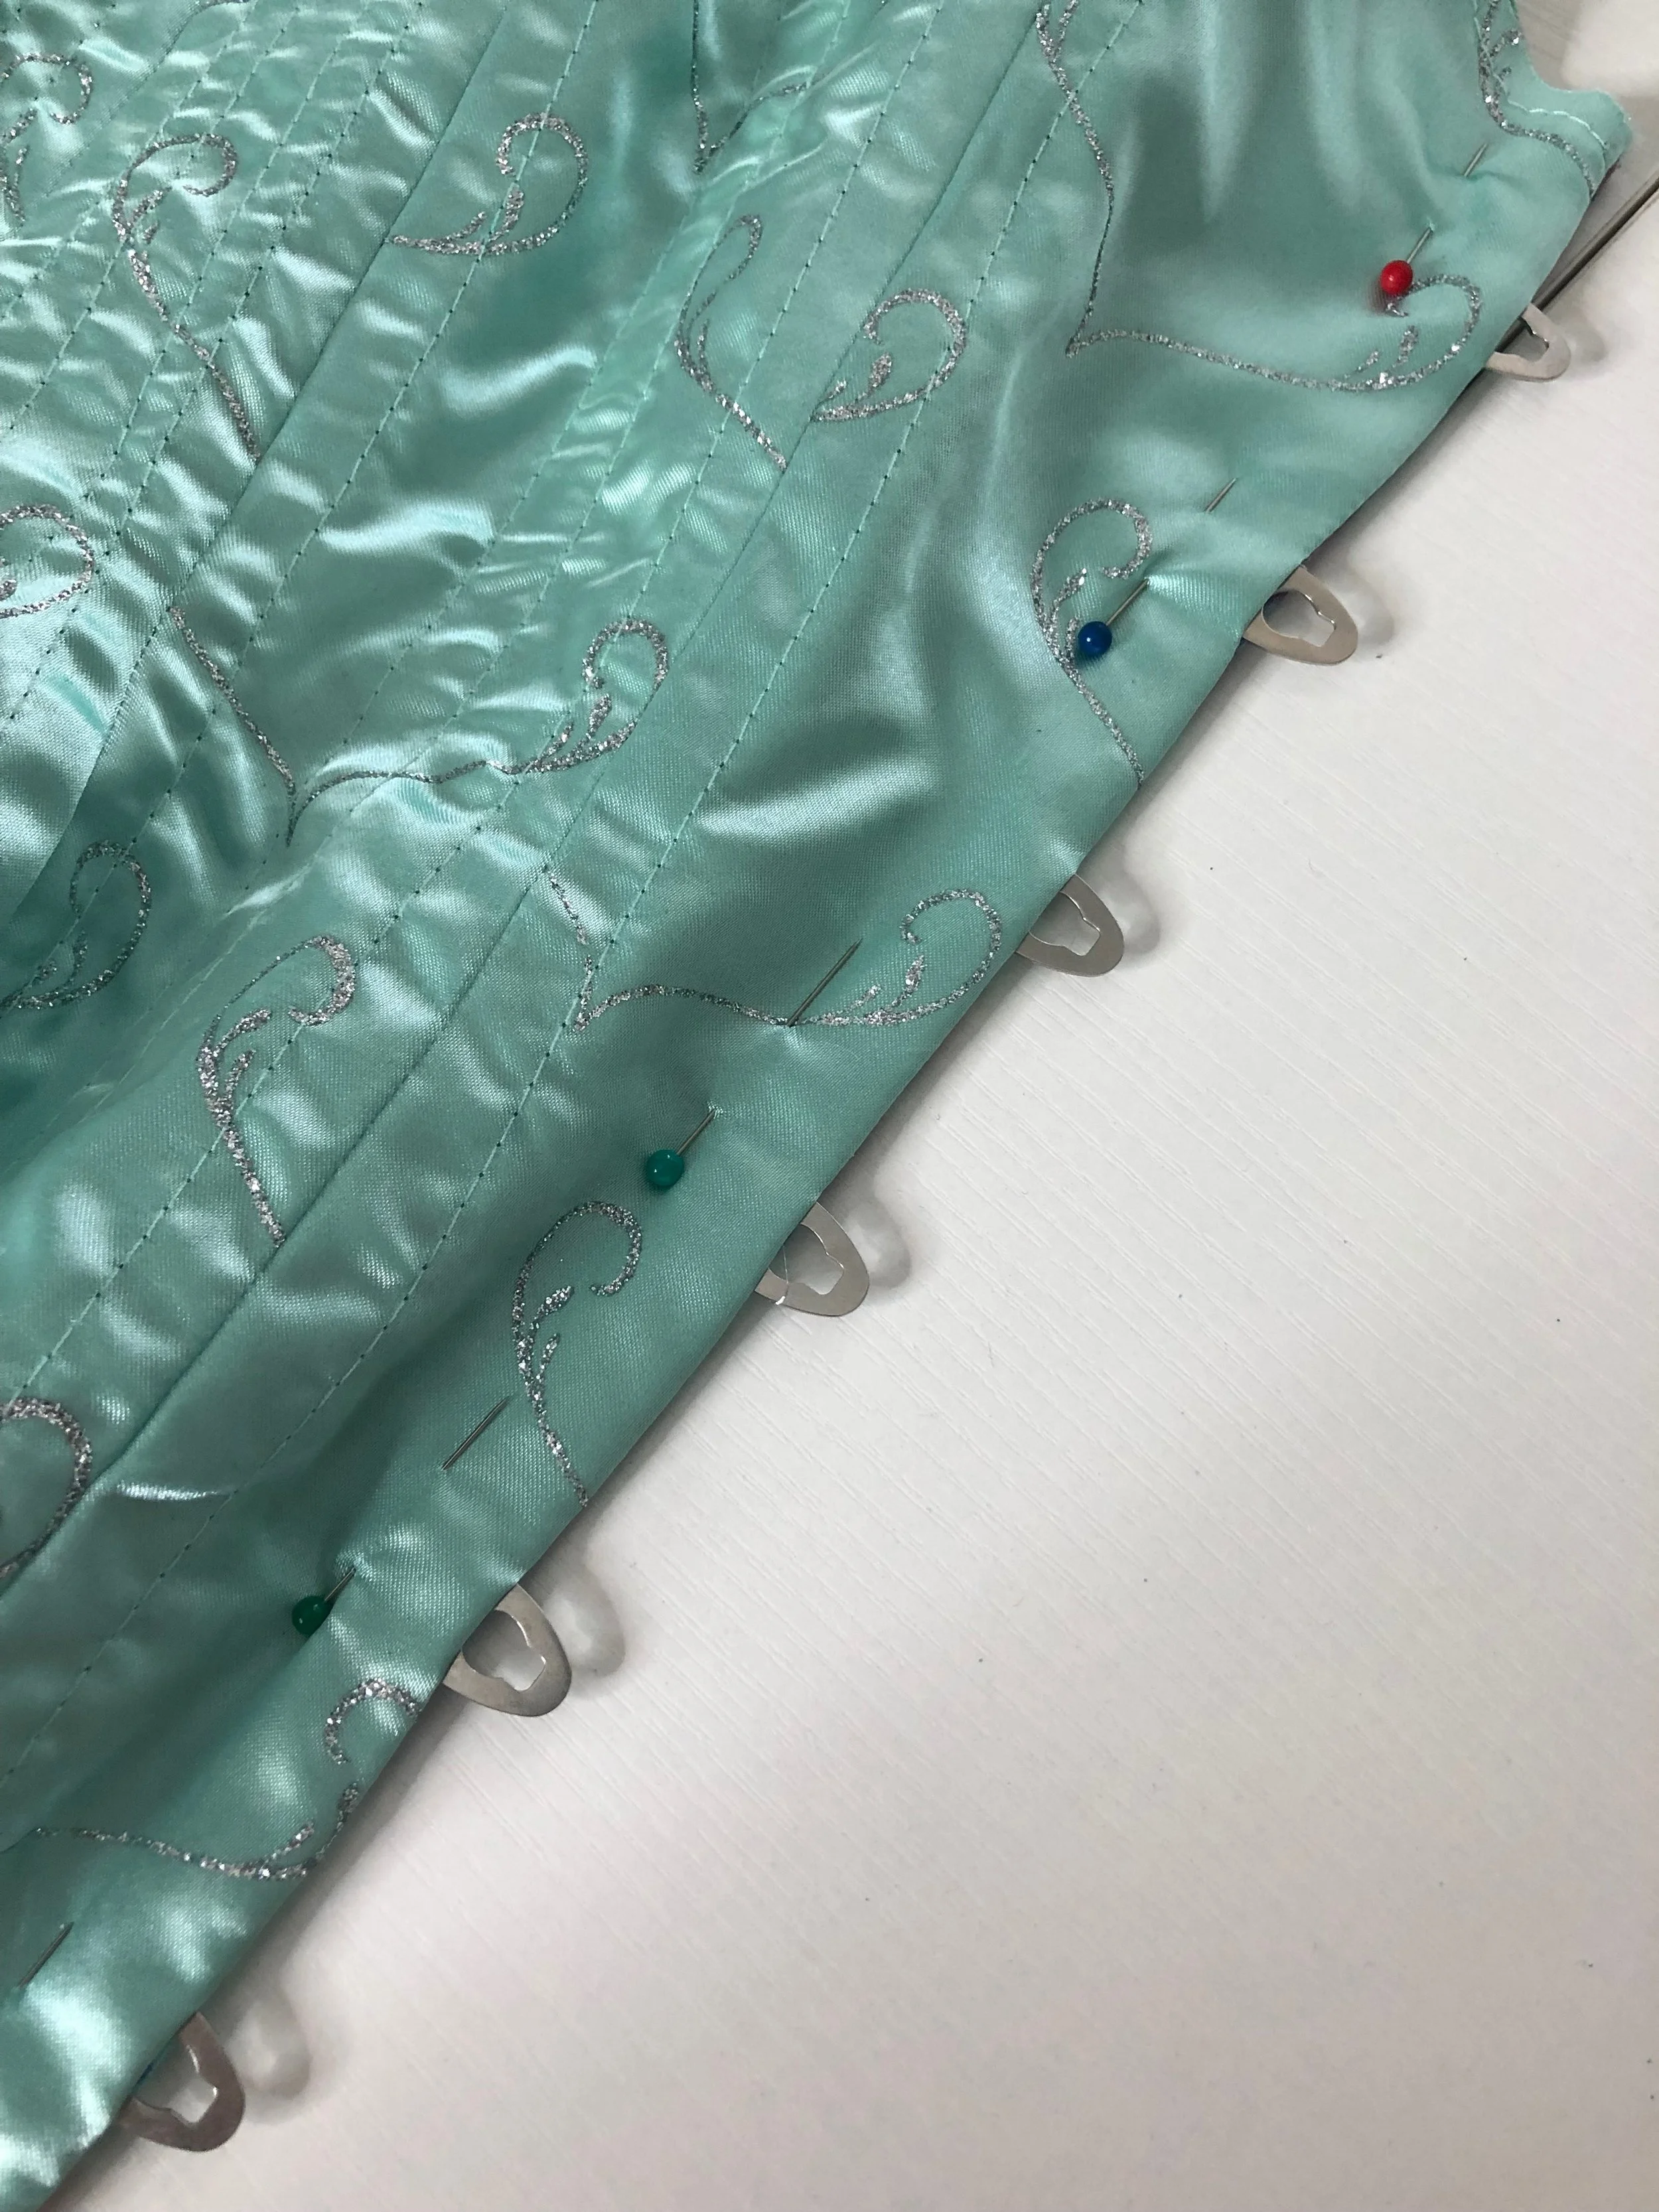
“Step 5g: Clip the corners, turn correct side out, and press. Sew five 3/8” wide boning channels into your cincher. One at the center back seam, one at each side seam, and at the front edge.”

For this step I honestly just stitched a 1/4” on each side of the seams and that created a large enough channel for the bones to be placed into.

IMG_4060.JPG

“Step 5h: Sew 2 rows of stitching from the top to the bottom at each seam line, and 3/8” in from the front edges.”

I combined this step with the previous one.

“Step 5i: insert bones into each of the channels from the top of the corselet, and baste the top of the cincher closed.”

IMG_4061.jpg

“Step 5j: Finish the top edge of the cincher with zigzag, binding or a trim to cover the raw edges.”

I used binding and then placed the grommets and this is the last photo I took of the progress.

IMG_4062.jpg

So the rest of the steps are on the hooping wire and adding the hoops. It was so difficult to photograph this section but the instructions are pretty straight forward. I will note that instead of having a 2” over lap on my wire I created a 5” overlap so they would stay secure better. In the past of making hoops I had issues with the overlap not being enough and them popping out.

Another adjustment I made was the bone casing, I added about 6 inches to the casing would actually meet. I also machine stitched each hoop casing on as I added the hoop instead of pinning it all and then sewing it. I used a zipper foot to sew it on and had no issues with sewing it alongside the metal boning.

Those were the only adjustments I made, I chose to use tape to bind the metal together and I just made sure to feed the taped pieces past the first tape so that the stitching would keep the wire from moving.

IMG_4064.JPG

I also tried Ariels underskirt on over the hoop and it seemed to fit nicely so I plan to use this hoop for future ballgowns as well as displaying pieces.

IMG_4069.JPG

If you found this blog helpful please consider supporting my work on Patreon or Ko-fi, both places help with material cost on costumes and allow me to continue to spend the time to write these blogs and make videos.

How I made my False Front Ariel Underskirt

Welcome back to my blog, today I am going to share how I made my false front underskirt that goes underneath my Ariel Ballgown.

I’ll start by explaining briefly how and why I made the underskirt this way. I have been making this costume primarily out of materials from my stash and instead of purchasing an extra 3-4 yards of silk to make the entire skirt out of silk I chose to make the front panel out of silk and the other panels out of Kona cotton that I got on sale for $5 per 108” width yard. I don’t normally buy my kona cotton at Joanns because I absolutely love the Robert Kaufman Kona cotton but the extra wide white cotton is actually very nice quality and since I didn’t have enough silk for the skirt the cotton was a much more affordable option.

So to start off I used Simplicity Pattern 1728, 4 yards of 108” width Kona Cotton, 2.5 yards of “rolling fog” silk dupioni from Silk Baron and then a yard of trim that I painted and an assortment of beads that I also had in my stash.

IMG_3712.JPG

I used this pattern for the underskirt and with lots of modifications. I will say there is absolutely nothing wrong with using this pattern if that’s what you want but I personally enjoy modifying patterns to get the results I desire.

For the purpose of this blog I just used the piece to make the skirt which was piece number 10.

I started the entire process by cutting out the cotton first and like most patterns I completely ignored the instructions and did my own thing.

Going into this project I knew I wanted a fuller skirt so using pattern piece 10 I cut out the front panel on the fold, then I cut “side” panels and “back” panels. I can’t remember but I am pretty sure the pattern called for only front and back.

IMG_3622.jpg

After cutting out all the cotton pieces (this was actually how I found out that I didn’t have enough silk and would need to do the false front) I cut out the one silk panel which was the front on the fold.

From there I cut a waistband and I actually used the piece from this pattern as well.

IMG_3623.jpg

Then I painted the trim, I didn’t have enough to cover the silk panel but I still had enough to cover the amount of space needed.

IMG_3620.JPG

While the paint dried (I think it suggested 4 hours) I started sewing the cotton panels with french seams.

IMG_3626.jpg

For the closure in the back I rolled the cotton inward and the base was basically done.

IMG_3624.jpg

Once the paint was dry, I tacked down the silver trim onto the silk dupioni with 1.5” space from the hem so I could roll it later. It doesn’t look like I photographed that step but I did pin the silk front onto the dress form over the cotton before I actually added the trim to make sure it would cover enough of the under skirt.

IMG_3627.jpg

Once the trim was applied to the skirt, I took the liberty to embellish the heck out of it. I did this before adding it to the cotton because the cotton actually acts as a lining and will keep all those pretty stitched concealed for a cleaner finish.

IMG_3788.JPG

So now, it’s time to add the silk front to the rest of the skirt. The picture above is actually from after the silk application but you can still see the details which is important. So it’s very important to add the silk before adding the waistband.

I started this step by pinning the top of the center front of the silk to the top of the center front of the cotton. Baste those two together. Then went in to add my gather stitch but don’t gather down yet, just leave those be for a bit.

Once the top was together, I went down each side and folded the silk in half an inch onto the cotton lined up wit the seam from the cotton. Alternatively you could baste the two pieces together before putting the skirt together and then put the skirt together. Or you could also completely omit that center piece of cotton however if you do any embellishments you would be stuck with thread shown on the inside so the garment might not be competition level clean. All of these options are right though because in sewing there is no “wrong way” to do something, there’s just ways that work better for some then others.

IMG_3811.JPG

Once both sides are done in this manor I actually go in and pin the entire hem to be made for half an inch rolled hem. I found that the front where the trip was had to be stitched by hand due to the embellishments but the rest of the hem was machine sewn.

IMG_3809.JPG

Once the hem was done, I gathered down the top and slapped a waistband on it! I didn’t photograph this part since I have been putting waistbands on everything lately so I didn’t feel the need to show how that was done.

I did sew two hooks in the back of the skirt to put on and take off.

Finally, I went in and added my Patrons names to the hem of the skirt with this beautiful Robison Anton Thread Bright Jade

IMG_E3804.JPG

Once the skirt was done, I threw it over the hoop skirt to prep for the main dress. The entire build thread on this costume will be put into PDF e-book format in late June or early July and will be on Patreon first.

If you would like your name inside Constance Hatchaway like the names in this dress you can become a Patron for $1 or support me on ko-fi for $3 and anyone who buys 3 or more coffees for me on ko-fi will get the PDF Build Book on Constance Hatchaway when I release it on Patreon in September.

Don’t forget you can always support me while purchasing materials through TnT Cosplay Supply with no extra cost to you as well as Amazon when using my personal links to both.

Using Laughing Moons Victorian Corset Pattern

Welcome to my blog, I often get asked about what corset pattern I use and I’m finally making a blog post about it. I love the Laughing Moon Pattern #100 I’ve used it for myself and my customers multiple times.

Like every pattern you should always start with a mock up, since I’ve used this pattern on several occasions I am going to skip that part for the purpose of this blog and get right into cutting my fabric.

I used a cotton print for the lining, a cotton blend for the interling and a light weight satin for the fashion fabric all of these fabrics were pulled from my stash.

IMG_3341.JPG

I also cut a layer of fusible interfacing and ironed it onto the cotton lining.

IMG_3347.JPG

Then I basted the interlining fabric to the satin on all of the sides to make it stronger.

IMG_3348.JPG

At this point I marked the darts on each panel with a water soluble marker.

IMG_3369.JPG

Now it’s time to sew the panels together with right sides together and on a 5/8th inch seam allowance.

IMG_3371.JPG

Then I press all the seams open in order for the corset to lay flat.

IMG_3373.JPG
IMG_3374.JPG

I pinned the seams on the fashion fabric down to make boning channels and added three pieces of bias tape for the extra boning channels.

I sew them down.

IMG_3378.JPG

Next I started making bias binding by cutting 1 3/4in strips on the bias of the cotton blend fabric.

IMG_3379.JPG

Then I pressed the binding in half and in quarters.

IMG_3380.JPG

Now for the boning, I measure each piece and cut it an inch smaller than the channel. Then I did the ends of the spiral steel into plastidip, allow it to sit for 30 minutes and dip it a second time. Two times are good but 3-4 are even better.

IMG_3381.jpg

Now I installed the busk, I did this before I added the boning into their channel because that’s just easier for me. So I started by marking the busk on the inside of the lining fabric with right sides together.

IMG_3393.JPG

I stitched the pieced together on the line and added the busk, pinning super close to the metal bar of the busk.

IMG_3394.JPG

Now I sew the busk into place with my zipper foot.

IMG_3395.JPG

I marked the second half.

IMG_3396.JPG

Use an awl to poke the holes for the busk piece.

IMG_3398.JPG

Once all the holes are punched then I pinned along the busk line and using the zipper foot I sewed the busk in place.

IMG_3399.JPG

Now I can add the steel boning and bast along all the edges.

IMG_3400.JPG

Now it’s time to add the bias binding.

IMG_3401.JPG

Then I stitched in the ditch to stich down the bias binding, I normally hand stitch it in the back but I know stitching in the ditch is faster. My major issue with it was that I was going way too fast and not catching the back part of the binding. Needless to say this was my BEST busk installation and my worst bias application making it overall a mediocre corset.

IMG_3402.JPG

Now time for the grommet installation.

IMG_3435.JPG

Measure and Mark the grommet placement. I start 1 inch from the top and then do them 1.5 inches in between each.

I hole punch, use the awl and then set the grommet with the tool and a hammer (a mallet works better but I misplaced mine so for the purpose of this corset I used a hammer).

IMG_3439.JPG
IMG_3440.JPG
IMG_3441.JPG
IMG_3442.JPG
IMG_3443.JPG
IMG_3445.JPG

Adding grommets is the final step to making the corset but I realized after I was done that there should have been a piece of boning put in the back seam between the edge of the fabric and the grommets to help stabilize the grommets.

It’s not the worst thing in the world but it will definitely help to have it there.

Here’s the completed corset.

IMG_3457.JPG
IMG_3467.JPG

Thank you again for reading!

The Chilling Adventures of Sabrina's Red Dress

After a couple larger projects I really wanted to tackle something that was easy enough to finish in a weekend. Back in December I binge watched all of The Chilling Adventures of Sabrina and after seeing her Red Dress I knew I wanted to make it. I initially planned on just buying a dress off of Amazon and calling it a day but I really liked the buttons and collar in particular so I just decided to make it.

I bought a wig off Amazon, it’s no longer available at the time but it only cost $16 and the headband is the same one I made for my Alice in Wonderland wig.

I bought 2.5 yards of red suiting fabric from Joann Fabrics, 3 buttons and a pre-made lace collar off of Amazon. This exact collar is no longer available on Amazon but here’s a link to some that could work. Please note that all Amazon links in this blog are affiliate links and using them helps me buy materials for future projects. With coupons I was able to get all the materials and wig for less than $50.

IMG_3216.JPG

I started with draping a pattern on my dress form for the bodice and skirt, I didn’t get any pics of this but I basically put the pre-made collar piece on my dress form and then started draping fabric from there. I lined up the neck with the collar and the shoulder where the shoulder collar piece was sewn. Then from there I chose where I wanted the gathered section to be on the bust. I put darts in the back panel and planned for a zipper.

For the skirt, I decided to use the end of the gather line for the front side seam of the skirt, then I followed the side seam for the side pieces. From there I just repeated the pieces for the back half of the dress.

I actually used a pattern for the sleeve because I am still very bad at draping fitted sleeve patterns and I was trying to make this in a weekend.

IMG_3218.JPG

After cutting out this sleeve I realized it would have been faster/easier to use this pattern and just shorten the hem but whatever I’m glad I at least made an attempt at patterning this dress.

I didn’t really take the time to clean up the fabric pieces I draped on my dress form but they still look decent to me.

IMG_3221.jpg

From there I detached the collar part from the fake shirt, I didn’t want the fake shirt to be seen and I thought it would just be easier to add the collar to the dress.

IMG_3220.JPG

Then I cut out the skirt pieces and over locked all the edges of the dress pieces. (Not pictured)

I started with the front bodice construction by folding the front center piece over, pressed and stitched.

IMG_3224.jpg

Then I added the buttons and button holes, as well as the gathers.

From there I moved onto the back and stitched the darts, I pressed them away from the zipper.

IMG_3227.jpg

Now it’s time to sew the front to the back at the shoulders and sides.

IMG_3228.jpg

From here I moved onto the sleeves, I started with the bottom of the sleeve and folded it up by an inch, stitched and pressed.

IMG_3225.jpg

Then I stitched the sleeves right sides together.

IMG_3226.jpg

The last thing I did for the bodice was sew on the collar and sleeves. Patterning to this point only took five hours which was way quicker than I expected.

IMG_3229.JPG

Starting with the middle front piece I stitched the side panels on working my way to the back of the dress. It’s very important to press each seam open as you add the skirt panels or else you will create extra bulk in the skirt.

IMG_3231.jpg

After sewing the back seam up leaving enough room for the zipper, I folded up the hem an inch and stitched it down. Finally I added the skirt to the top, installed the zipper which I forgot to buy so I had to baste in a hot pink separating zipped in order to take photos in the dress.

IMG_3233.JPG

A few changes I would make differently in the future is lengthen the sleeves, I always forget my arms are way longer than most sleeve patterns. I’d also lengthen the bodice by about an inch and a half, make the buttons a half inch closer to the middle and then make the shoulder about 3/4” wider on each side. My arm movement was not very good in this dress so for the future I will have to make adjustments but I think it looks cute.

Here’s a few photos’s from my photo shoot in the dress. I think this is going to be a great “casual” cosplay for me.

If you liked this blog and would like to help me fund my D23 costume head on over to ko-fi and I will put your name in the costume.

Thank you all for reading!

White Christmas, Red Dress pt 3

Welcome to part 3 and the final part of making my White Christmas Red Dress. In this blog I will go over how I made my full dress with the rhinestone details on it.

If you’re interested in learning how I made my petticoat you can find that here or how I made the skirt and cape-let with the fur trim you can read that here.

Full disclosure I did not drape the bodice pattern for this costume, that work was done by Sarah who was Betty to my Judy!

I started by making a mock-up with some of the scraps left over from the skirt and cape-let.

The mock-up fit literally like a glove so I made no adjustments to it and then went ahead to cut it out and make it again but this time with lining and sleeves.

IMG_2151.JPG

I didn’t take any pictures of this process but essentially I sewed the darts in first, then the panels together, then added the sleeves and actually over locked those at the seam in order to keep them clean.

Next I whipped up a quick collar for the neck to make it a turtle neck, I interfaced it and once again serged the edges to keep it clean.

IMG_2163.JPG

For the skirt addition, I just cut out a second circle skirt but 6” shorter and draped it over my current skirt. From there I marked with pins where I wanted to cut the slit and I actually cut it too high for the fur but I just hid that with the fur application. It wasn’t the cleanest way to do it but it worked. Then I over locked the hem to prepare it for the fur.

IMG_2165.JPG

For the fur addition I used the exact same technique described in part two, because I hand stitched the fur down it took about 6 hours to apply but looked lovely once it was done.

IMG_2176.JPG

Finally it was time to apply the invisible zipper. This was my first time ever attempting to do an invisible zipper and I wont lie it was way easier than I had ever imaged. I don’t own an invisible zipper foot but I’m considering buying one for the future.

IMG_2196.JPG

As per usual I over locked my seam before adding the zipper to “keep it clean”. I’m not going to go over step by step how to add an invisible zipper but I’m willing to make a video tutorial if that’s something people want from me in the future. So above is sewing the first side.

Below is sewing the second side.

It was so easy and look how good it turned out.

IMG_2198.JPG

Alright now the sewing was complete! It’s time for rhinestones!

Sarah created a template for us to go off of and a general idea of where the placement should have been.

We used the hot fix tool and 3mm/10ss and 5mm/20ss to make the snowflake design on the dresses. Hot fix is not my favorite method to apply rhinestones but it definitely is a great way to apply stones! I’ll actually be writing an entire blog after this about my favorite choices of rhinestones and techniques so if you like this blog then stay tuned.

IMG_2200.JPG

I applied the stones all over the dress, cape-let and ever on the bodice and sleeves and we were good to go. The red stones were very tricky to see on the red fabric but I knew they were there and that’s all that really matters.

IMG_2203.JPG

That was it, the dress was done and I was ready to for epic amounts of twirling.

49571347_2145927522095643_1044910460161228800_o.jpg

Thank you all for reading my blog.

I’ll be posting blogs every first and third Friday of the month so stay tuned!