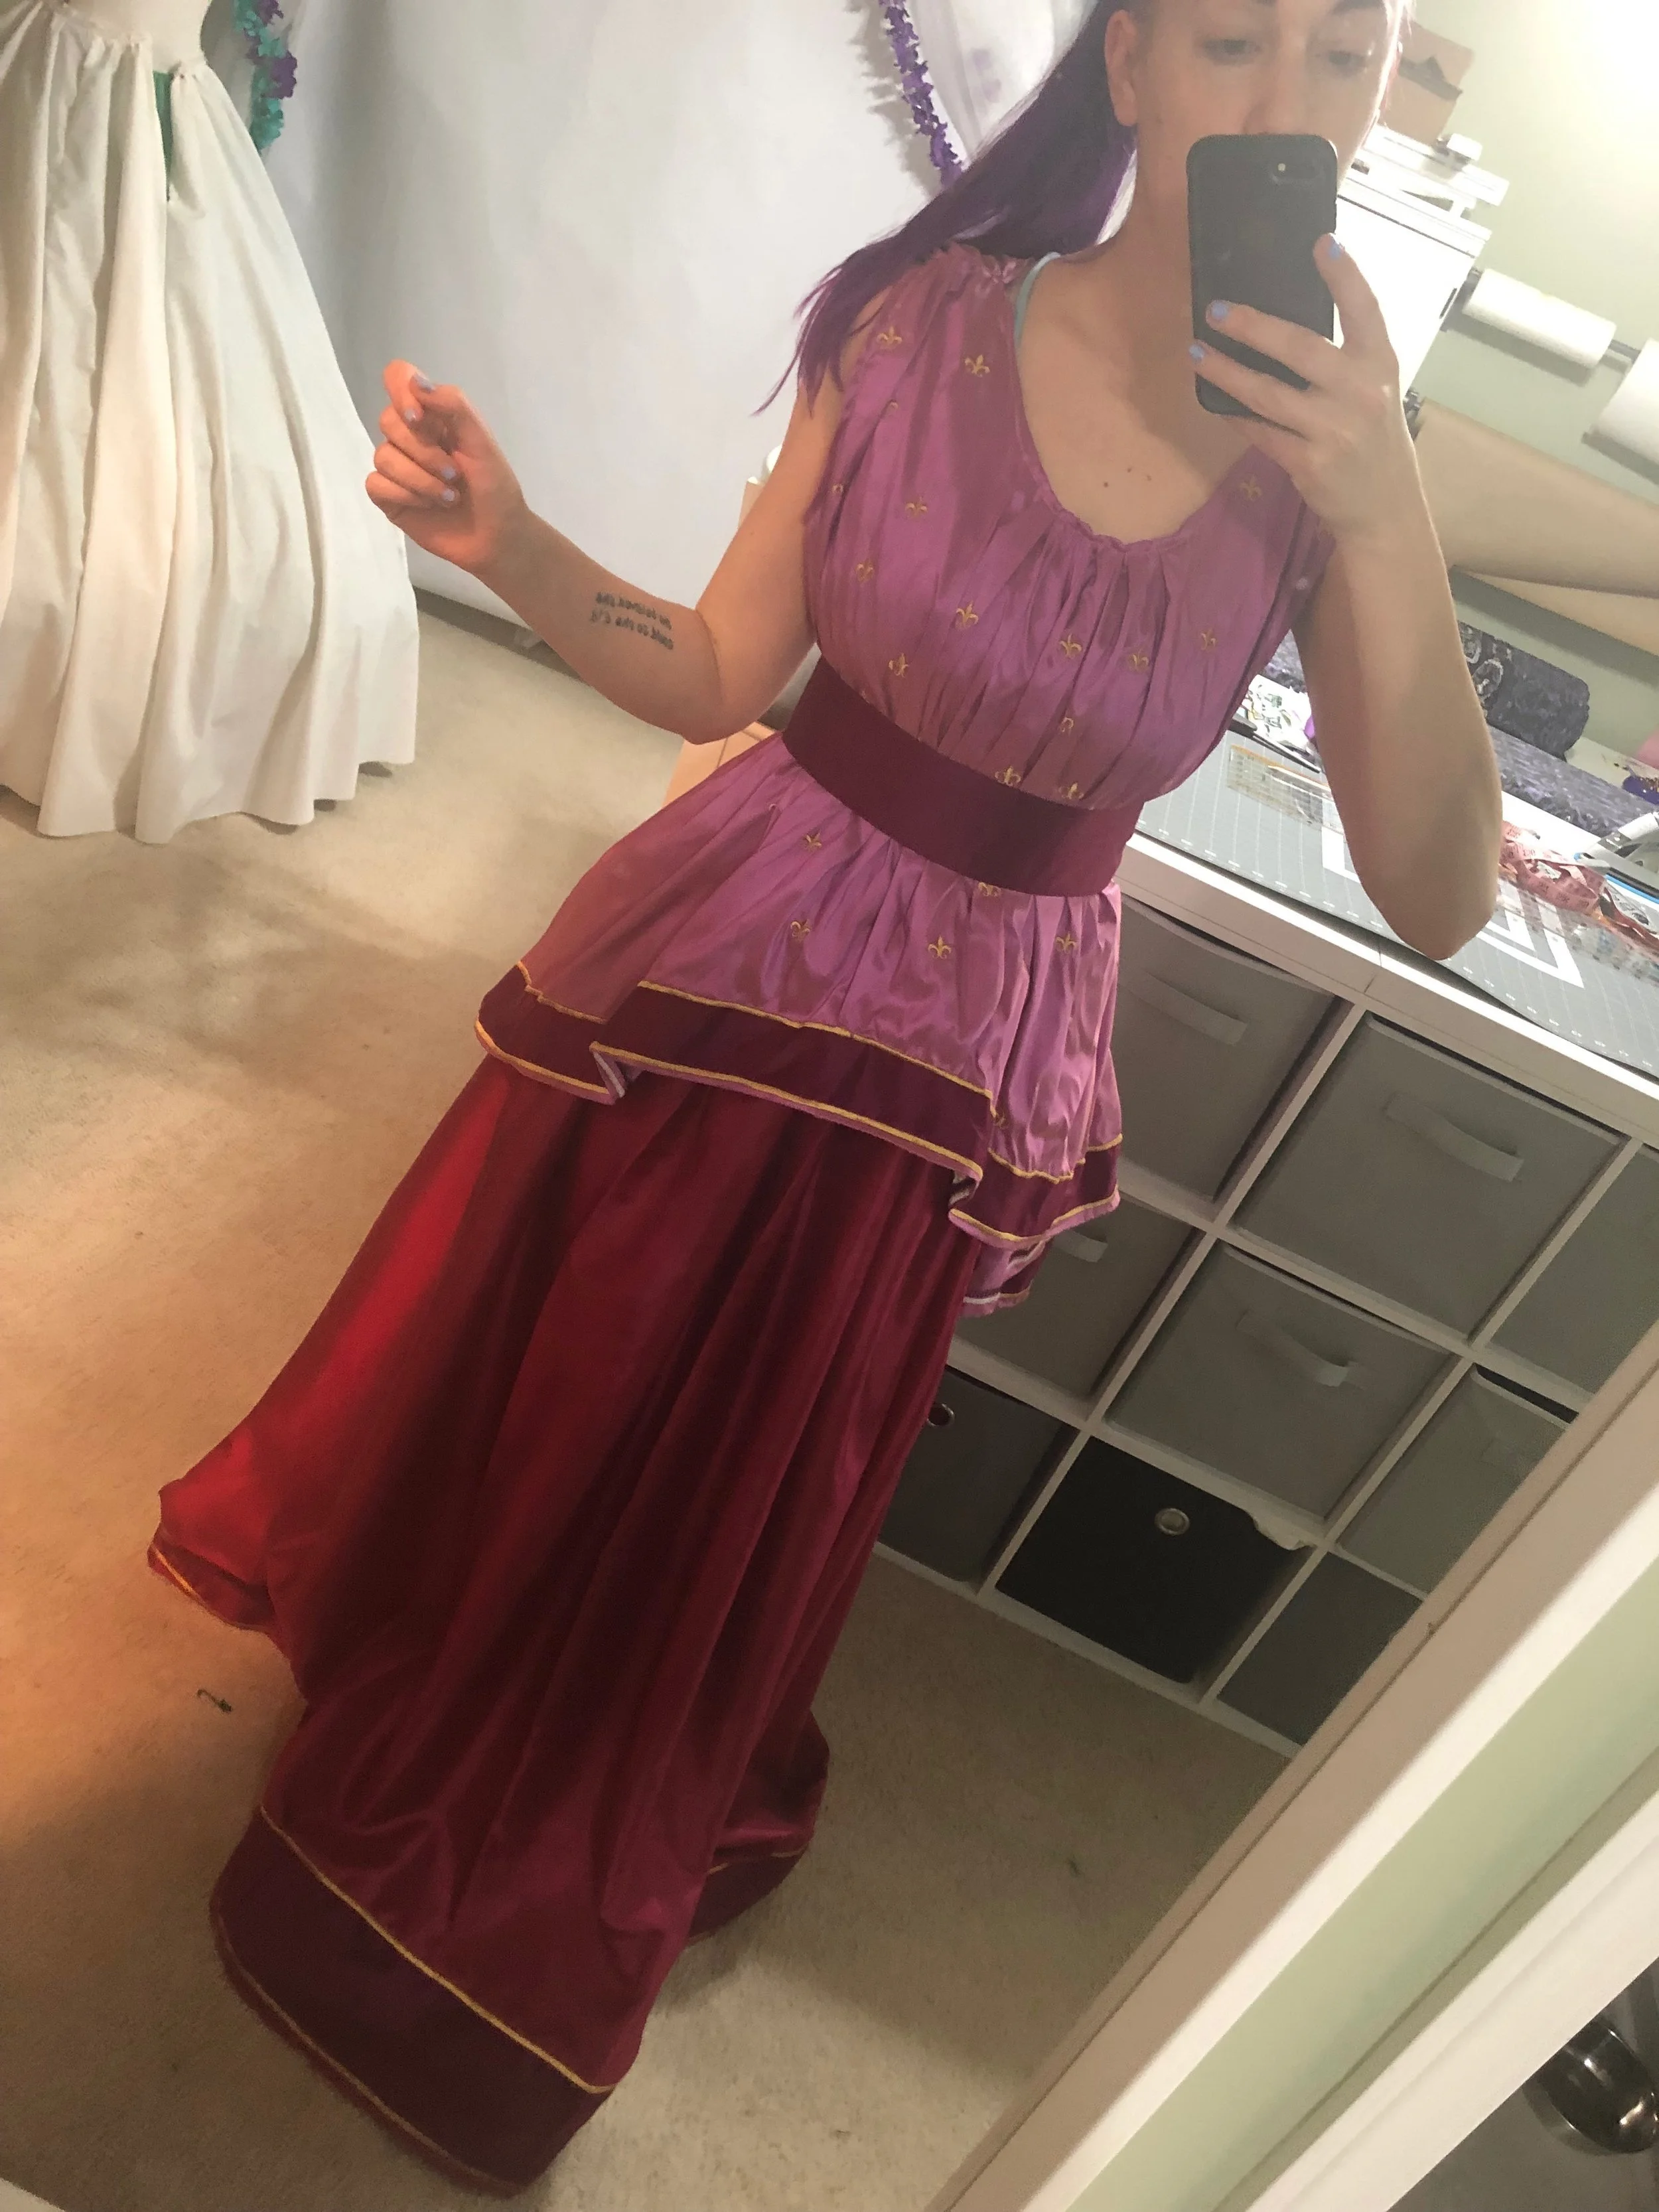
Welcome to a new blog on making Historically Accurate Megara from Hercules. I made this costume in three weeks leading up to Momocon so I take a lot of short cuts and don’t exactly do things historically accurate but this design has been on my list for over a year now so what better time to make it then now.
To start off, I used silk instead of linen because I had never used silk shantung before and I really wanted to, I know now that it doesn’t give the drape that I need from the image but the color of the fabric was still stunning so I stand by my choice.
I purchased three yards of silk shantung from mood, three yards of silk habotai and three yards of silk shantung from Silk Baron. I used embroidery thread from Robison Anton in 24k Gold, as well as sewing thread from Intressa for sewing the garments.
The embroidery design was already programmed in my Husqvana embroidery machine in the exact size I wanted it so I chose to go the easy but inaccurate route vs digging for something more appropriate.
This blog is going to cover the shirt and skirt, while the next blog will cover the accessories and wig styling.
To start out I draped the chiton over my dress form by gathering the sleeves and neckline by hand, I did this on stream so naturally I forgot to take photo’s of it. There’s only two a bodice front and back to this piece so it goes together rather simply.
Once I had the shapes I wanted I cut out my fabric and serged all the edges to minimize the fraying.
Now I went in with my embroidery machine and stitched out the design, over and over and over again.

I’m aware this is not a historically accurate choice but this is the choice I made so after 6 hours of placing, pressing go, stitching, and starting all over again I finally had this design all over my costume.
So now it was time to gather down the sleeves and neckline and then sew the pieces together.


Next I made a strip of fabric out of the Mulberry silk shantung the length of the hem by 3 inches. I folded over the edges and baste the strip down.

Then using my embroidery machine I satin stitched the edges. This greatly worked against the drape but still looks good. If I were to redo this, I would not fold the edges inside and I would not do such a wide satin stitch.

Then I made a belt out of the Mulberry silk shantung, I cut a piece of it 5” by 30” added interfacing to it and then sewed snaps on the back.


Now it’s time to make the skirt, this part was really easy and basically mimics what I did for my Jafar skirt. So I took my 3 yards of habotai and created the 5” strip at the bottom just like I did on the hem of the shirt.

Then, creating a french seam I stitched the two edges together in the back leaving a 6 inch gap from the top. I gathered down the 110” to 28” made a waistband, and attached the skirt to the waistband.

That’s the skirt, it took longer to stitch out the embroidery than it did to sew both the top and bottom of this costume. I would say about 15 hours have been put in so far.