Capelet Sew Along for St Jude

Join me on Friday December 6th at 12pm ET to kick off our Holiday St Jude Fundraising with a Sew Along!

Fabric sponsored by Shannon Fabrics

WHAT: We will be making a fully lined cuddle capelet with sherpa binding.

IMG_6289.jpg

MATERIALS:

2 yards of fashion fabric: Sparkle Cuddle Glitter

2 yards of lining fabric Silky Satin Solid

1 yard of Sherpa Fur

Closure of your choice

Thread

Scissors

Sewing Machine

Iron

Tape Measure

We will be drafting our own pattern for this but if you want you can purchase one.

WHERE: Twitch.tv/CaseyReneeCosplay

The Video of the Stream will be exported to YouTube and linked in this blog once it is complete.

GOALS and GIVEAWAYS:

IMG_6292.jpg

For the month of December our goal is to raise $1000 for St Jude.

Shannon Fabrics has also gifted us with a baby blanket kit and a baby blanket to giveaway and once I finish my capelet I will be giving it away on stream as well.

Every donation of $5 or more enters you into our giveaways.

Here’s the entire December Stream Schedule:

St Jude Stream Schedule.png

How I made my False Front Ariel Underskirt

Welcome back to my blog, today I am going to share how I made my false front underskirt that goes underneath my Ariel Ballgown.

I’ll start by explaining briefly how and why I made the underskirt this way. I have been making this costume primarily out of materials from my stash and instead of purchasing an extra 3-4 yards of silk to make the entire skirt out of silk I chose to make the front panel out of silk and the other panels out of Kona cotton that I got on sale for $5 per 108” width yard. I don’t normally buy my kona cotton at Joanns because I absolutely love the Robert Kaufman Kona cotton but the extra wide white cotton is actually very nice quality and since I didn’t have enough silk for the skirt the cotton was a much more affordable option.

So to start off I used Simplicity Pattern 1728, 4 yards of 108” width Kona Cotton, 2.5 yards of “rolling fog” silk dupioni from Silk Baron and then a yard of trim that I painted and an assortment of beads that I also had in my stash.

IMG_3712.JPG

I used this pattern for the underskirt and with lots of modifications. I will say there is absolutely nothing wrong with using this pattern if that’s what you want but I personally enjoy modifying patterns to get the results I desire.

For the purpose of this blog I just used the piece to make the skirt which was piece number 10.

I started the entire process by cutting out the cotton first and like most patterns I completely ignored the instructions and did my own thing.

Going into this project I knew I wanted a fuller skirt so using pattern piece 10 I cut out the front panel on the fold, then I cut “side” panels and “back” panels. I can’t remember but I am pretty sure the pattern called for only front and back.

IMG_3622.jpg

After cutting out all the cotton pieces (this was actually how I found out that I didn’t have enough silk and would need to do the false front) I cut out the one silk panel which was the front on the fold.

From there I cut a waistband and I actually used the piece from this pattern as well.

IMG_3623.jpg

Then I painted the trim, I didn’t have enough to cover the silk panel but I still had enough to cover the amount of space needed.

IMG_3620.JPG

While the paint dried (I think it suggested 4 hours) I started sewing the cotton panels with french seams.

IMG_3626.jpg

For the closure in the back I rolled the cotton inward and the base was basically done.

IMG_3624.jpg

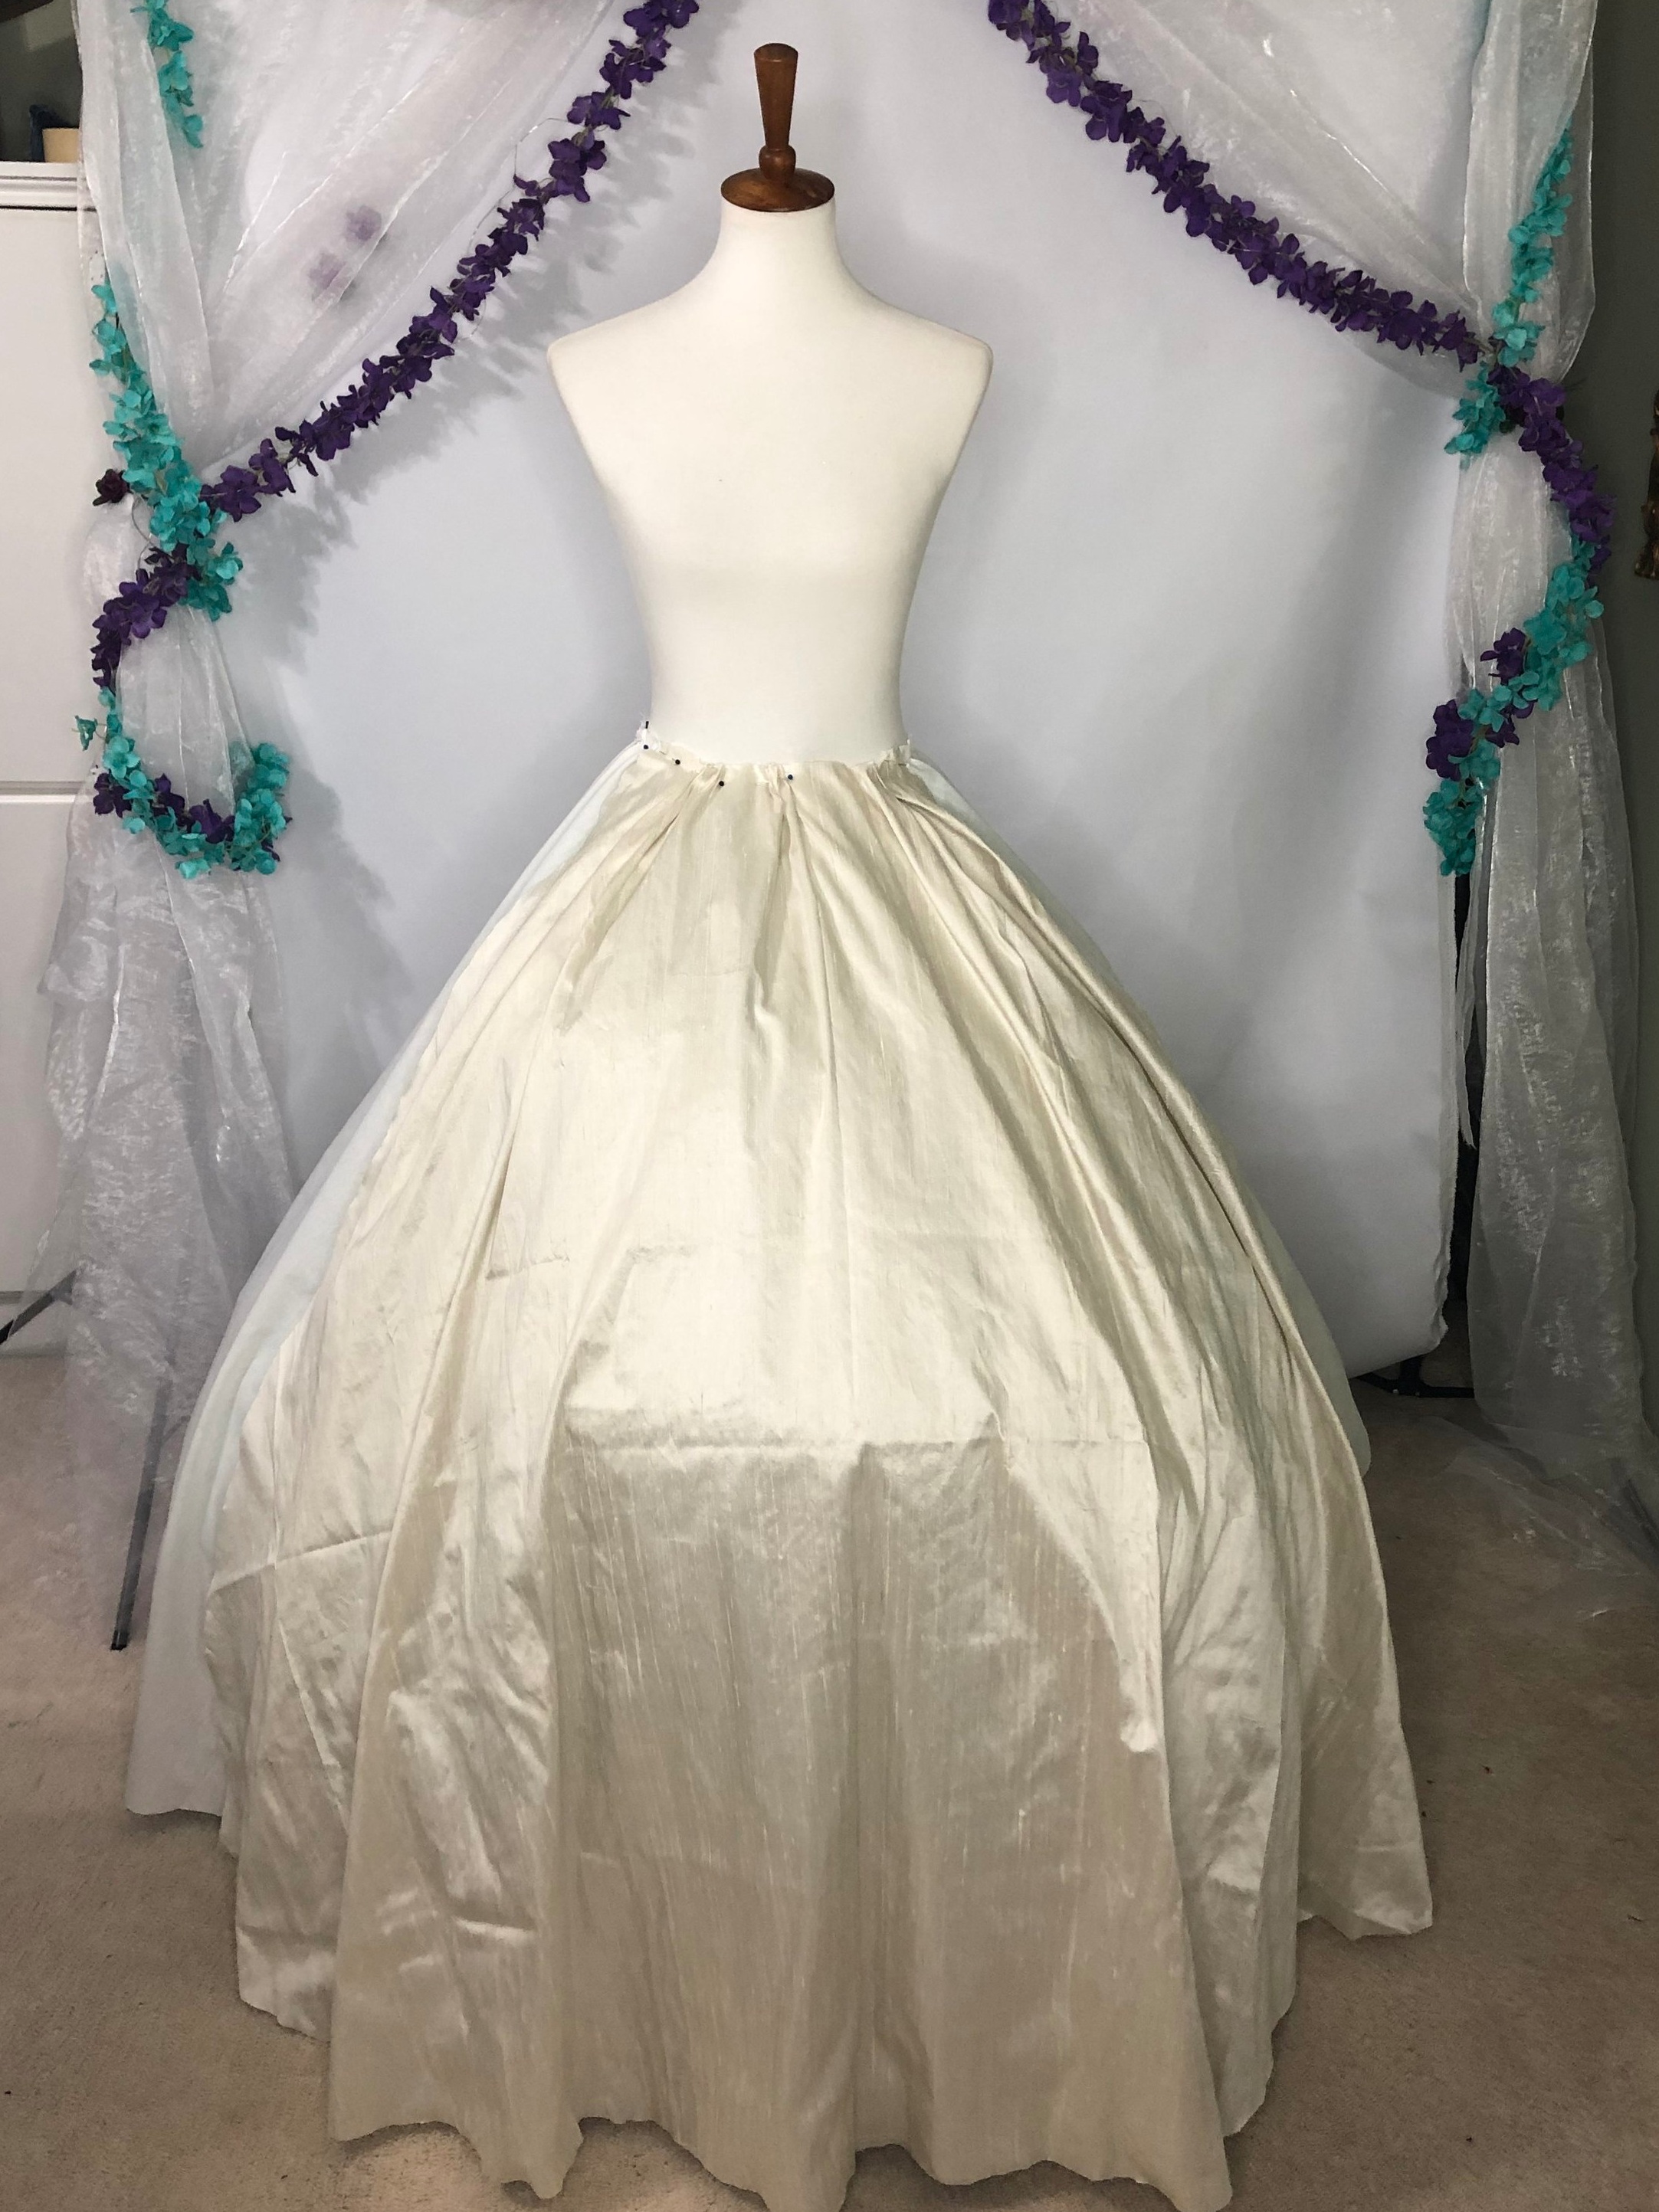
Once the paint was dry, I tacked down the silver trim onto the silk dupioni with 1.5” space from the hem so I could roll it later. It doesn’t look like I photographed that step but I did pin the silk front onto the dress form over the cotton before I actually added the trim to make sure it would cover enough of the under skirt.

IMG_3627.jpg

Once the trim was applied to the skirt, I took the liberty to embellish the heck out of it. I did this before adding it to the cotton because the cotton actually acts as a lining and will keep all those pretty stitched concealed for a cleaner finish.

IMG_3788.JPG

So now, it’s time to add the silk front to the rest of the skirt. The picture above is actually from after the silk application but you can still see the details which is important. So it’s very important to add the silk before adding the waistband.

I started this step by pinning the top of the center front of the silk to the top of the center front of the cotton. Baste those two together. Then went in to add my gather stitch but don’t gather down yet, just leave those be for a bit.

Once the top was together, I went down each side and folded the silk in half an inch onto the cotton lined up wit the seam from the cotton. Alternatively you could baste the two pieces together before putting the skirt together and then put the skirt together. Or you could also completely omit that center piece of cotton however if you do any embellishments you would be stuck with thread shown on the inside so the garment might not be competition level clean. All of these options are right though because in sewing there is no “wrong way” to do something, there’s just ways that work better for some then others.

IMG_3811.JPG

Once both sides are done in this manor I actually go in and pin the entire hem to be made for half an inch rolled hem. I found that the front where the trip was had to be stitched by hand due to the embellishments but the rest of the hem was machine sewn.

IMG_3809.JPG

Once the hem was done, I gathered down the top and slapped a waistband on it! I didn’t photograph this part since I have been putting waistbands on everything lately so I didn’t feel the need to show how that was done.

I did sew two hooks in the back of the skirt to put on and take off.

Finally, I went in and added my Patrons names to the hem of the skirt with this beautiful Robison Anton Thread Bright Jade

IMG_E3804.JPG

Once the skirt was done, I threw it over the hoop skirt to prep for the main dress. The entire build thread on this costume will be put into PDF e-book format in late June or early July and will be on Patreon first.

If you would like your name inside Constance Hatchaway like the names in this dress you can become a Patron for $1 or support me on ko-fi for $3 and anyone who buys 3 or more coffees for me on ko-fi will get the PDF Build Book on Constance Hatchaway when I release it on Patreon in September.

Don’t forget you can always support me while purchasing materials through TnT Cosplay Supply with no extra cost to you as well as Amazon when using my personal links to both.

Making Historically Accurate Megara part 1

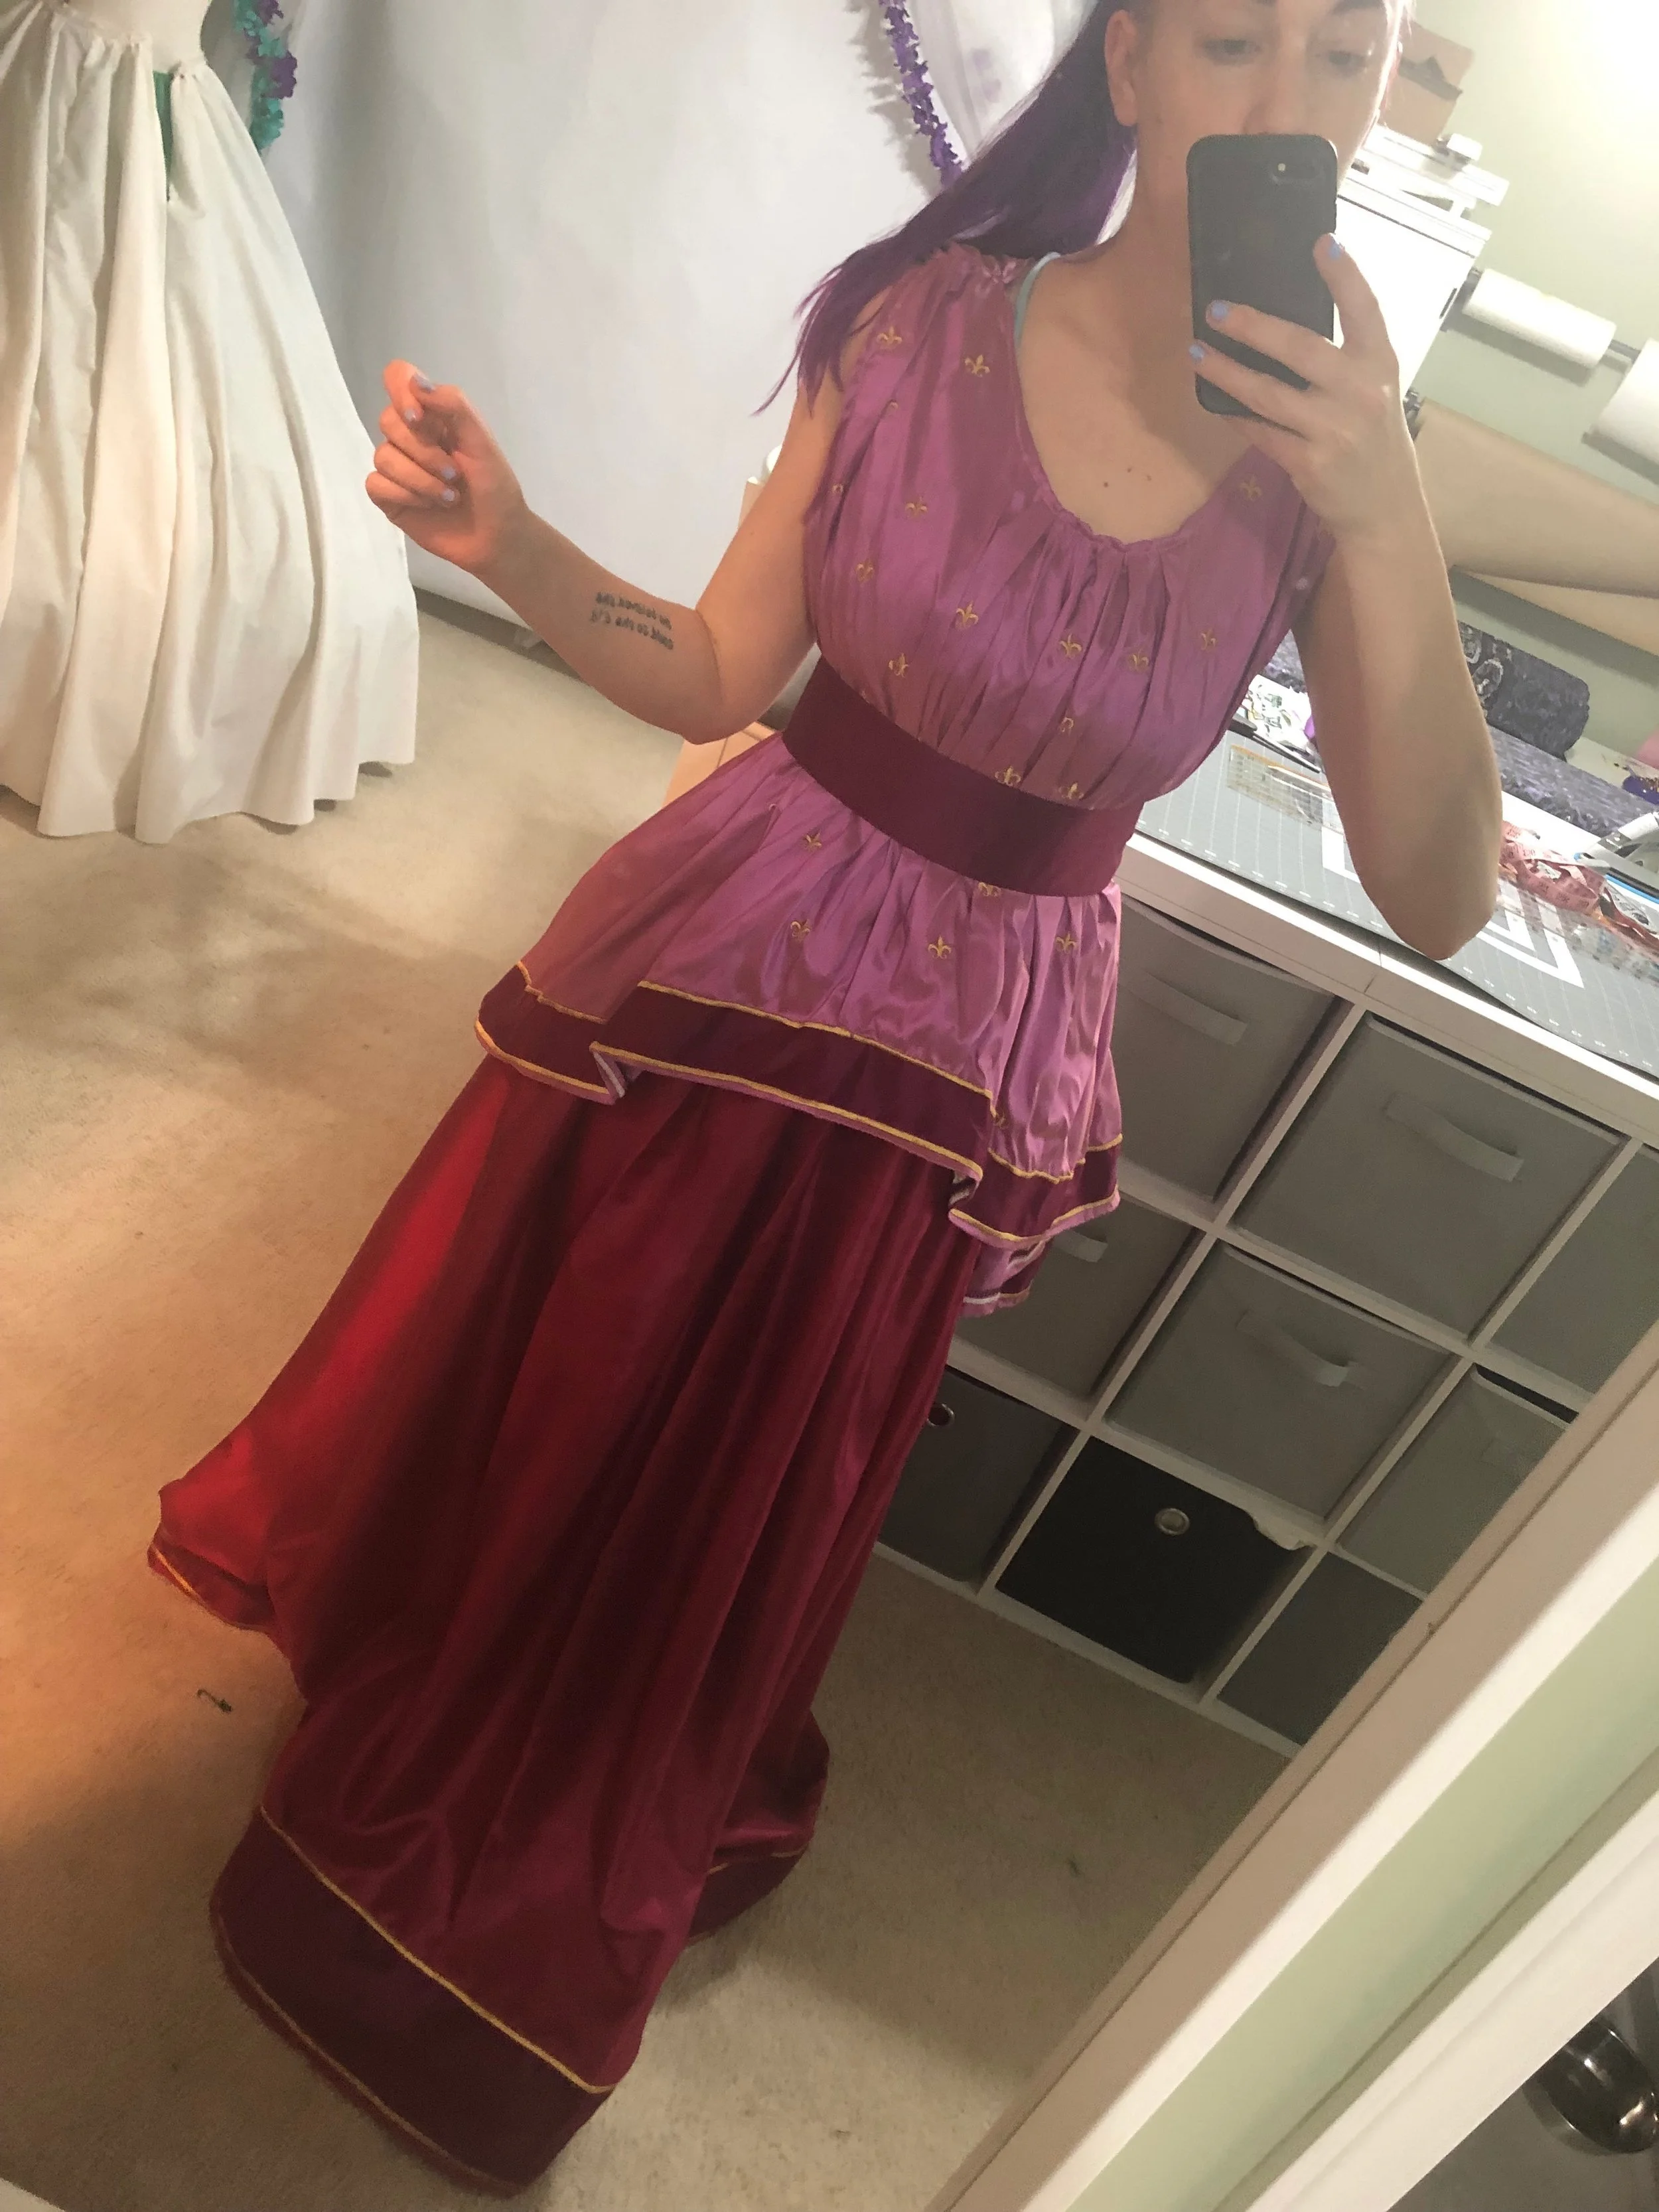
Welcome to a new blog on making Historically Accurate Megara from Hercules. I made this costume in three weeks leading up to Momocon so I take a lot of short cuts and don’t exactly do things historically accurate but this design has been on my list for over a year now so what better time to make it then now.

To start off, I used silk instead of linen because I had never used silk shantung before and I really wanted to, I know now that it doesn’t give the drape that I need from the image but the color of the fabric was still stunning so I stand by my choice.

I purchased three yards of silk shantung from mood, three yards of silk habotai and three yards of silk shantung from Silk Baron. I used embroidery thread from Robison Anton in 24k Gold, as well as sewing thread from Intressa for sewing the garments.

The embroidery design was already programmed in my Husqvana embroidery machine in the exact size I wanted it so I chose to go the easy but inaccurate route vs digging for something more appropriate.

This blog is going to cover the shirt and skirt, while the next blog will cover the accessories and wig styling.

To start out I draped the chiton over my dress form by gathering the sleeves and neckline by hand, I did this on stream so naturally I forgot to take photo’s of it. There’s only two a bodice front and back to this piece so it goes together rather simply.

Once I had the shapes I wanted I cut out my fabric and serged all the edges to minimize the fraying.

Now I went in with my embroidery machine and stitched out the design, over and over and over again.

IMG_3540.JPG

I’m aware this is not a historically accurate choice but this is the choice I made so after 6 hours of placing, pressing go, stitching, and starting all over again I finally had this design all over my costume.

So now it was time to gather down the sleeves and neckline and then sew the pieces together.

IMG_3656.JPG
IMG_3657.JPG

Next I made a strip of fabric out of the Mulberry silk shantung the length of the hem by 3 inches. I folded over the edges and baste the strip down.

IMG_3654.JPG

Then using my embroidery machine I satin stitched the edges. This greatly worked against the drape but still looks good. If I were to redo this, I would not fold the edges inside and I would not do such a wide satin stitch.

IMG_3659.JPG

Then I made a belt out of the Mulberry silk shantung, I cut a piece of it 5” by 30” added interfacing to it and then sewed snaps on the back.

IMG_3658.JPG
IMG_3661.JPG

Now it’s time to make the skirt, this part was really easy and basically mimics what I did for my Jafar skirt. So I took my 3 yards of habotai and created the 5” strip at the bottom just like I did on the hem of the shirt.

IMG_3668.JPG

Then, creating a french seam I stitched the two edges together in the back leaving a 6 inch gap from the top. I gathered down the 110” to 28” made a waistband, and attached the skirt to the waistband.

IMG_3671.JPG

That’s the skirt, it took longer to stitch out the embroidery than it did to sew both the top and bottom of this costume. I would say about 15 hours have been put in so far.

IMG_3669.JPG

The next blog will cover the accessories and wig styling.

For those that want to help support my creations you can always join my Patreon or donate to my Ko-fi.

The Chilling Adventures of Sabrina's Red Dress

After a couple larger projects I really wanted to tackle something that was easy enough to finish in a weekend. Back in December I binge watched all of The Chilling Adventures of Sabrina and after seeing her Red Dress I knew I wanted to make it. I initially planned on just buying a dress off of Amazon and calling it a day but I really liked the buttons and collar in particular so I just decided to make it.

I bought a wig off Amazon, it’s no longer available at the time but it only cost $16 and the headband is the same one I made for my Alice in Wonderland wig.

I bought 2.5 yards of red suiting fabric from Joann Fabrics, 3 buttons and a pre-made lace collar off of Amazon. This exact collar is no longer available on Amazon but here’s a link to some that could work. Please note that all Amazon links in this blog are affiliate links and using them helps me buy materials for future projects. With coupons I was able to get all the materials and wig for less than $50.

IMG_3216.JPG

I started with draping a pattern on my dress form for the bodice and skirt, I didn’t get any pics of this but I basically put the pre-made collar piece on my dress form and then started draping fabric from there. I lined up the neck with the collar and the shoulder where the shoulder collar piece was sewn. Then from there I chose where I wanted the gathered section to be on the bust. I put darts in the back panel and planned for a zipper.

For the skirt, I decided to use the end of the gather line for the front side seam of the skirt, then I followed the side seam for the side pieces. From there I just repeated the pieces for the back half of the dress.

I actually used a pattern for the sleeve because I am still very bad at draping fitted sleeve patterns and I was trying to make this in a weekend.

IMG_3218.JPG

After cutting out this sleeve I realized it would have been faster/easier to use this pattern and just shorten the hem but whatever I’m glad I at least made an attempt at patterning this dress.

I didn’t really take the time to clean up the fabric pieces I draped on my dress form but they still look decent to me.

IMG_3221.jpg

From there I detached the collar part from the fake shirt, I didn’t want the fake shirt to be seen and I thought it would just be easier to add the collar to the dress.

IMG_3220.JPG

Then I cut out the skirt pieces and over locked all the edges of the dress pieces. (Not pictured)

I started with the front bodice construction by folding the front center piece over, pressed and stitched.

IMG_3224.jpg

Then I added the buttons and button holes, as well as the gathers.

From there I moved onto the back and stitched the darts, I pressed them away from the zipper.

IMG_3227.jpg

Now it’s time to sew the front to the back at the shoulders and sides.

IMG_3228.jpg

From here I moved onto the sleeves, I started with the bottom of the sleeve and folded it up by an inch, stitched and pressed.

IMG_3225.jpg

Then I stitched the sleeves right sides together.

IMG_3226.jpg

The last thing I did for the bodice was sew on the collar and sleeves. Patterning to this point only took five hours which was way quicker than I expected.

IMG_3229.JPG

Starting with the middle front piece I stitched the side panels on working my way to the back of the dress. It’s very important to press each seam open as you add the skirt panels or else you will create extra bulk in the skirt.

IMG_3231.jpg

After sewing the back seam up leaving enough room for the zipper, I folded up the hem an inch and stitched it down. Finally I added the skirt to the top, installed the zipper which I forgot to buy so I had to baste in a hot pink separating zipped in order to take photos in the dress.

IMG_3233.JPG

A few changes I would make differently in the future is lengthen the sleeves, I always forget my arms are way longer than most sleeve patterns. I’d also lengthen the bodice by about an inch and a half, make the buttons a half inch closer to the middle and then make the shoulder about 3/4” wider on each side. My arm movement was not very good in this dress so for the future I will have to make adjustments but I think it looks cute.

Here’s a few photos’s from my photo shoot in the dress. I think this is going to be a great “casual” cosplay for me.

If you liked this blog and would like to help me fund my D23 costume head on over to ko-fi and I will put your name in the costume.

Thank you all for reading!

Alice in Wonderland: A 24-Hour Challenge

“We’re all mad here.”

Or at least that’s what I keep telling myself to justify the 24-Hour madness that was our Alice in Wonderland build!

The goal was to create the dress, the chibi, the set, do the photoshoot and edit the photo from the shoot in 24 hours live on Twitch.

We slayed that goal and completed it in 19 Hours ending with this beautiful image by Alexandra Lee Studios.

4571EE.jpg

I didn’t take as many photo’s during the process as I normally do and I cut many corners but let’s just dive right into making this costume.

To start I made a calf length petticoat that I covered in a video here. It was a four layer, three tier petticoat made out of a combination of tulle and organza.

IMG_2621.JPG

The first thing I made was the headband. I made it out of black cotton, interfacing and black elastic. I used this blog and pattern on my Cricut Maker to cut the fabric and interfacing. I personally don’t like hard head bands because they give me a head ache but this one was soft and didn’t annoy me at all.

Also, since I had so many questions during the stream here is the link to the wig.

IMG_2636.JPG

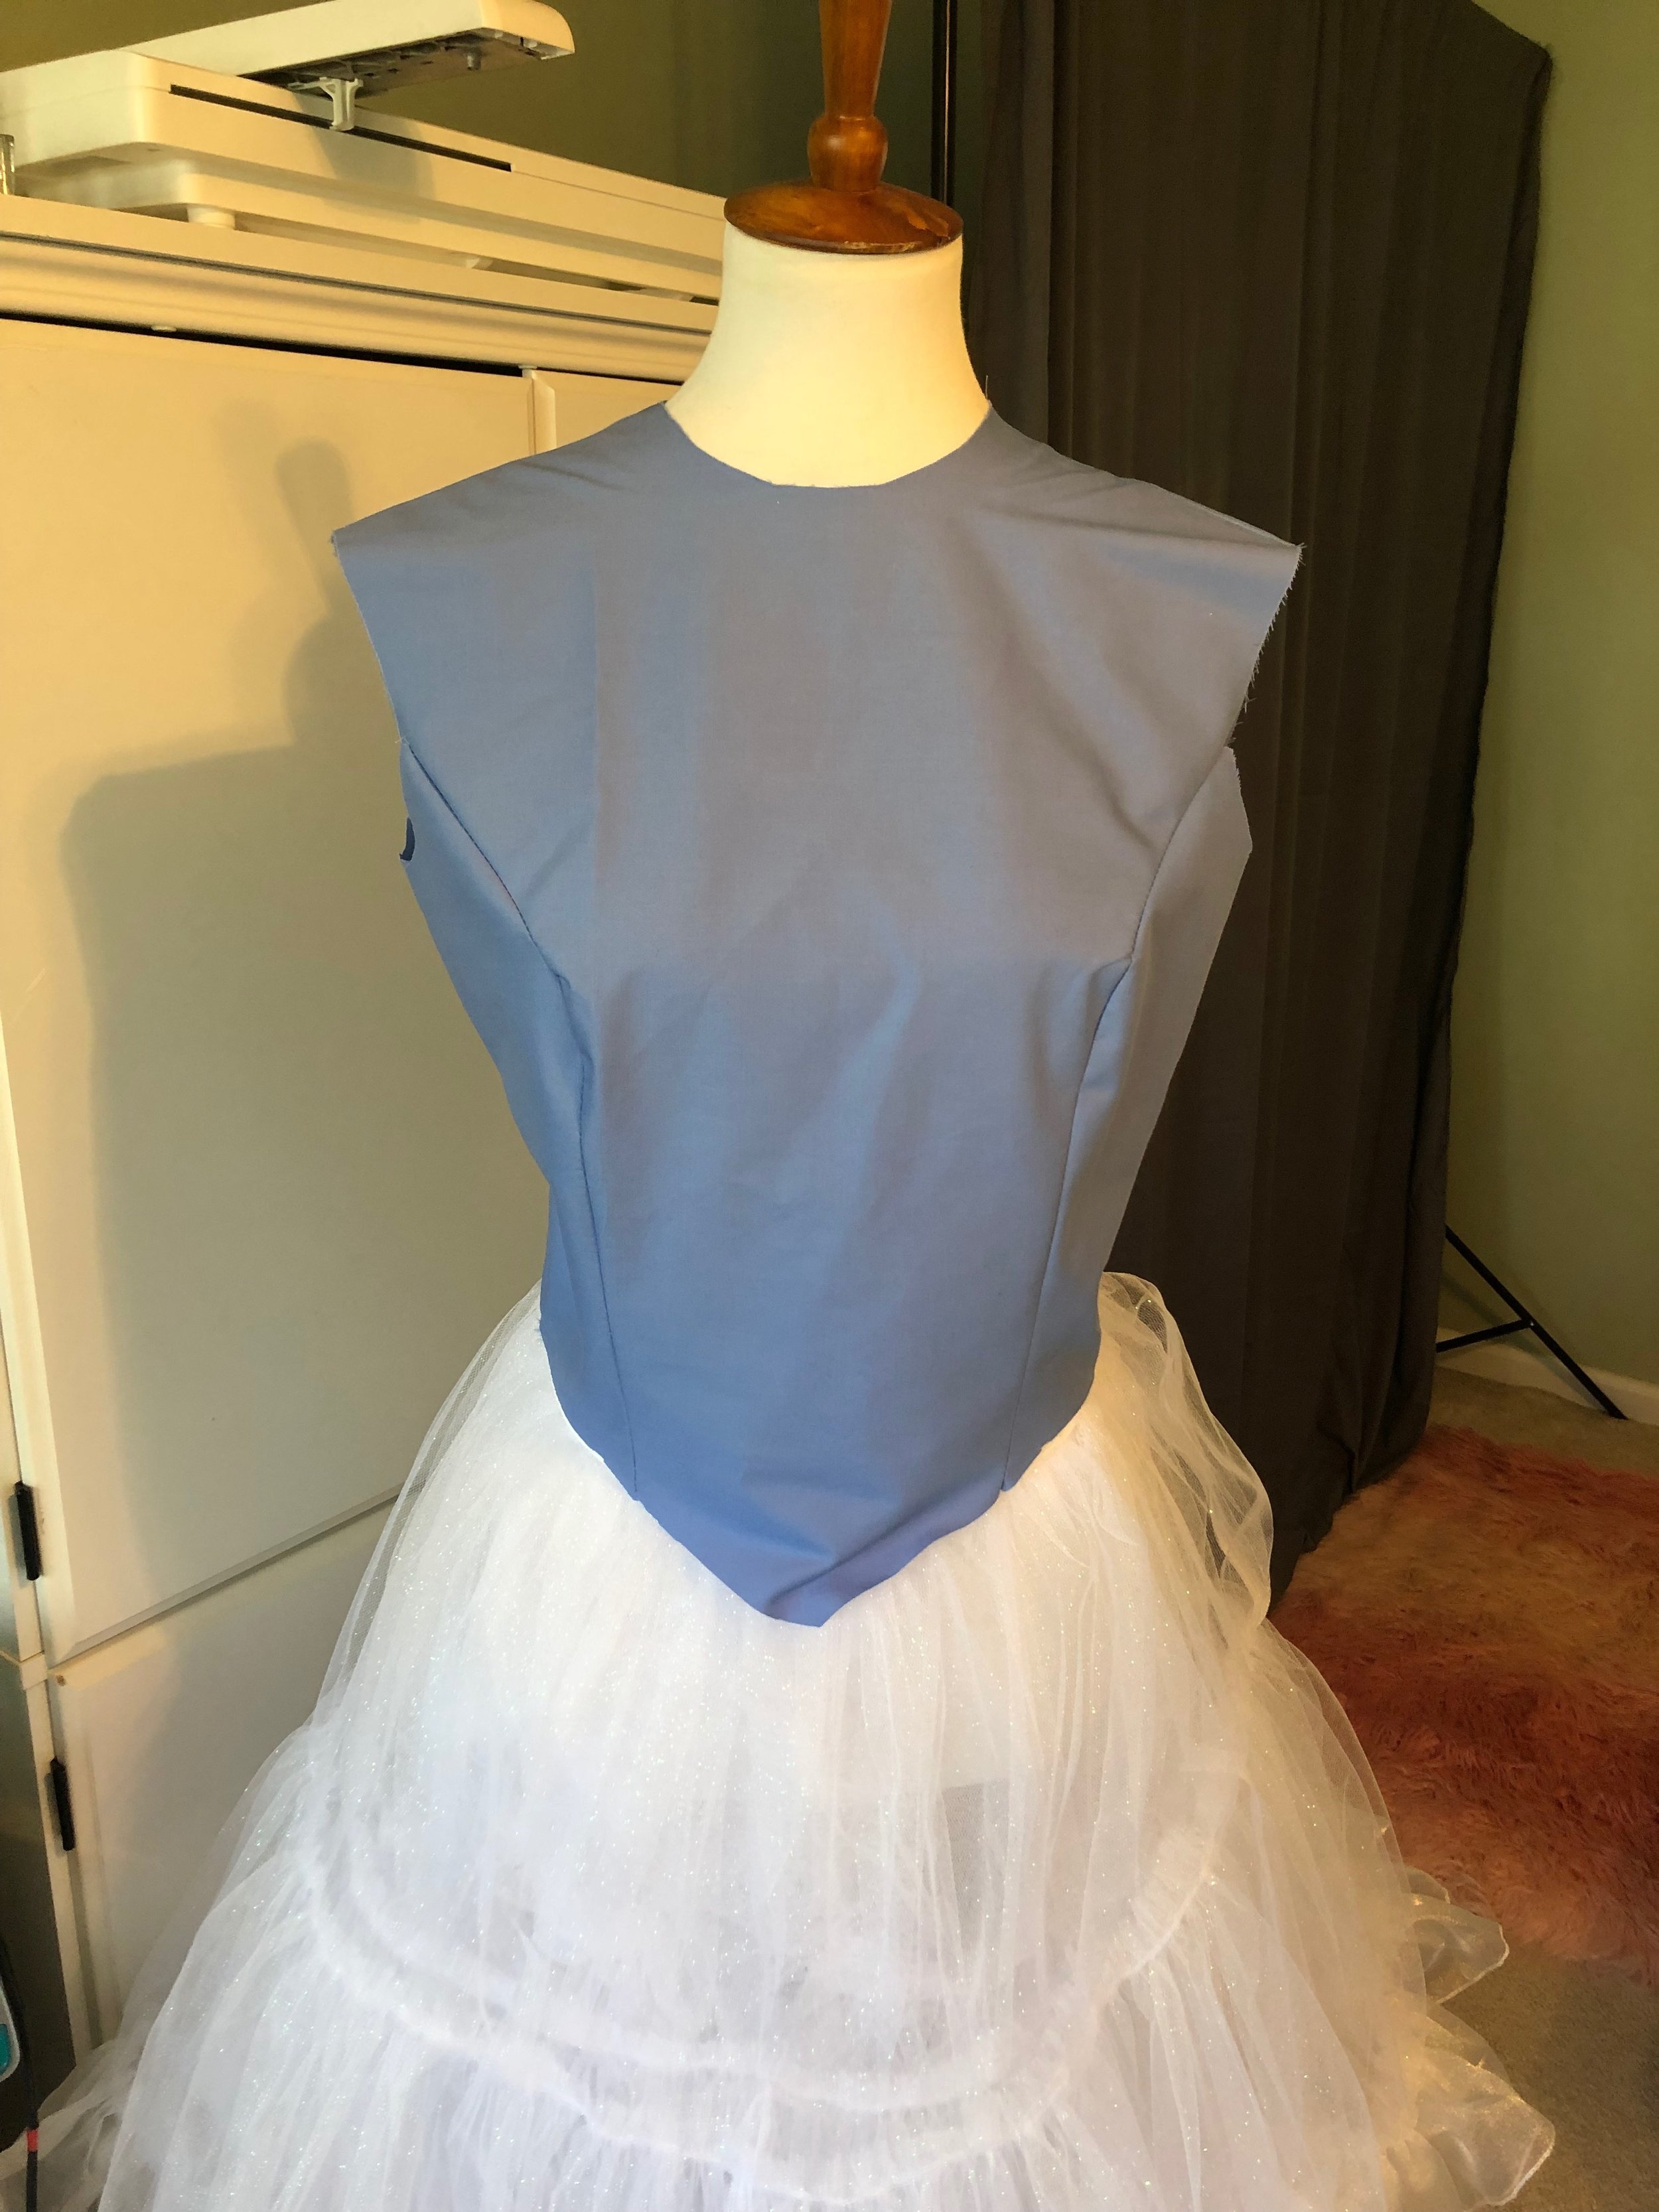
Now it’s time for the dress. I did this in basically two parts, the bodice with sleeves and collar which I used the pattern pictured below and a circle skirt.

simplicity-princess-peach-pattern-8476-envelope-front.jpg

Specifically I used the bodice and sleeves exactly like the pattern suggests and I modified the collar to look more like Alice’s but I also made a split collar so it was two separate pieces.

I made the bodice exactly like the pattern with the intention of over locking the seams but I ran out of white thread for my over lock machine and the black thread was noticeable through the fabric so I had to whip up a lining as well.

IMG_2639.JPG

I made the lining exactly like the bodice and then set it aside to add the sleeves.

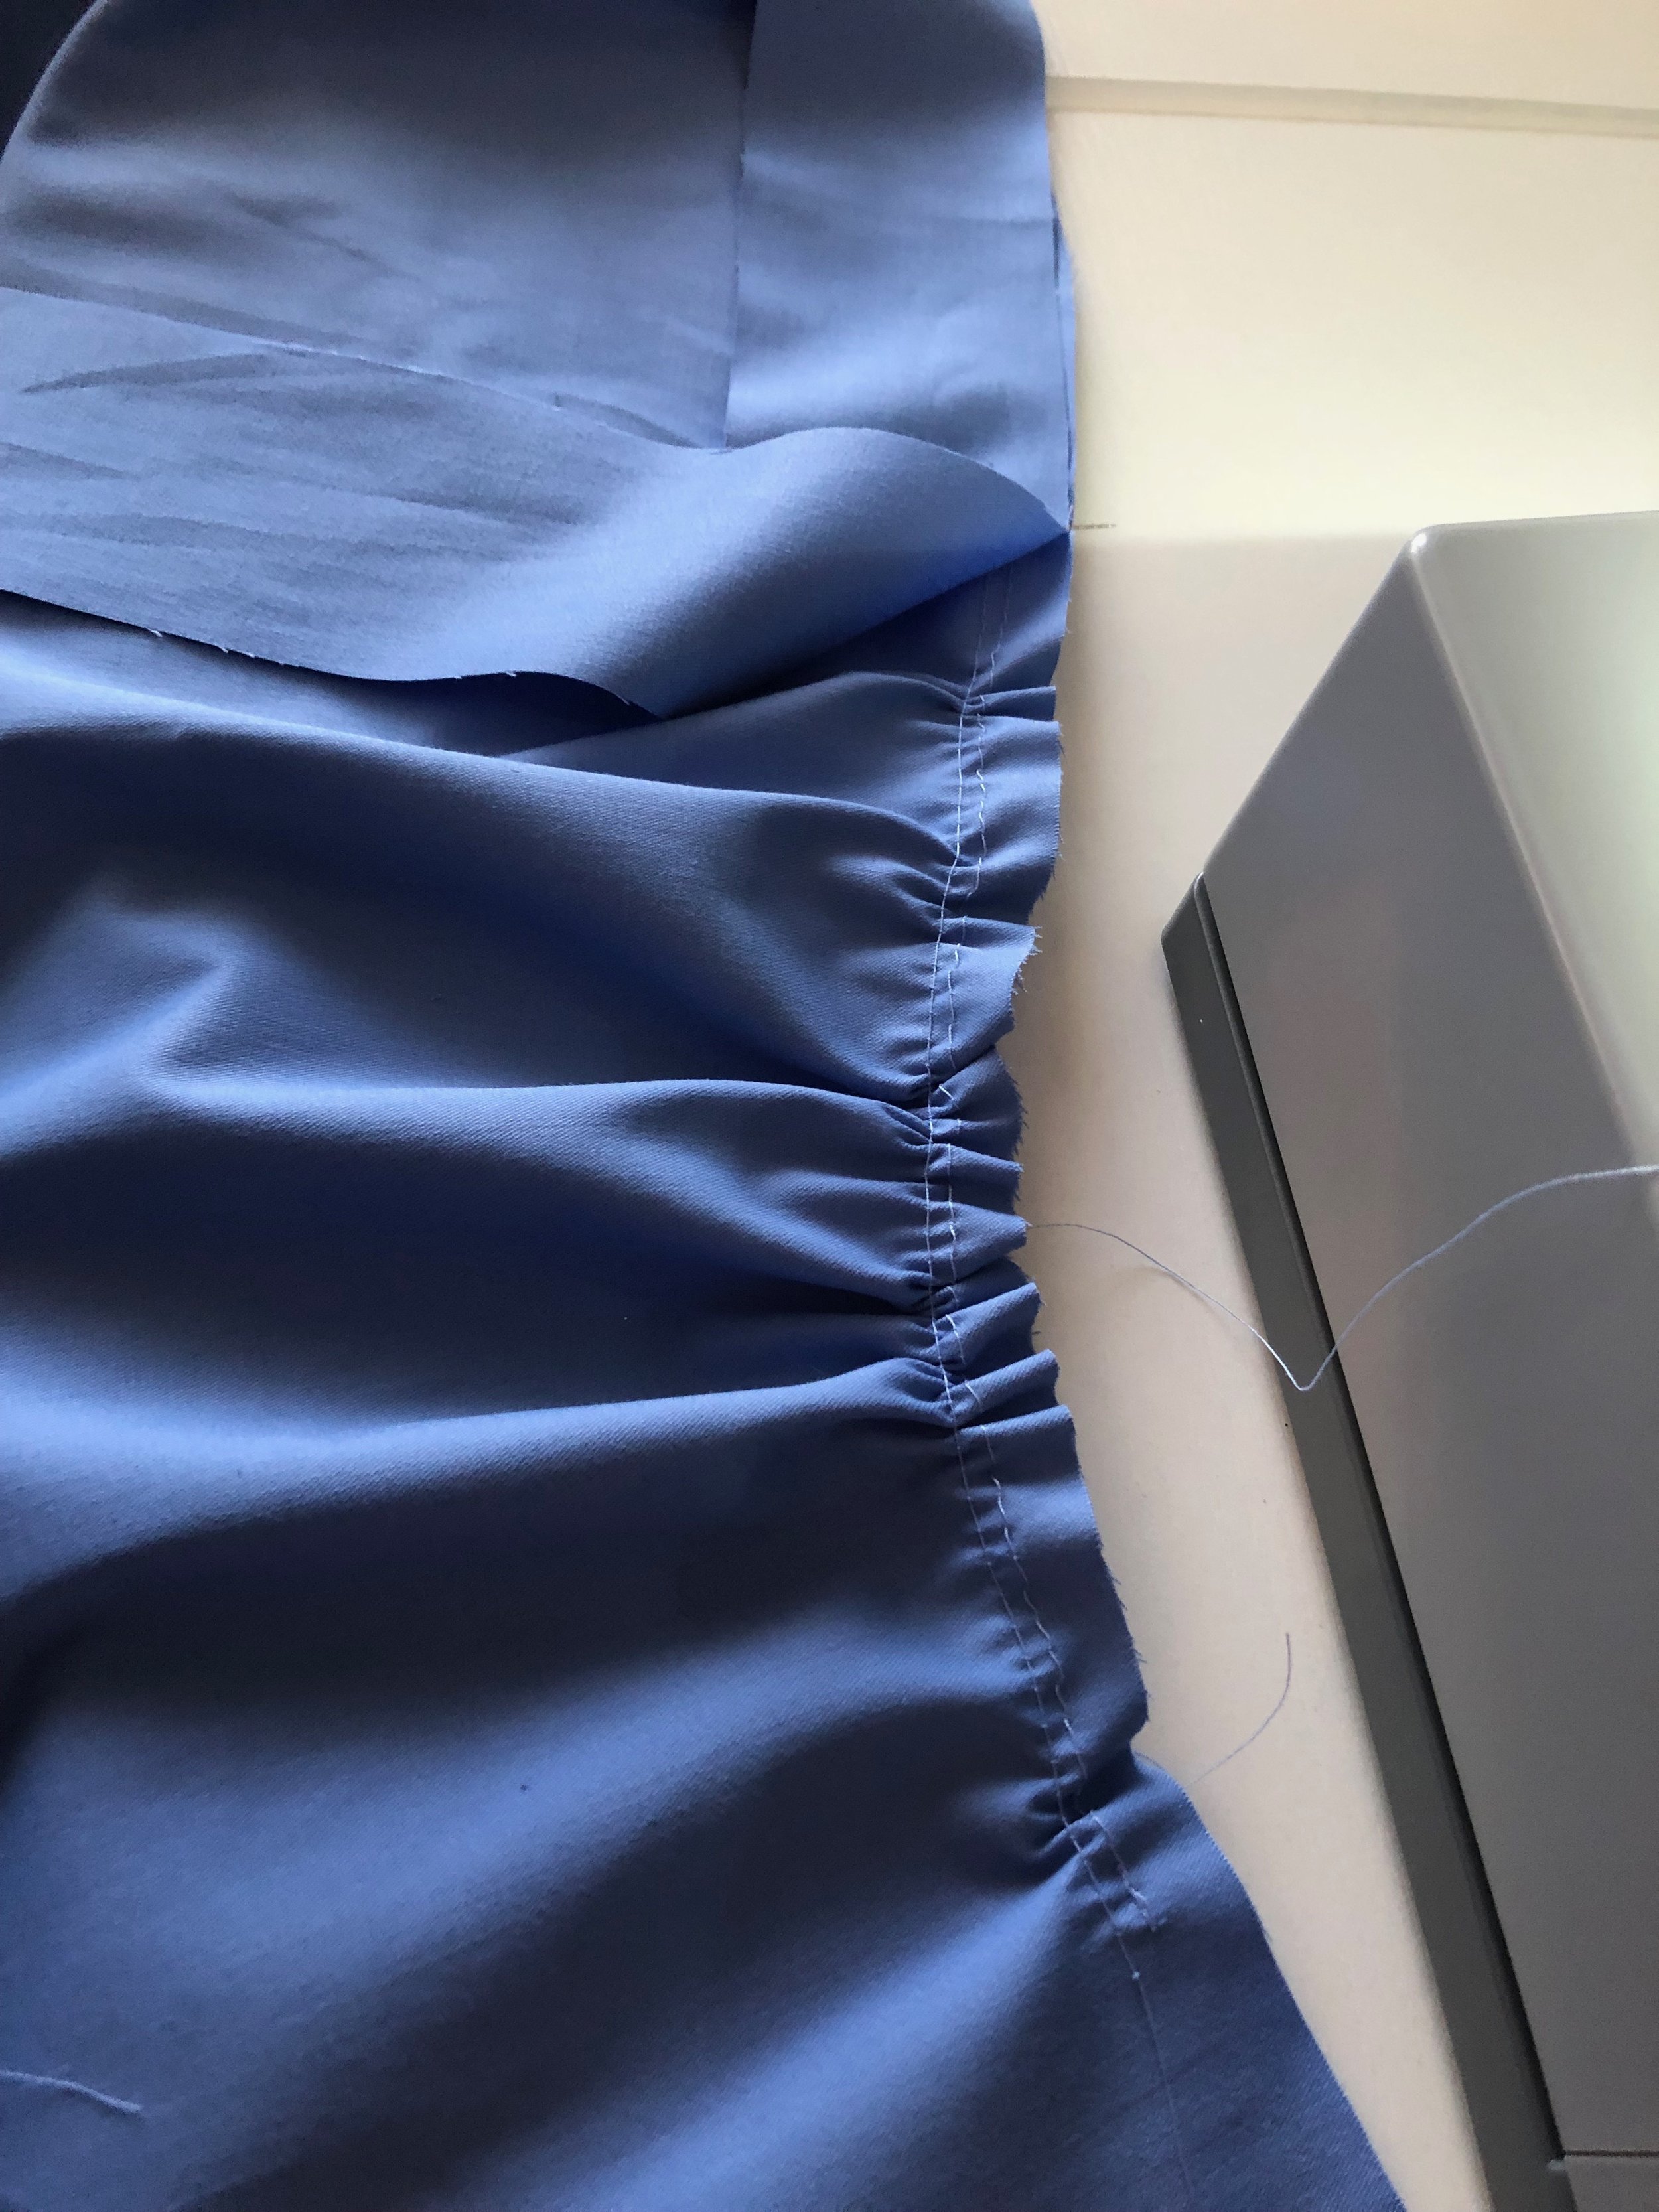
This required gathering the top and bottom of the sleeve and adding 5/8 inch elastic at the bottom of the sleeve to keep it fitted on my arm.

IMG_2640.JPG
IMG_2641.JPG

Next I made the collar. I used the inner curve of the “B” pattern collar to create the inner curve of my collar and then I just eye balled the outer edge of it and I thought it worked. Once the pattern piece was made I cut it out 4 times on my fabric and twice on my interfacing (my collar was two separate pieces). I attached it to the bodice and then I was ready to add my circle skirt.

IMG_2645.JPG

Next, I added my circle skirt. I made this using my waist measurement and the length from my waist to the end of my petticoat plus 2.5 inches. I had to cut mine in two pieces halves and I really wanted to add pockets but it just didn’t happen since I thought we were running out of time.

I cut my fabric all the way to the salvage so I didn’t have to worry about the skirt being clean on the inside. For the hem, I marked 1/2 inch and 2 inches from the bottom of the skirt, then I ironed it and hand stitched it down. I probably should have used the bling hem stitch on my new sewing machine but I was on hour 13 and getting tired so I just hand stitched it.

IMG_2649.JPG

From here I stitched the lining in at the neck and back through the zipper, flipped and pressed. From there I hand stitched the arms and bodice where the skirt attaches. Then I applied the zipper. It was supposed to be an invisible zipper but again we were close to 11pm and I still needed to make the apron so I said YOLO.

This is also where I stopped taking photos. So instead of going super into detail about the apron, I will just state the it was draped over the dress out of Quilters Cotton from Joann fabrics. I essentially made two trapezoids that I connected with a 4” by 60” strip of fabric with two 4” by 45” strips that tie at the top.

Now it was time to get into makeup and costume. Alex had spent this time making the chibi and the set as well as drawing all the amazing art for the White Board Wars.

AliceChibi.png

Here’s a few BTS photo’s:

IMG_2673.jpg
IMG_2668.JPG
IMG_2657.JPG

Finally, here’s the clip from when Alex did the before and after.

That’s a wrap on the 24 Hour Challenge.

The next blog will be a series on Stellagosa, I’m not sure if it will be a 3,4 or 5 part series for the costume but see ya in 2 weeks for the first blog on her which will be about sewing the sleeves, necklace, and bodice for her focusing on the detail stitches and what I did using my new Husqvana Viking Topaz 50 Sewing and Embroidery machine.

As always, if you live my content and want to support it further you can do so on ko-fi, patreon, or join me on Twitch Tues, Wed, and Thurs at 12pm EST.

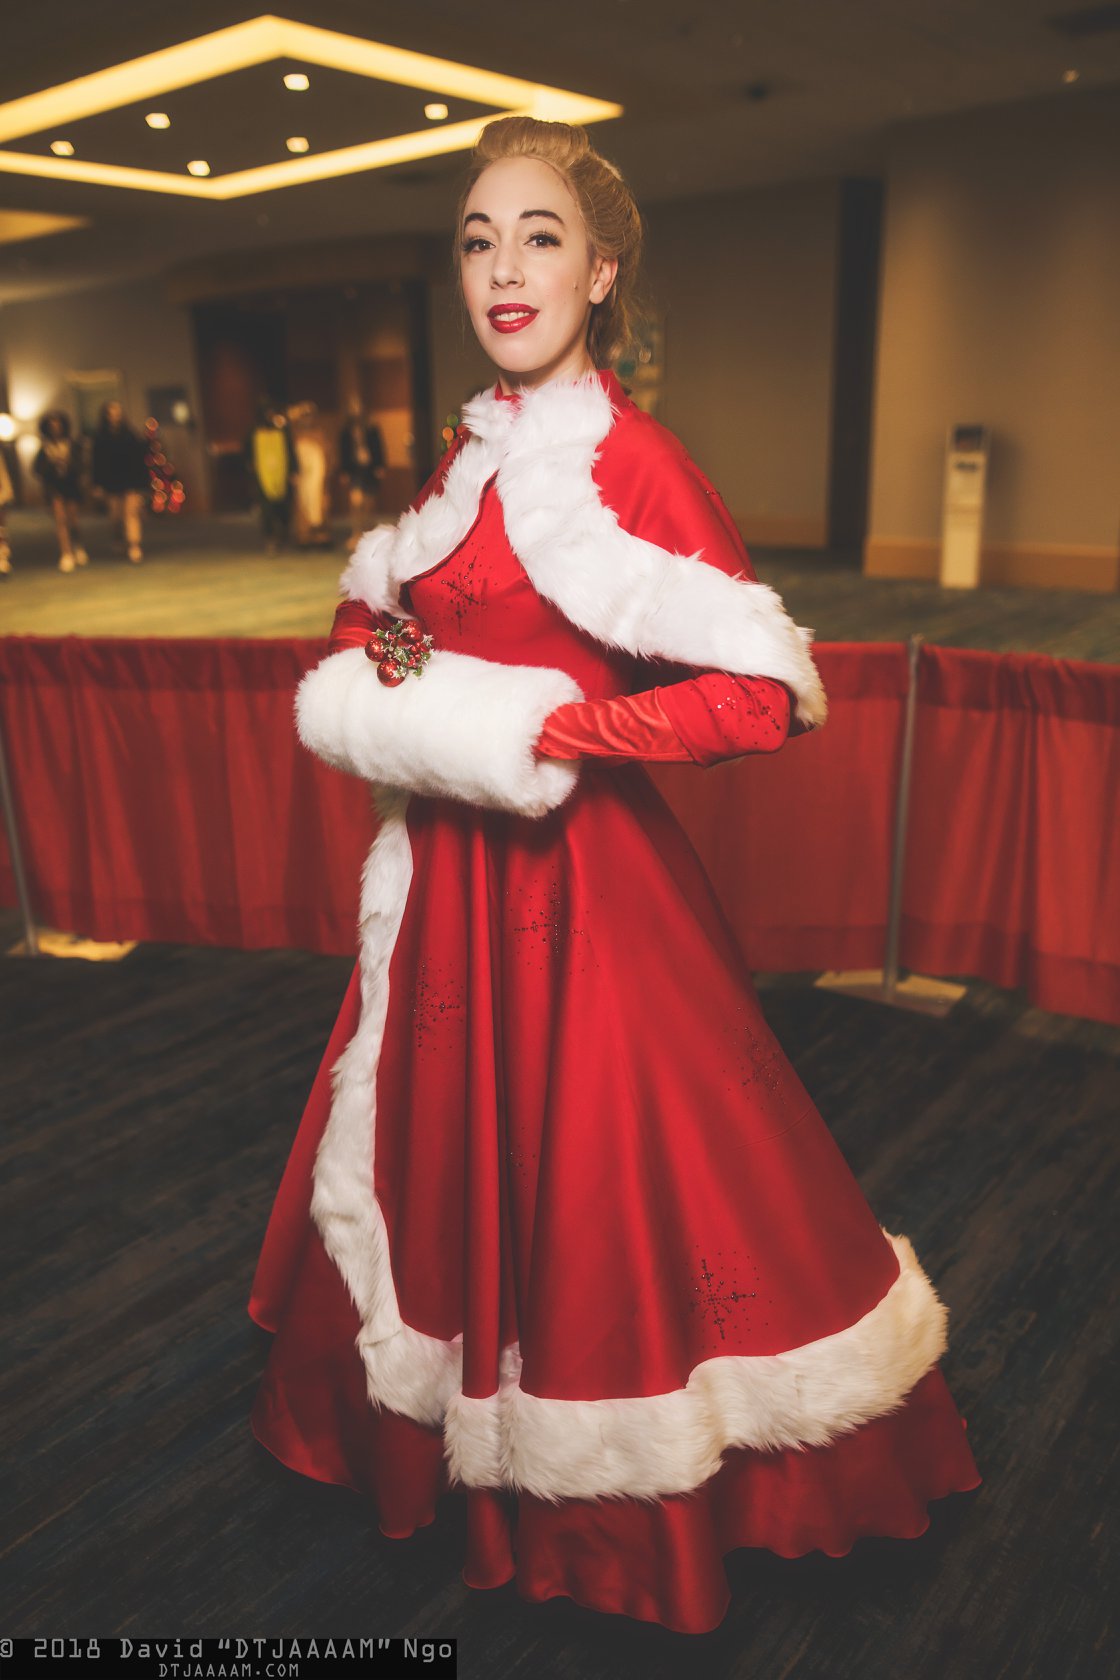
White Christmas, Red Dress pt 3

Welcome to part 3 and the final part of making my White Christmas Red Dress. In this blog I will go over how I made my full dress with the rhinestone details on it.

If you’re interested in learning how I made my petticoat you can find that here or how I made the skirt and cape-let with the fur trim you can read that here.

Full disclosure I did not drape the bodice pattern for this costume, that work was done by Sarah who was Betty to my Judy!

I started by making a mock-up with some of the scraps left over from the skirt and cape-let.

The mock-up fit literally like a glove so I made no adjustments to it and then went ahead to cut it out and make it again but this time with lining and sleeves.

IMG_2151.JPG

I didn’t take any pictures of this process but essentially I sewed the darts in first, then the panels together, then added the sleeves and actually over locked those at the seam in order to keep them clean.

Next I whipped up a quick collar for the neck to make it a turtle neck, I interfaced it and once again serged the edges to keep it clean.

IMG_2163.JPG

For the skirt addition, I just cut out a second circle skirt but 6” shorter and draped it over my current skirt. From there I marked with pins where I wanted to cut the slit and I actually cut it too high for the fur but I just hid that with the fur application. It wasn’t the cleanest way to do it but it worked. Then I over locked the hem to prepare it for the fur.

IMG_2165.JPG

For the fur addition I used the exact same technique described in part two, because I hand stitched the fur down it took about 6 hours to apply but looked lovely once it was done.

IMG_2176.JPG

Finally it was time to apply the invisible zipper. This was my first time ever attempting to do an invisible zipper and I wont lie it was way easier than I had ever imaged. I don’t own an invisible zipper foot but I’m considering buying one for the future.

IMG_2196.JPG

As per usual I over locked my seam before adding the zipper to “keep it clean”. I’m not going to go over step by step how to add an invisible zipper but I’m willing to make a video tutorial if that’s something people want from me in the future. So above is sewing the first side.

Below is sewing the second side.

It was so easy and look how good it turned out.

IMG_2198.JPG

Alright now the sewing was complete! It’s time for rhinestones!

Sarah created a template for us to go off of and a general idea of where the placement should have been.

We used the hot fix tool and 3mm/10ss and 5mm/20ss to make the snowflake design on the dresses. Hot fix is not my favorite method to apply rhinestones but it definitely is a great way to apply stones! I’ll actually be writing an entire blog after this about my favorite choices of rhinestones and techniques so if you like this blog then stay tuned.

IMG_2200.JPG

I applied the stones all over the dress, cape-let and ever on the bodice and sleeves and we were good to go. The red stones were very tricky to see on the red fabric but I knew they were there and that’s all that really matters.

IMG_2203.JPG

That was it, the dress was done and I was ready to for epic amounts of twirling.

49571347_2145927522095643_1044910460161228800_o.jpg

Thank you all for reading my blog.

I’ll be posting blogs every first and third Friday of the month so stay tuned!