Earlier this month I had the opportunity to travel to Denver, CO to film a web series with Sew Daily called the Con Crunch Challenge.
The premise is you get 2 hours to finish up those last-minute touches on a cosplay. Pretend you’re in your hotel room the day/night/morning of the convention and you need SOMETHING to wear for the con that day, what do you do?
Since I had recently done a deep inventory of my fabric stash I thought this would be an excellent time to use up some of the fabric I have been sitting on for a year or more.
Now, I decided to take the challenge a step further and I made a dress, neck piece and head piece in 2 days before leaving for Colorado.
I was inspired by white and blue fabrics I had so I decided on an Ice Queen look inspired by Cersei Lannister. I used one of the Cersei pattern from Simplicity as the base dress with plans to add embellishments to it while on the show.
Something I am known for is my love and addiction to rhinestones, so I planned to apply a hundred or so Swarovski’s during the show using the RNK Cordless Hotfix tool as well as cut and apply lace applique on the show.
So I made the Cersei inspired dress in a single day following the instructions on the package and since my satin was very lightweight I used a quilters cotton to flat line all the pieces.

I’m not really going to cover construction on the dress since it’s all available on the pattern. The neck piece was inspired by Cersei’s necklace from the same dress look but I wanted it to match the sleeve binding and be sparkly. To make this I wrapped plastic wrap and masking tape around my dress form neck to create a pattern and drew the seam lines where I wanted them.
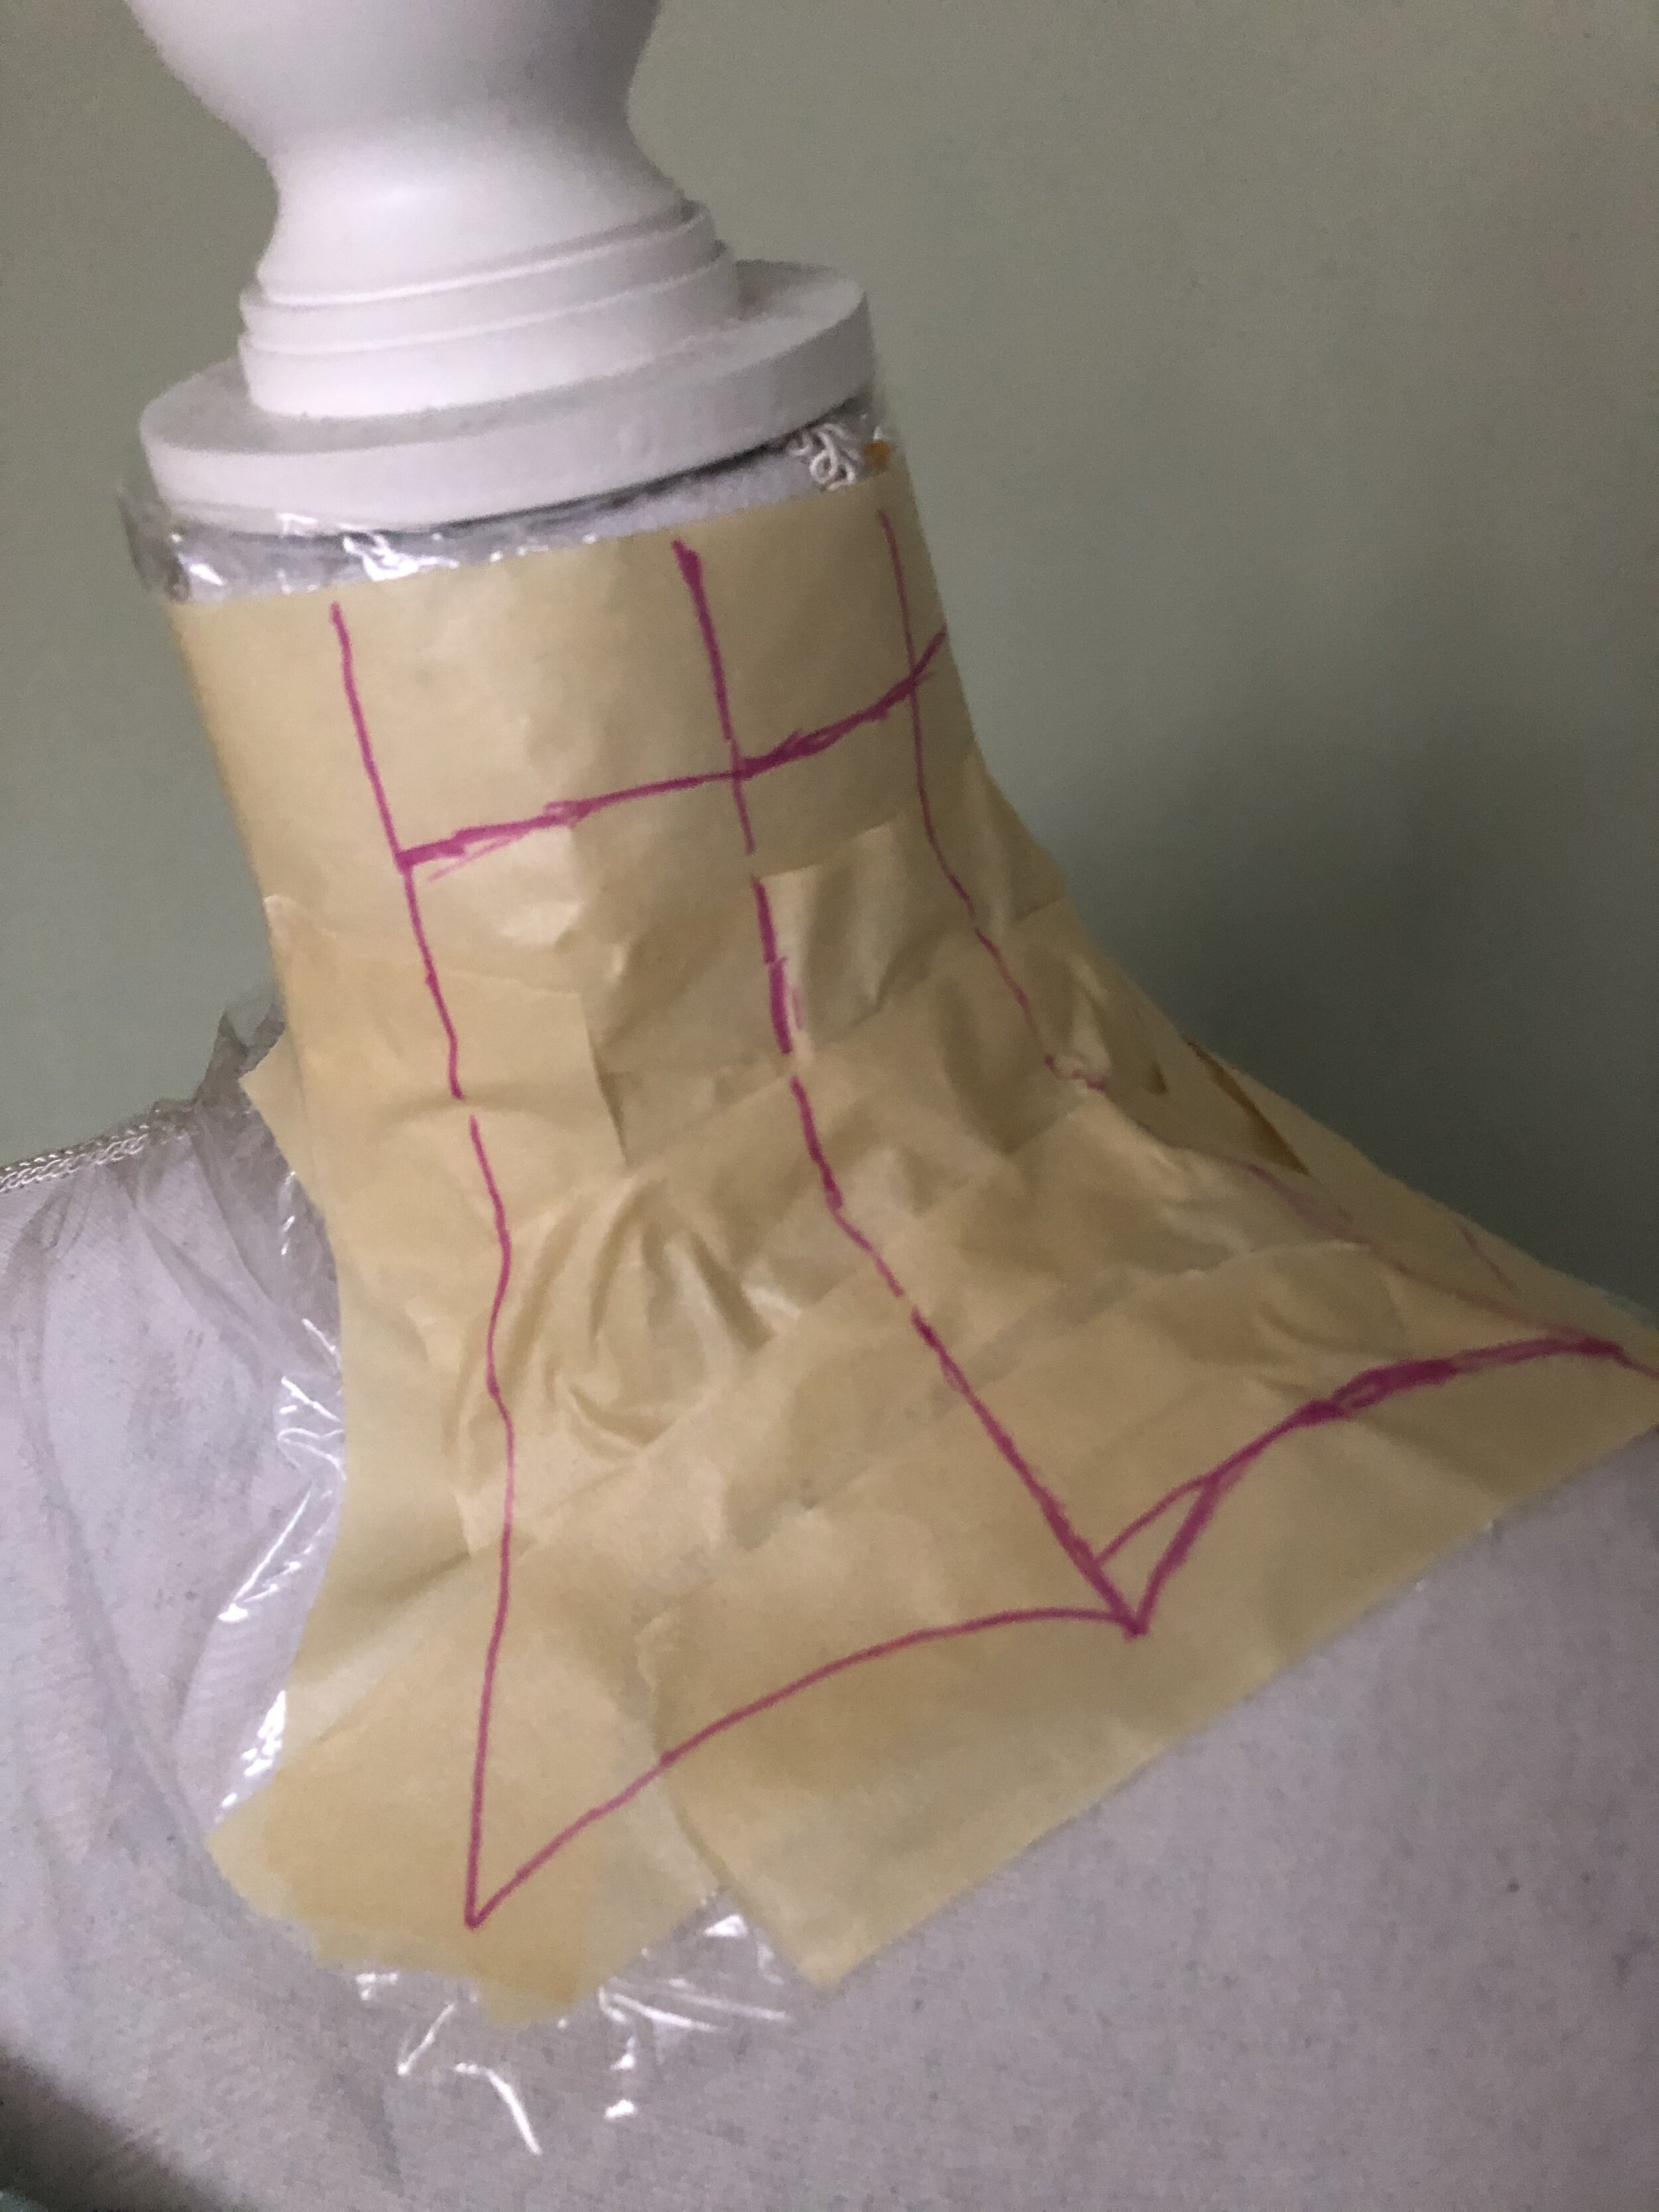
From there I transferred that to pattern paper, cut the top inch off the neck but then added 5/8 inch seam allowance to the sides, cut this out on cotton, satin and the iridescent fabric.

After cutting the fabric it was time to fuse the iridescent fabric to the satin to make it a cohesive piece of fabric. To do this I used Sew Much Cosplay Mighty Fuse and cut every piece out with Might Fuse. Before starting this costume, I did a test of the Mighty Fuse with the iridescent fabric since I wasn't sure the melting point of the fabric. Luckily there's no adjustment needed on my iron so following the directions on Mighty Fuse I had my iron set for wool and adhered the first webbing side to the fabric.

From there I pealed off the backing and lined up my piece with my satin fabric and once again at the wool setting I adhered the webing to the satin and now both pieces were acting as one piece of fabric which will make sewing the neck piece easier.
Starting at the center front and working my way to the back I stitched each panel onto the piece and repeated with the cotton lining pieces. I completely forgot to clip inside the piece and therefore it does no lay as flat as I would like so in the future I would take the time to do that but from there I pinned the pieces right sides together, stitch, flip and press. I should note that I also pressed all my seams open as I added new panels. I machine stitched velcro onto the back of the piece and that was it for the neck piece before Con Crunch.
For the headpiece, I actually made a Pinterest board for a "Winter Witch" look which was the main inspiration for the project and as it went on the costume evolved and one model had this really interesting headpiece, so I took inspiration from that. I started the same way I did with the neck piece and draped a piece to be the base of the head piece.

From there I made some adjustments, after a really failed attempt to get the shape I wanted, and finally came up with a pattern. I cut that out on the white satin I used on the dress and on Sew Much Cosplay Super Structure Foam. Using a cotton pressing towel with my iron on the wool setting I adhered the foam to the fabric like the directions said. The pressing cloth was important for this because the satin could melt from the heat of the iron.

Once the foam was stuck on the fabric, I stitched the two halves and then made a lining and stitched that to the base of the head piece.

Now that the base was complete I was able to use some scrap foam to draft the piece I wanted standing up. The main adjustment I had to make was the curve on the bottom of the piece, I needed to make sure that it could hold the weight of the piece.

Once that was how I wanted it, I cut it out on the Super Structure Foam and fabric. I adhered the foam to the fabric and then stitched the lining, right sides together and slip stitched the bottom to close the piece up.

From there I marked lines into the top piece so that I could sew into them and add to the detail in the piece. Sewing through the Super Structure Foam is a dream, it adds for really beautiful details. Then I added some beads to the quilted piece and hand stitched it to the base. Finally, I hot glued the base onto a headband and it was ready for the show.

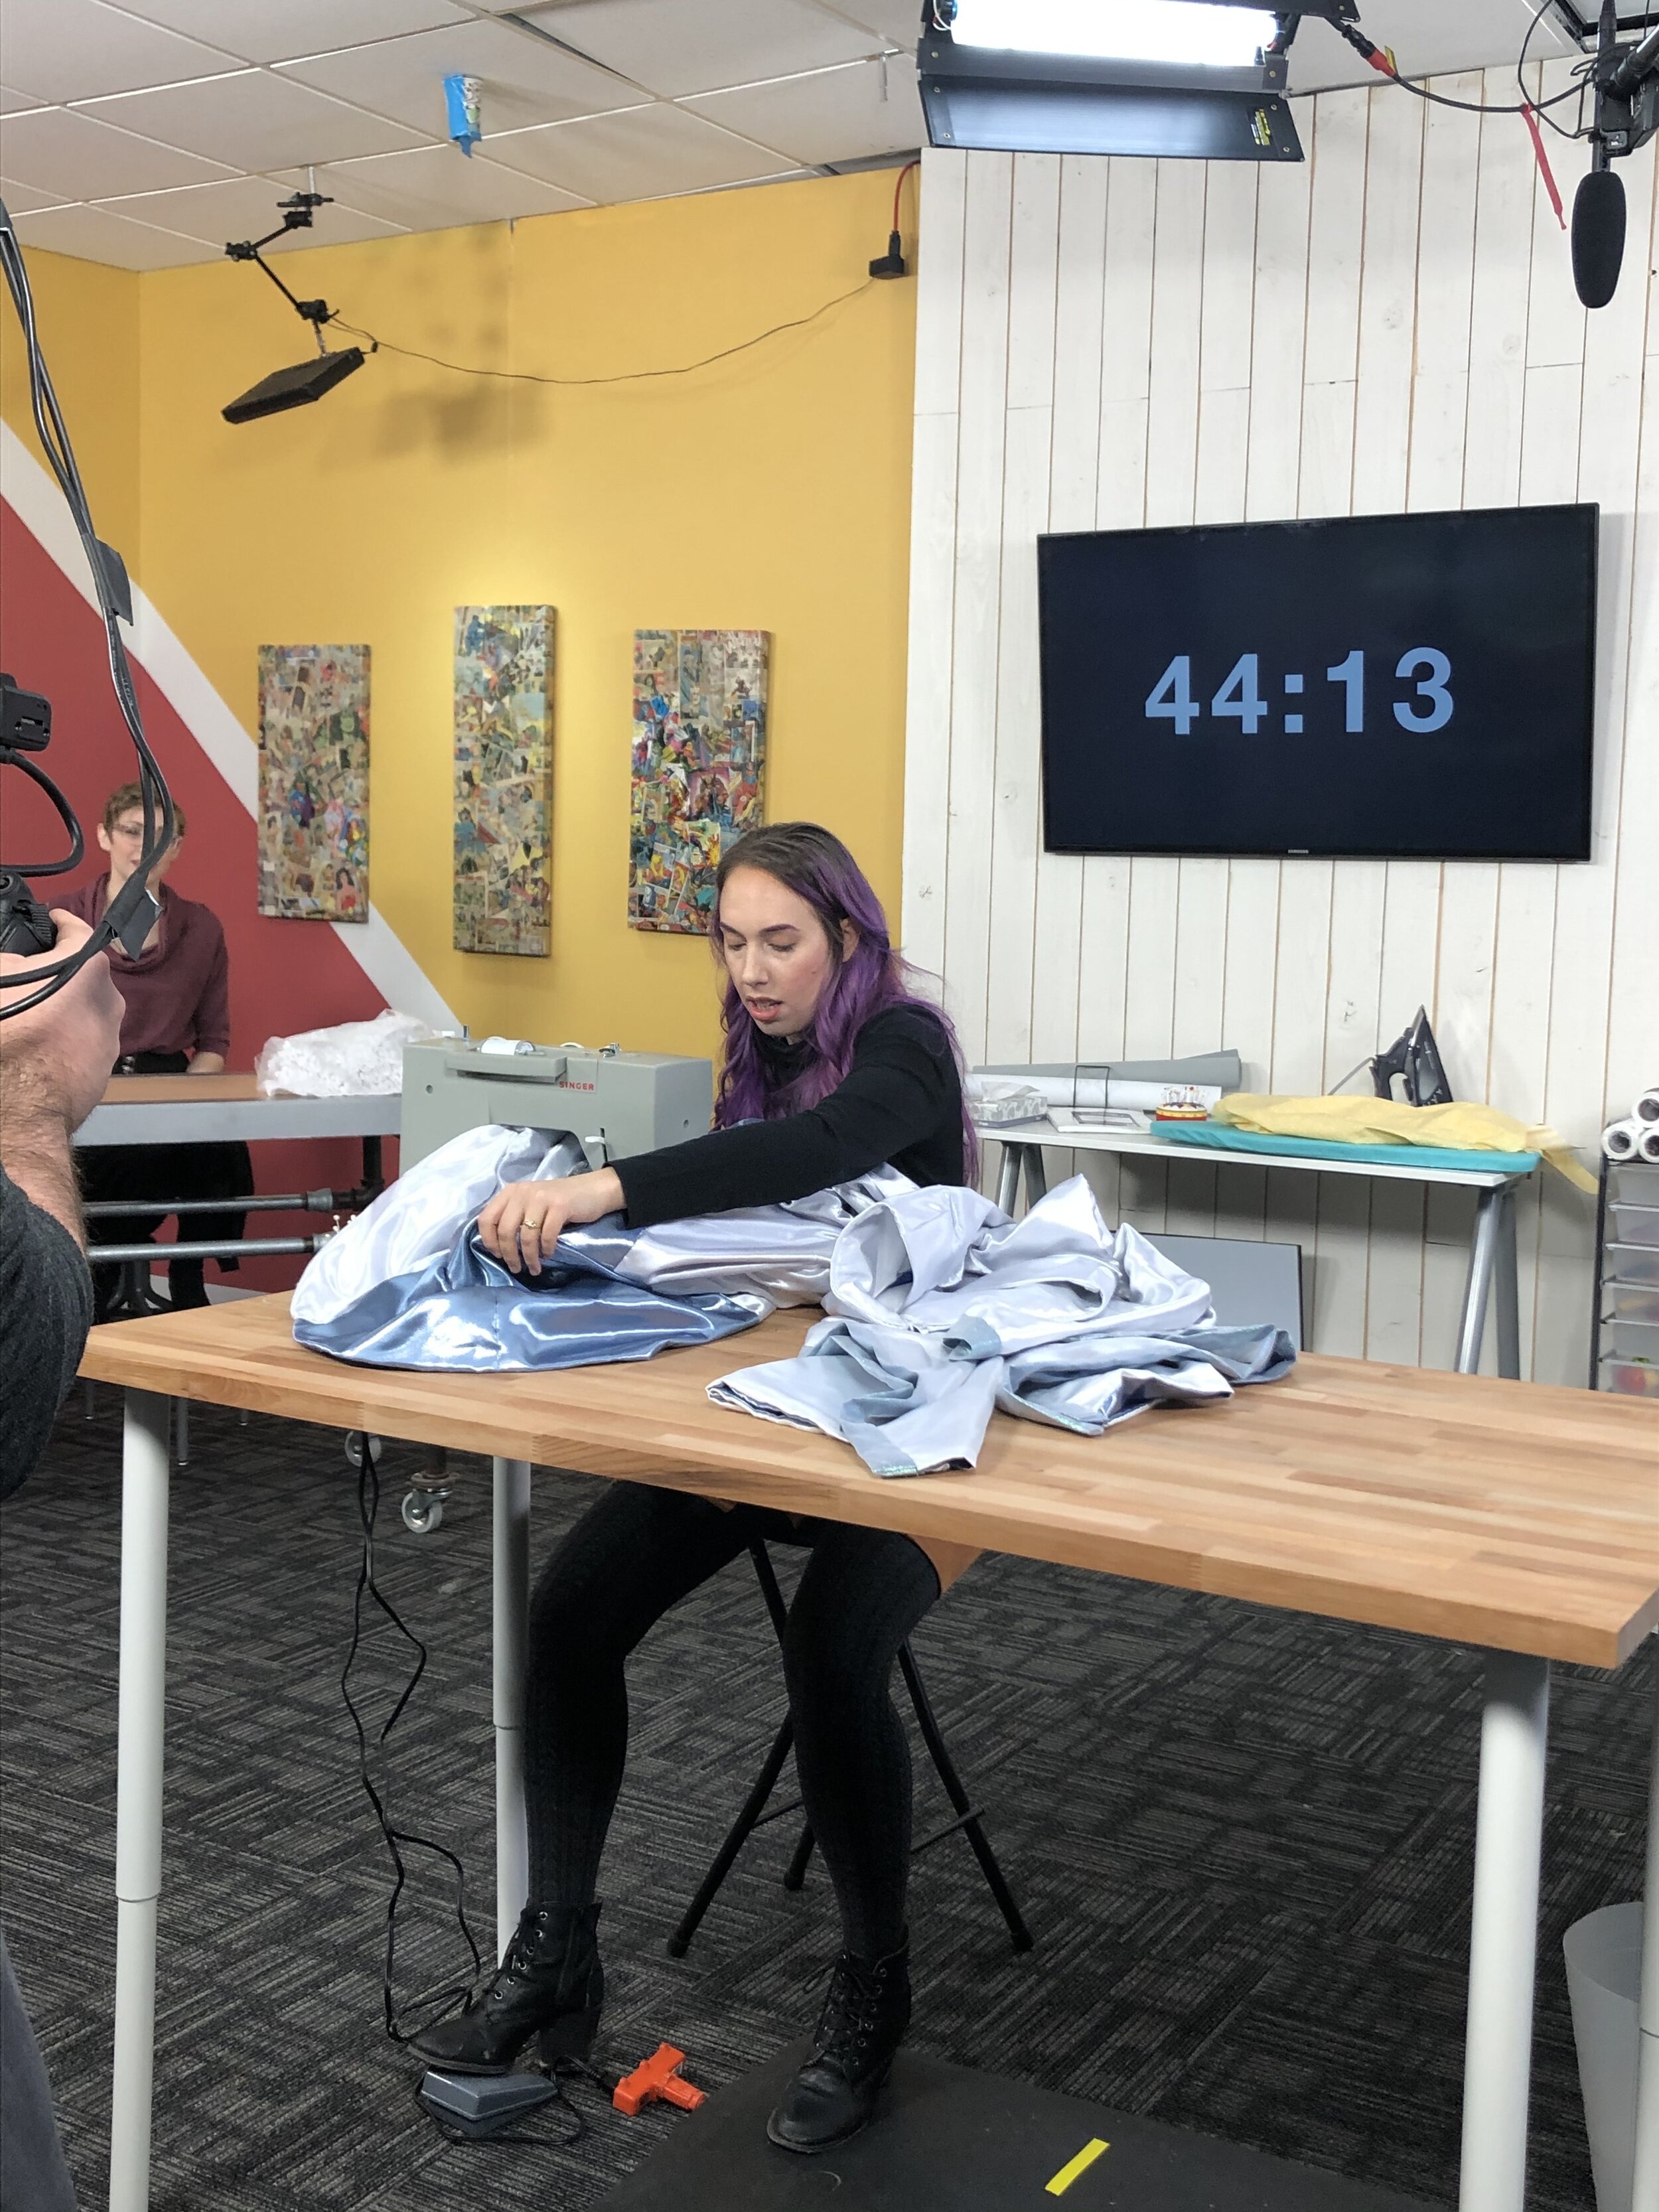
So for the Con Crunch Challenge I had 2 hours to apply lace applique I still needed to cut out to the skirt panels of the dress, and apply rhinestones to the head piece, neck piece and dress if time permitted.
I started with the Heat Cut tool by RNK to cut out 8 pieces of applique, I was hoping that 4 on each side would be enough and luckily it was. Using the heat tool was helpful because it melted the fabric edges as well as cut the pieces. From there I laid out the pieces and tried to get them to mirror each other.

Before pinning the applique to the dress I had to apply a stabilizer with the iron. This was difficult because normally you do all of these steps before sewing all the panels of the dress together but due to time I had the dress closed up so I had to create a tent like thing so I could get the iron and stabilizer in the dress.

Once my stabilizer was set I pinned the applique to the dress, then using the free motion quilt foot on the sewing machine I went to town on stitching around all the edges of the applique. This was all I was able to get onto the dress because I had plans to add rhinestones to the other two pieces so with 40 or so minutes left on the clock I moved onto the next task.
The first thing I did was create the design I wanted on the headpiece, then using the tool I heated the glue on the stone and lightly pressed. Now I have been using a different tool for my other projects and it took me so long to get used to treating the RNK tool like a pen and hold down the button vs when I use a corded tool I just press. It made for funny tv because I would just press the stone but not the button and nothing would happen.

After a few dozen stones muscle memory started kicking in and I got used to the tool but I instantly loved the cordlessness of it, being able to move between the headpiece and neckpiece quickly was really nice. Once there was less than 20 minutes left on the clock my hands started shaking and I made a few mistakes but hid them with more rhinestones. After being content with my stone placement and amount on the headpiece and neck piece I decided with under 3 minutes on the clock that I would attempt to add some stones to the dress. The hardest part for this was just deciding where I wanted them but I decided on the collar and after placing the last 10 stones I had left I was DONE! With 24 seconds left on the clock.

This was such a fun weekend project using several new tools, materials and a new sewing foot on a machine I was pretty proficient with. Make sure to share with your friends and check out my Instagram for all my up to date projects.
Here’s the store locator to help you find all the products used in this blog.
