Project Ebon Blade Stellagosa: Part 1 Sleeve, Bodice and Necklace

New Costume time! This one is a little different than I am used to, it is not historical, Disney or spooky but it does have a bit of sewing and it is very beautiful.

This blog will cover how I made the sleeves, necklace and bodice for Project Ebon Blade Stellagosa artwork by Zach Fischer This entry will be covering just the sewing parts but I will do an entire entry on all the sculpting and thermoplastic parts. My intention is to make this costume light up but it might not get done for C2E2 (now less than 3 weeks away) so if I get it done for Dragoncon there will be an entire blog or video on that at a later date.

There will be either 2 or 3 more parts to this blog which I will link at the end as I complete them. But lets jump in.

I started the entire process with the sleeves, I made a duct tape and clear wrap sleeve around my arm (like people do with their duct tape dress forms) and cut it open where I wanted my seam. I don’t have photo’s of this process but I transferred that onto fabric.

IMG_2611.JPG

From there I refined my sleeve design and then began to draw the separate panels onto the sleeve. I found it very hard to draw and erase on the fabric so I quickly switched to pattern paper and accepted that this was my design.

Once I had moved to the paper I was also able to start drawing on the stitching design I was going to attempt.

IMG_2612.JPG

Now that I basically had the plan for the design it was time to do a test of it. I made an entire sleeve design test before working on the official sleeves because I wanted to make sure the design read as the design from the image as well as I wanted to get good at doing it on my machine.

So to create the curved design I used two design stitches in my Embroider/Sewing Machine. I have a Husqvarna Viking Topaz 50 and I am still very new at using it.

Using Rayon Embroidery Thread from Robison Anton in Saturn Gray I used the curved stitch at a 26mm length and a 42mm length to create the design, I stitched it out on the slowest speed and stopped after one curve was stitched. I use this same design, stitch length and method on both the necklace and the bodice.

IMG_2614.JPG

Then I used a satin stitch (which is pre loaded in my machine) to attached the grey cotton but also to attach the silk taffeta to the silk habotai.

IMG_2615.JPG

As you can see there was some spacing issues and a lot of control issues with both the design and the satin stitch so it was actually really beneficial to make the practice sleeve.

IMG_2616.JPG

At this point I repeated the entire process but for the real sleeves. Then I cut out the habotai and satin stitched the taffeta piece onto the habotai.

IMG_2631.JPG

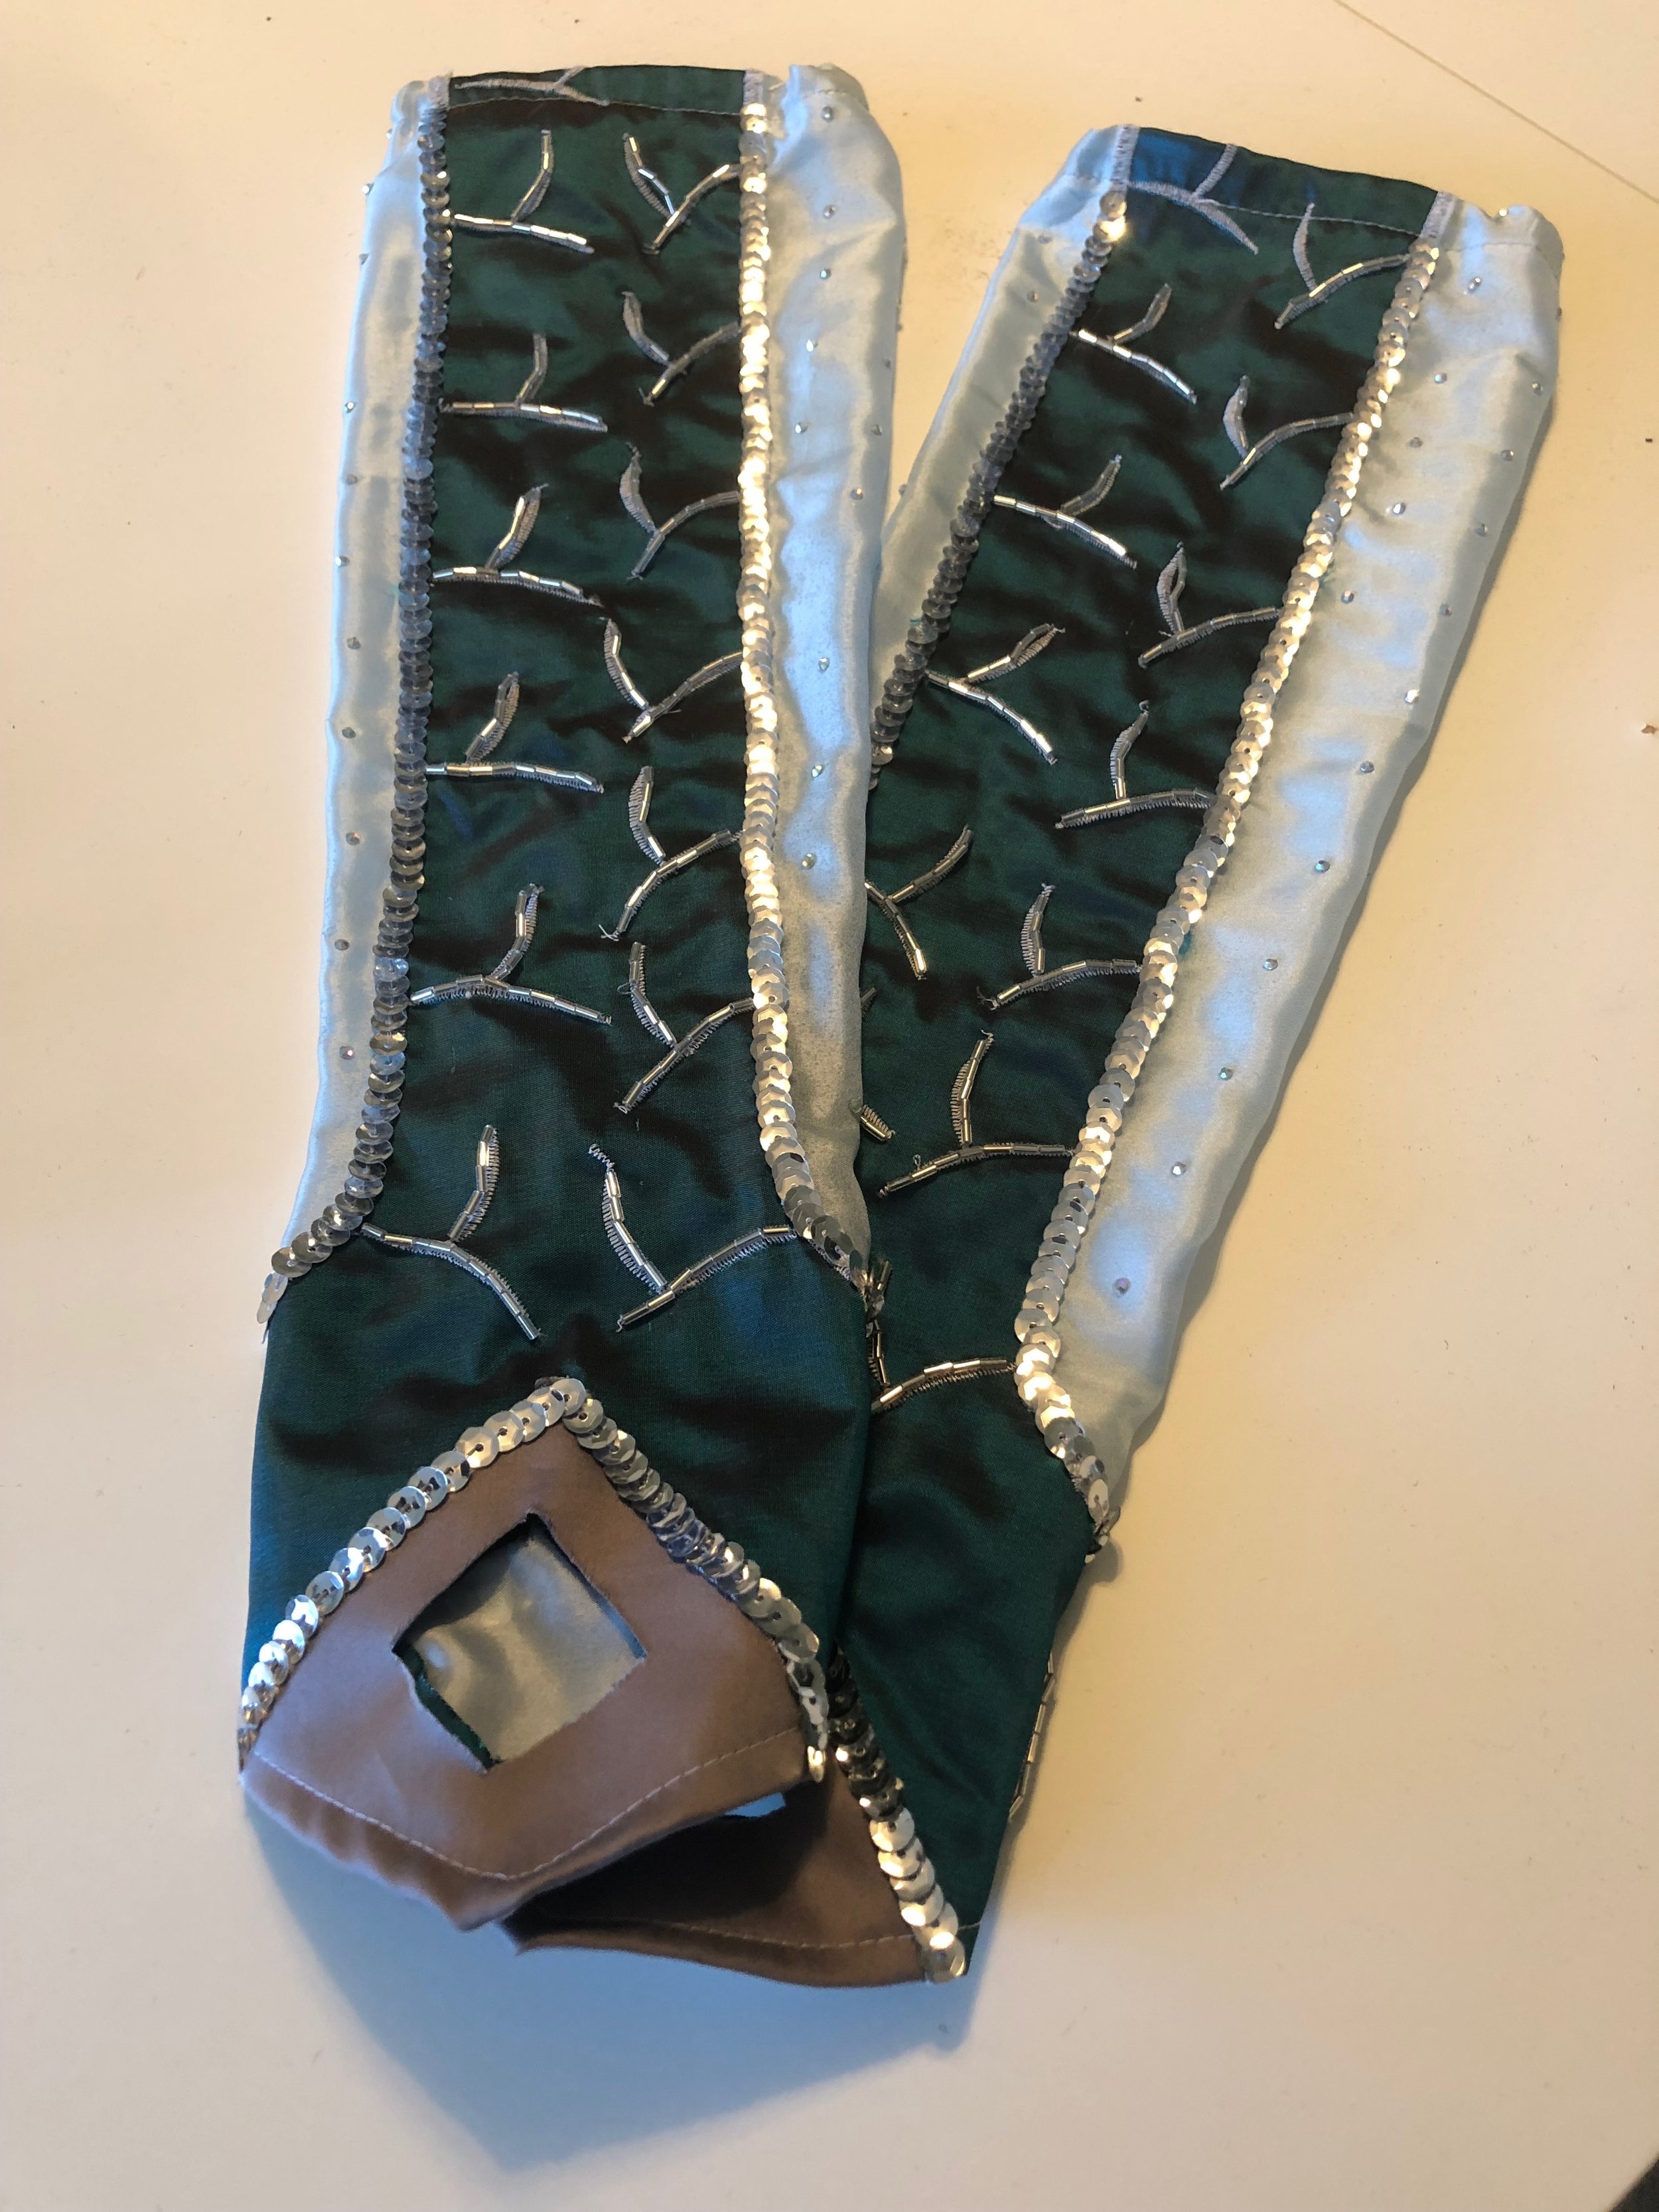
From there I over locked all the edges, applied rhinestones to give it the sparkly look and at this time I had no intention of adding further embellishments. So I stitched the seams together, folded in the top seam, added elastic to help hold it on my arm, folded the bottom seam and that was that.

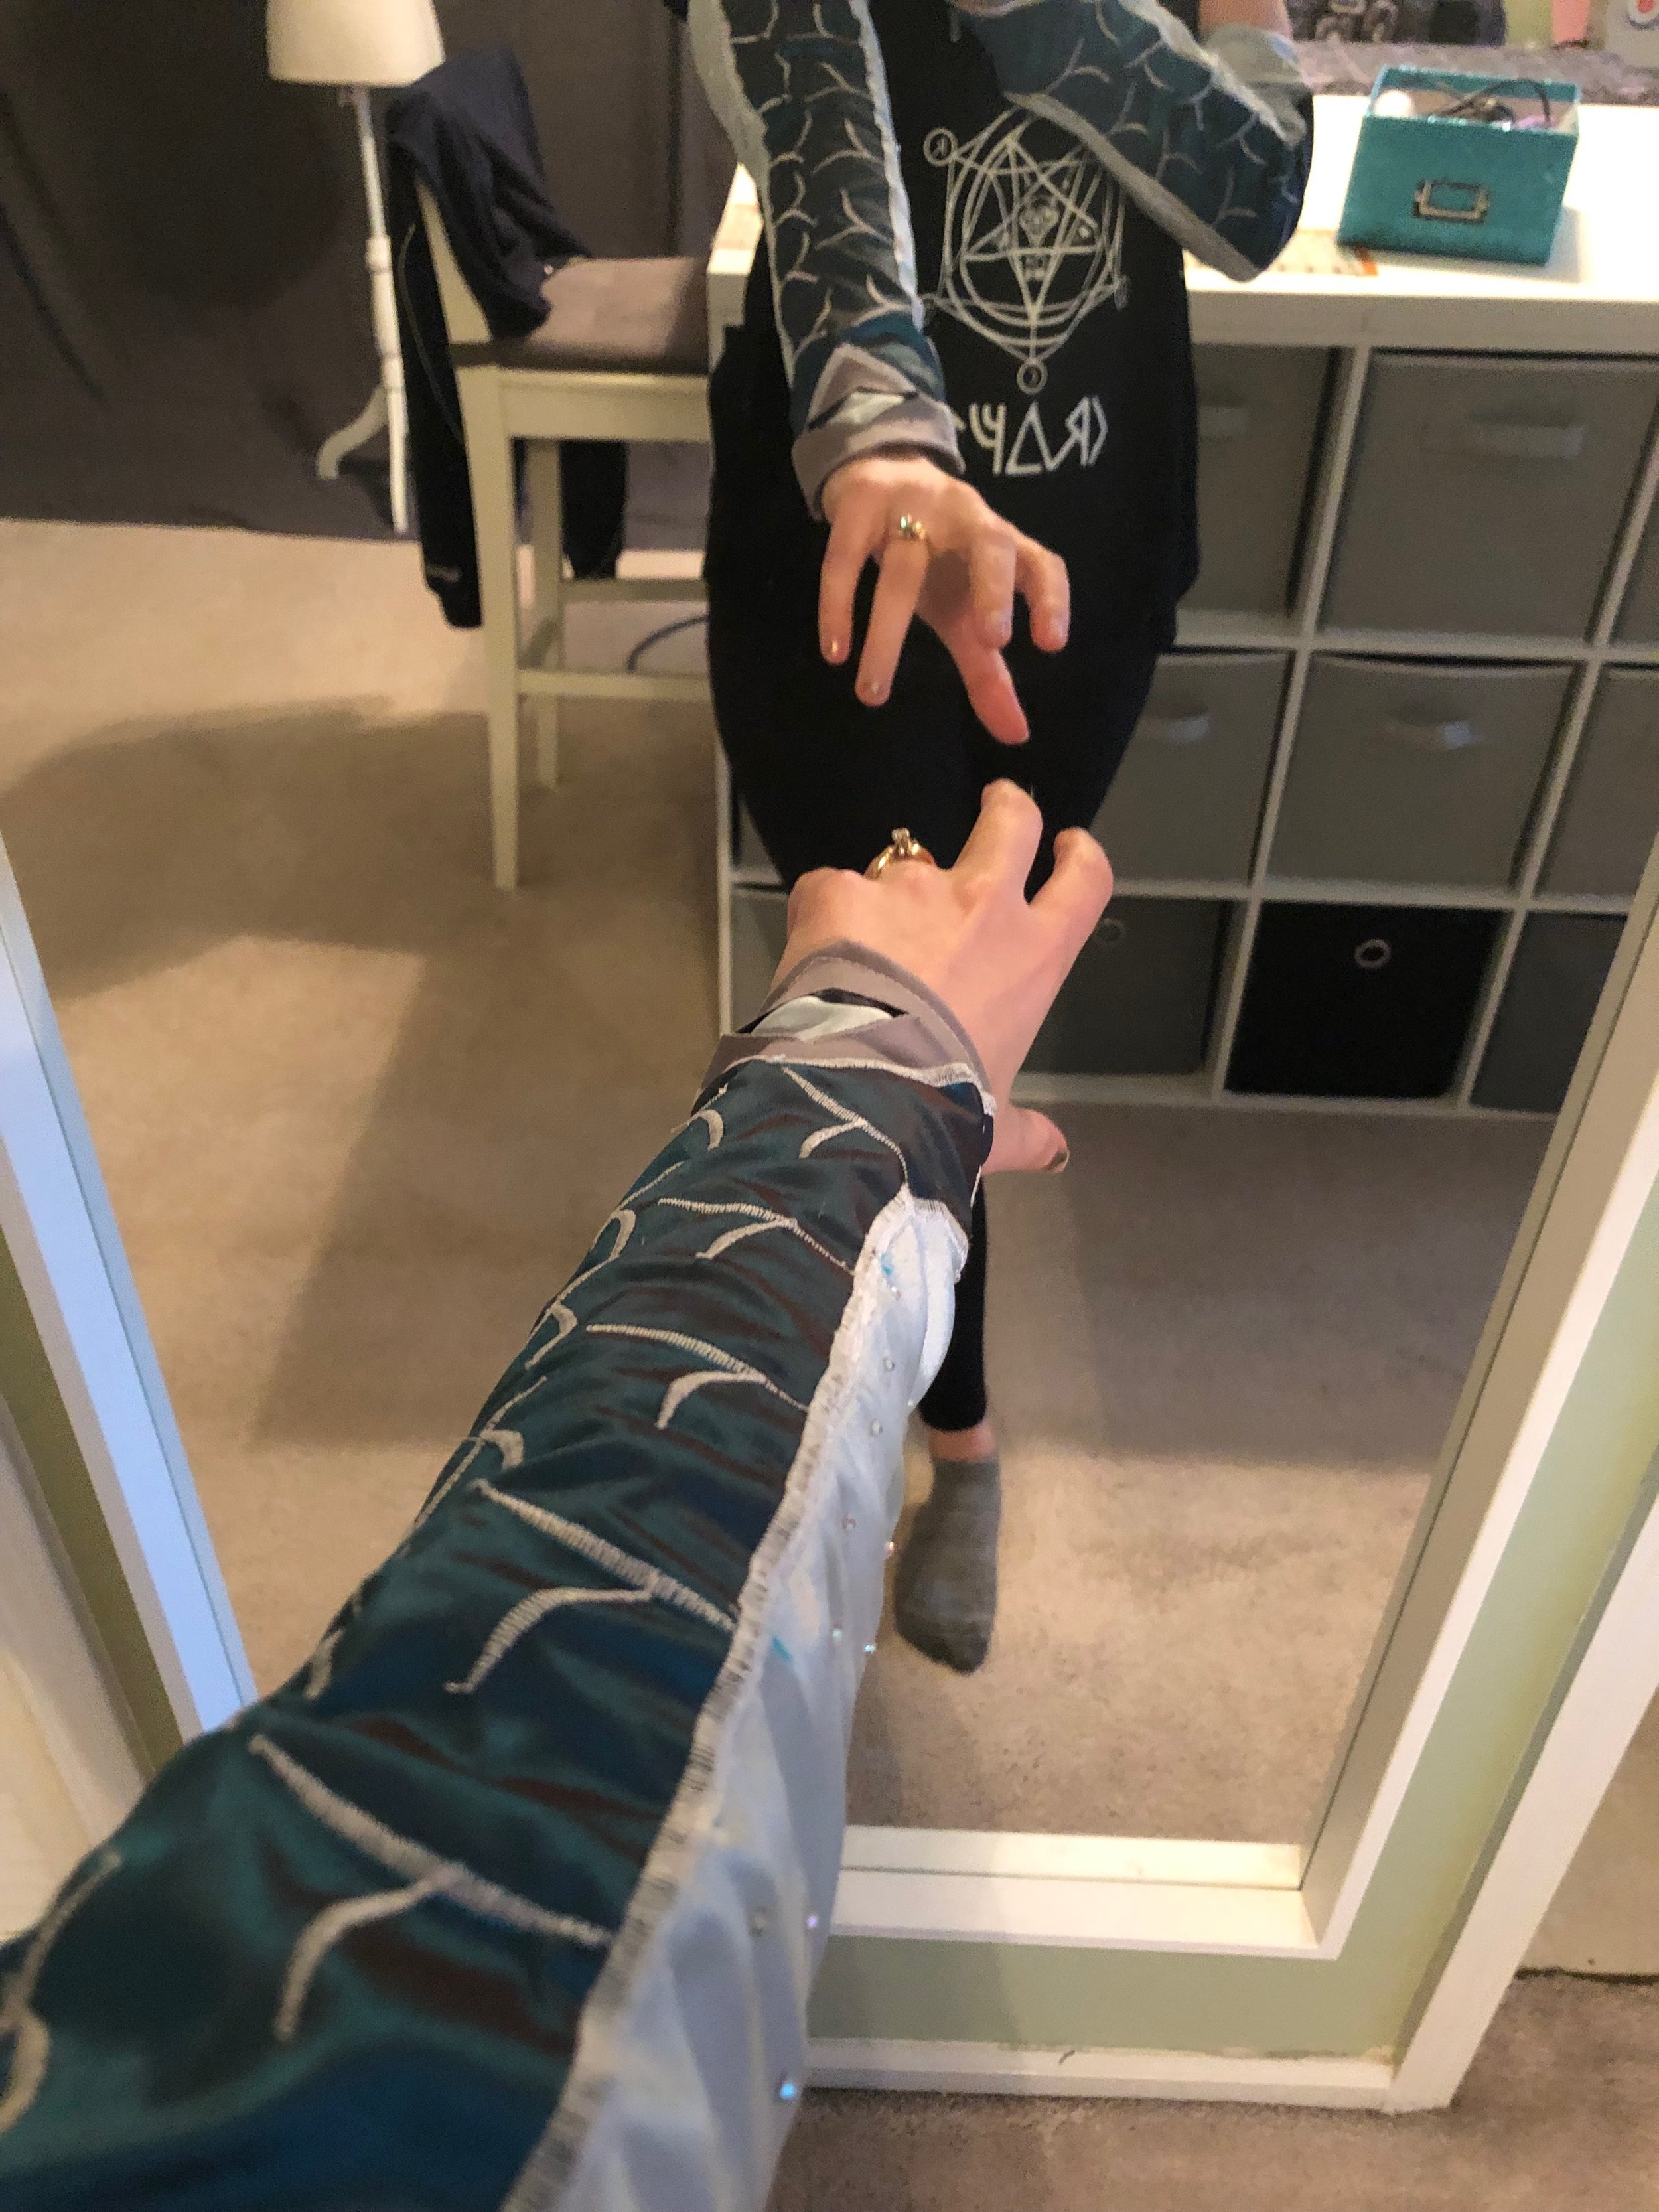
But later on I decided I did want to apply embellishments so here they are. Note the diamond cut out at the tip of the sleeve is for gem placement once I have made those.

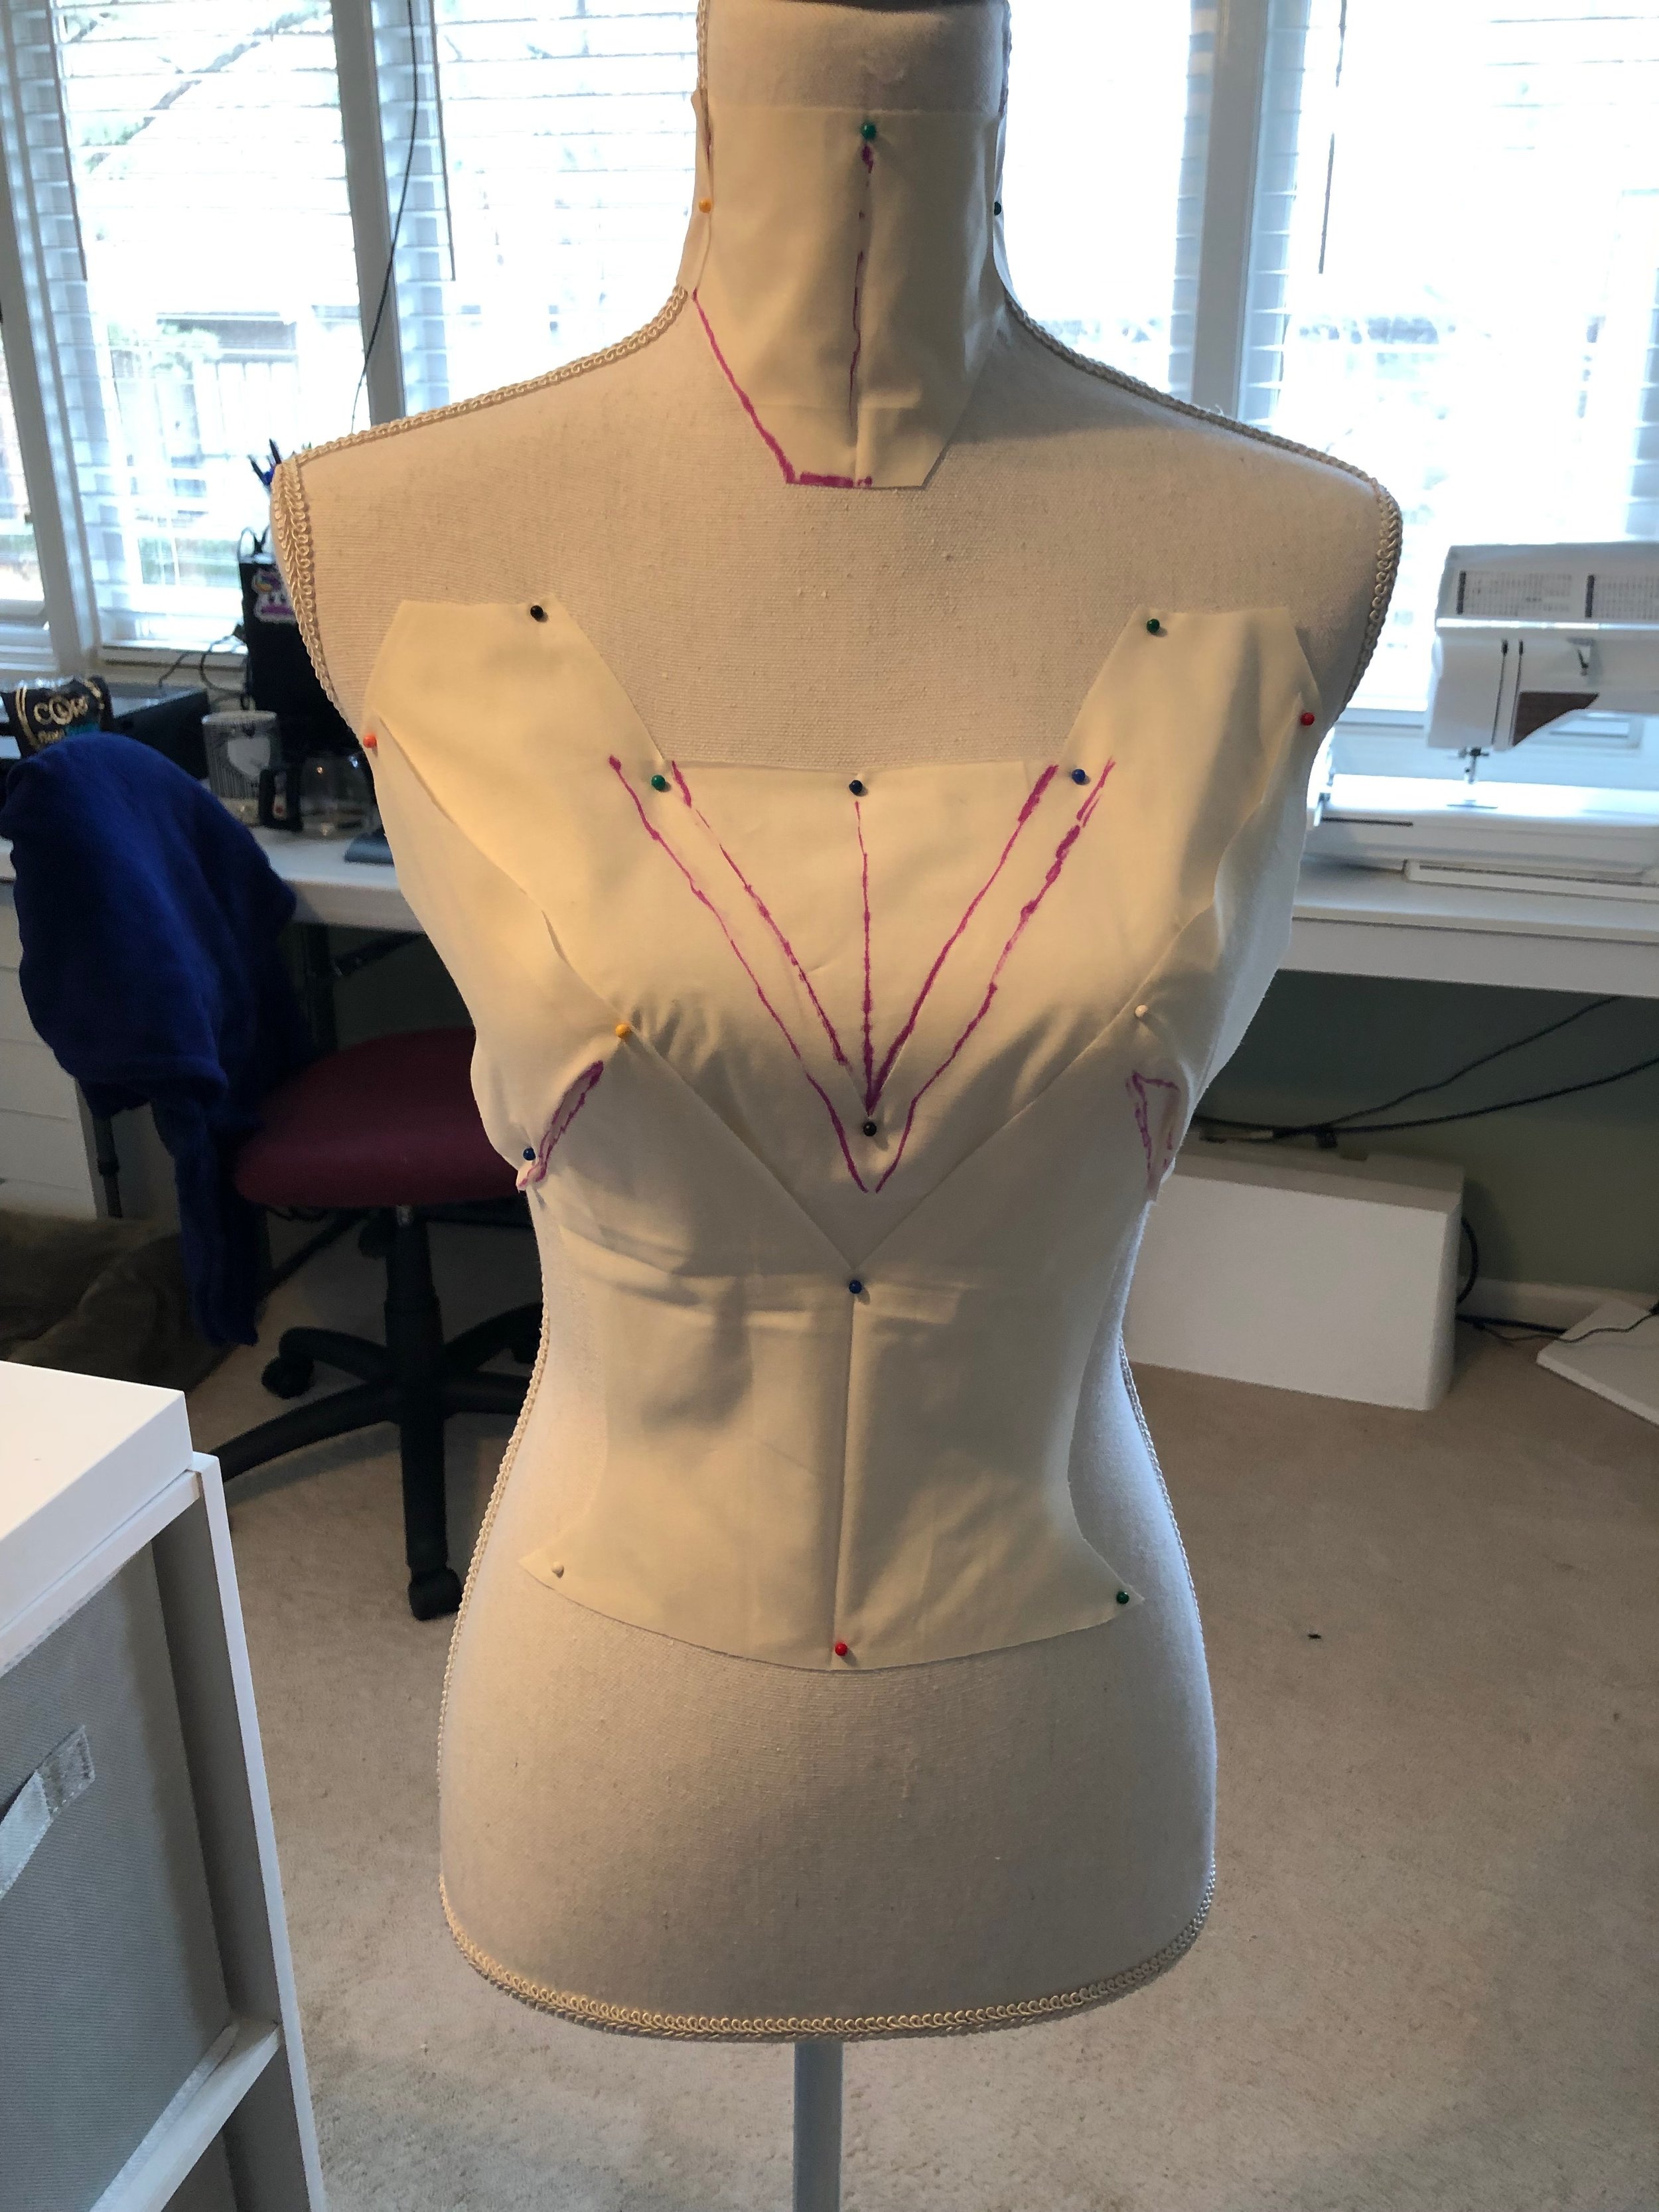
Next up is the necklace. I did some basic drafting of the necklace and the bodice on my dress form. I didn’t take a ton of photos of the draping or necklace making process but it was fairly easy.

IMG_2609.JPG

So from my pattern above, I cut that out on taffeta and cotton as well as made some bias tape out of the cotton. I drew the design onto the fabric with fabric colored pencil. Then I did the curved design stitch over it.

IMG_2725.JPG

Then I cleaned it all up with bias, added hooks in the back and that was that. Later on I added beads and sequins to the necklace as well.

IMG_2726.JPG

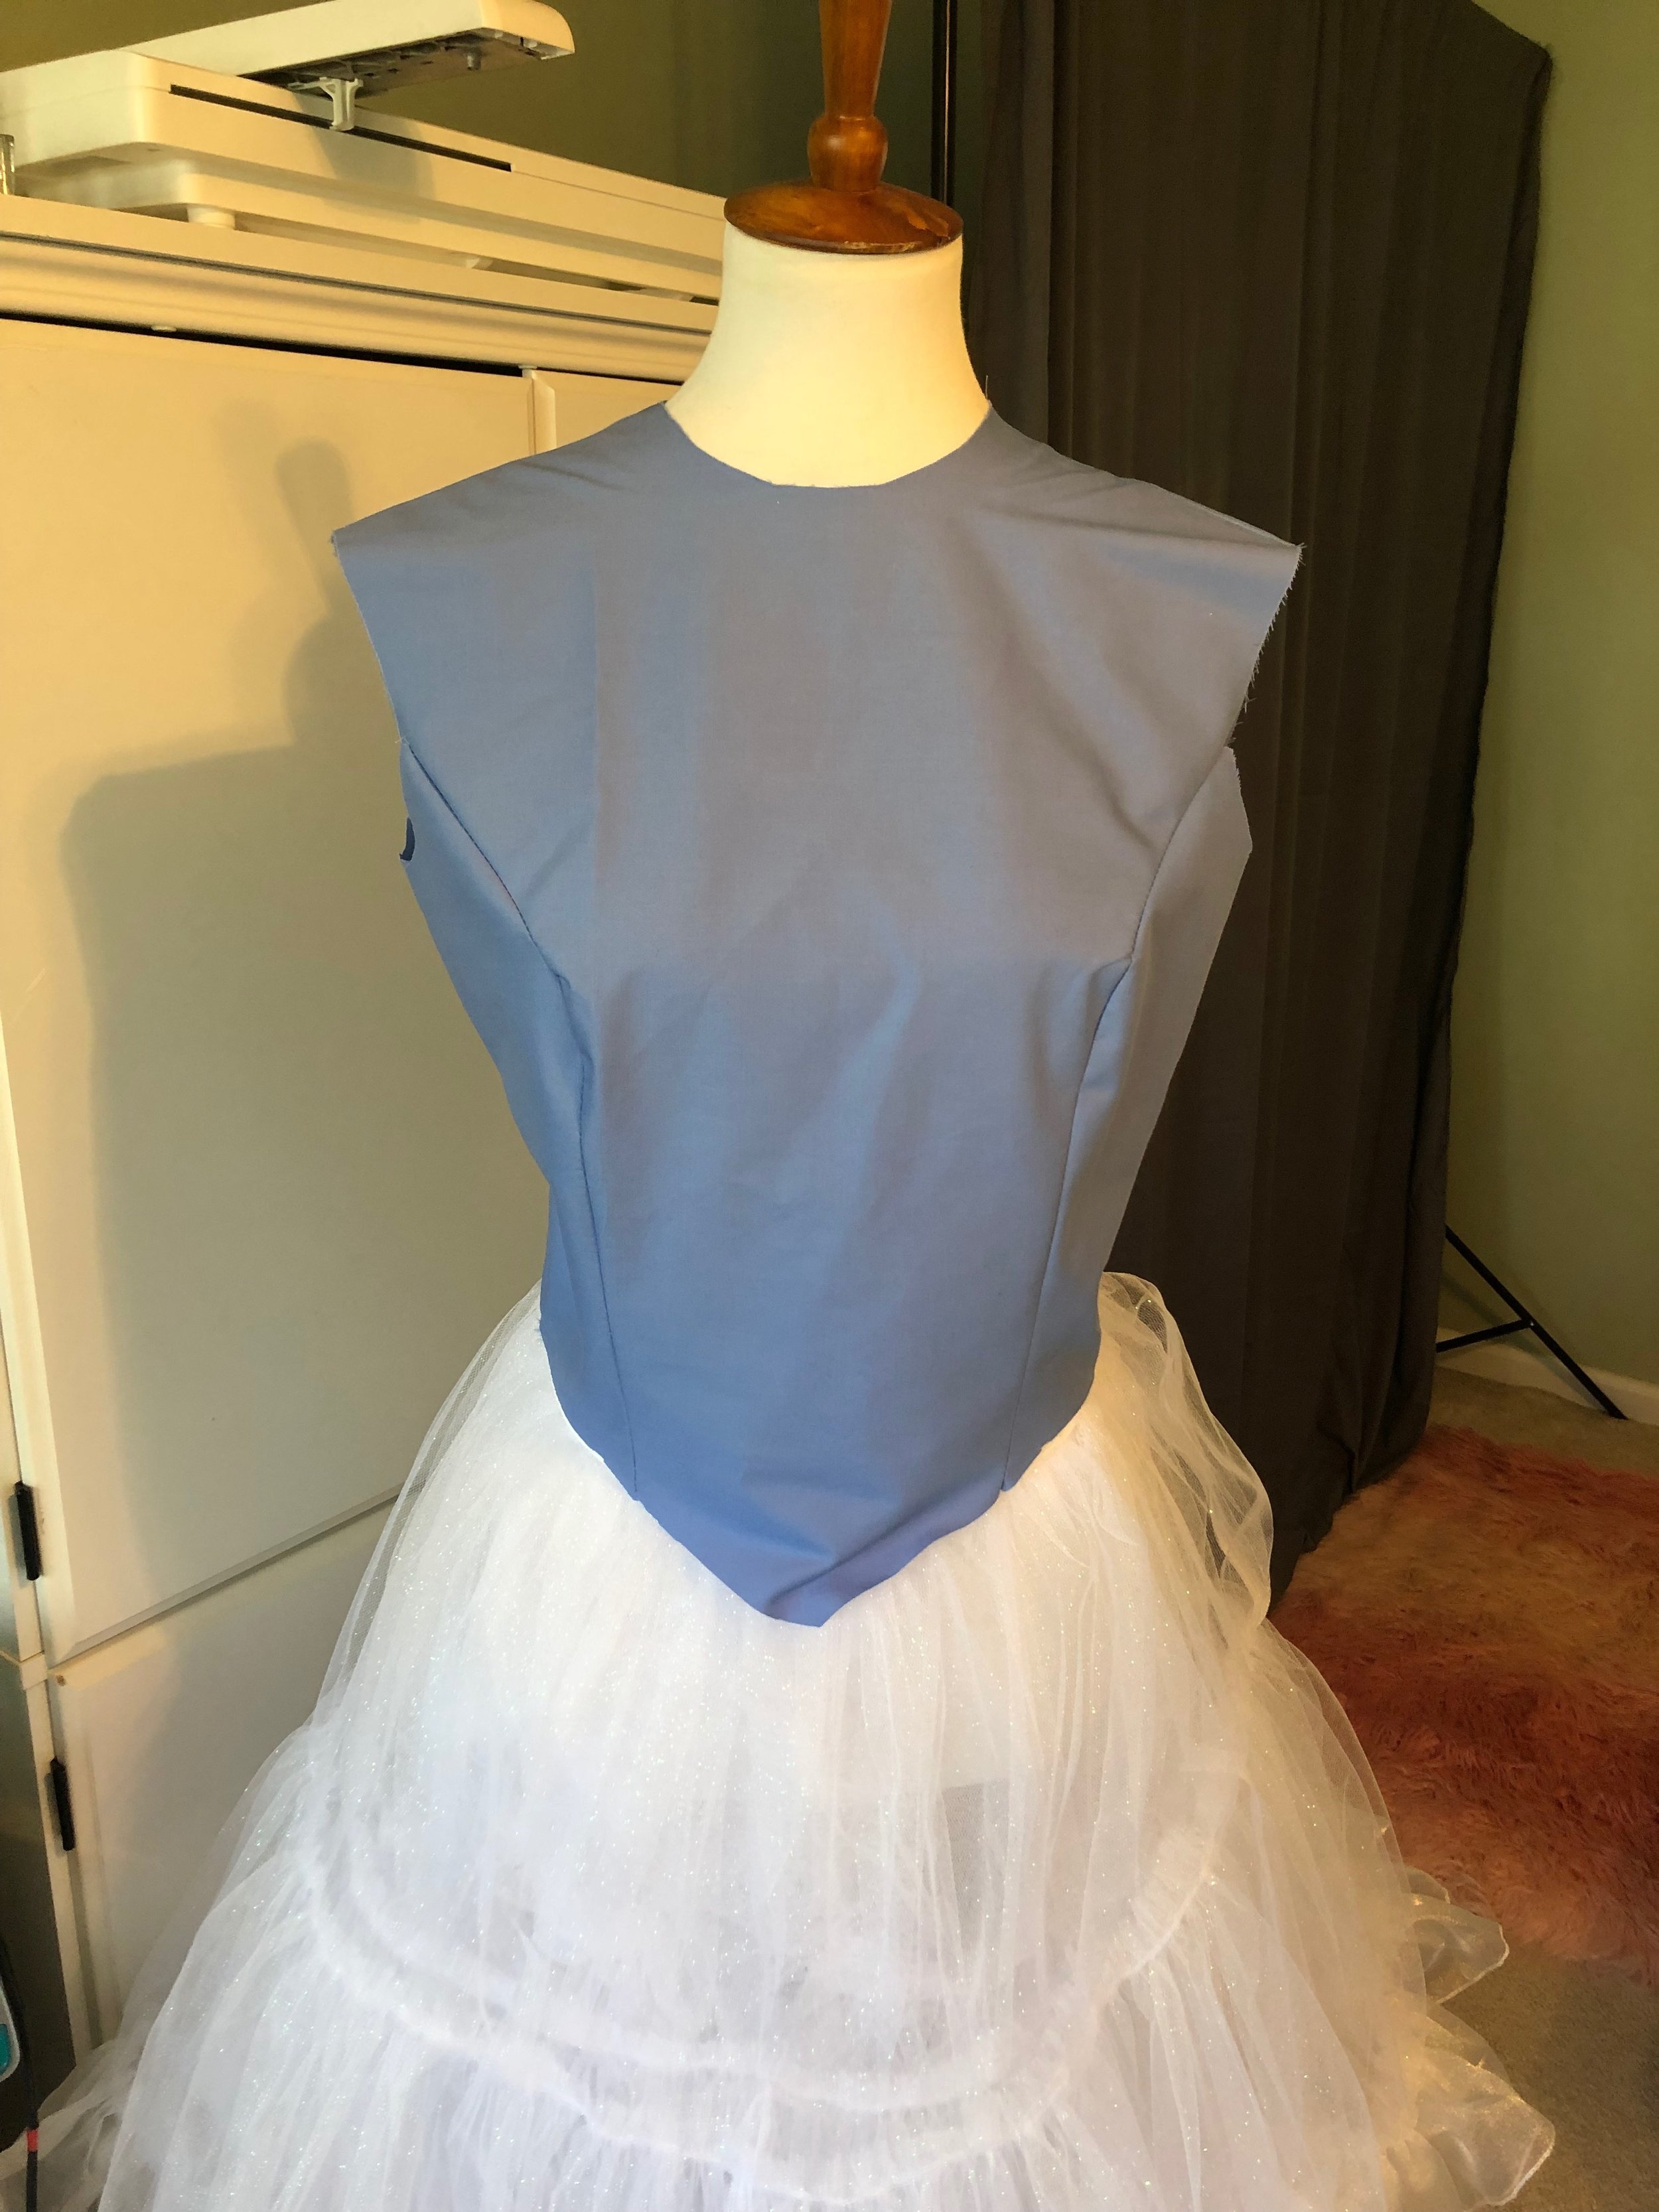
Finally the bodice, which was kind of all over the place but I will try to make sense of it all. So I started with the piece that had the curved design on it. I cut that out on taffeta and cotton, made binding for it and I also left the stabilizer on the taffeta when I stitched the cotton on to help give it structure. This bodice has no boning and very little interfacing due to the nature of the see through habotai that is true to the drawing.

IMG_2728.JPG

I had some issues with the bias in the “V” part of the piece, I have since figured out how to do it right but since at this point I already knew I was going to spend several hours adding embellishments I just let it stay this way.

IMG_2733.JPG

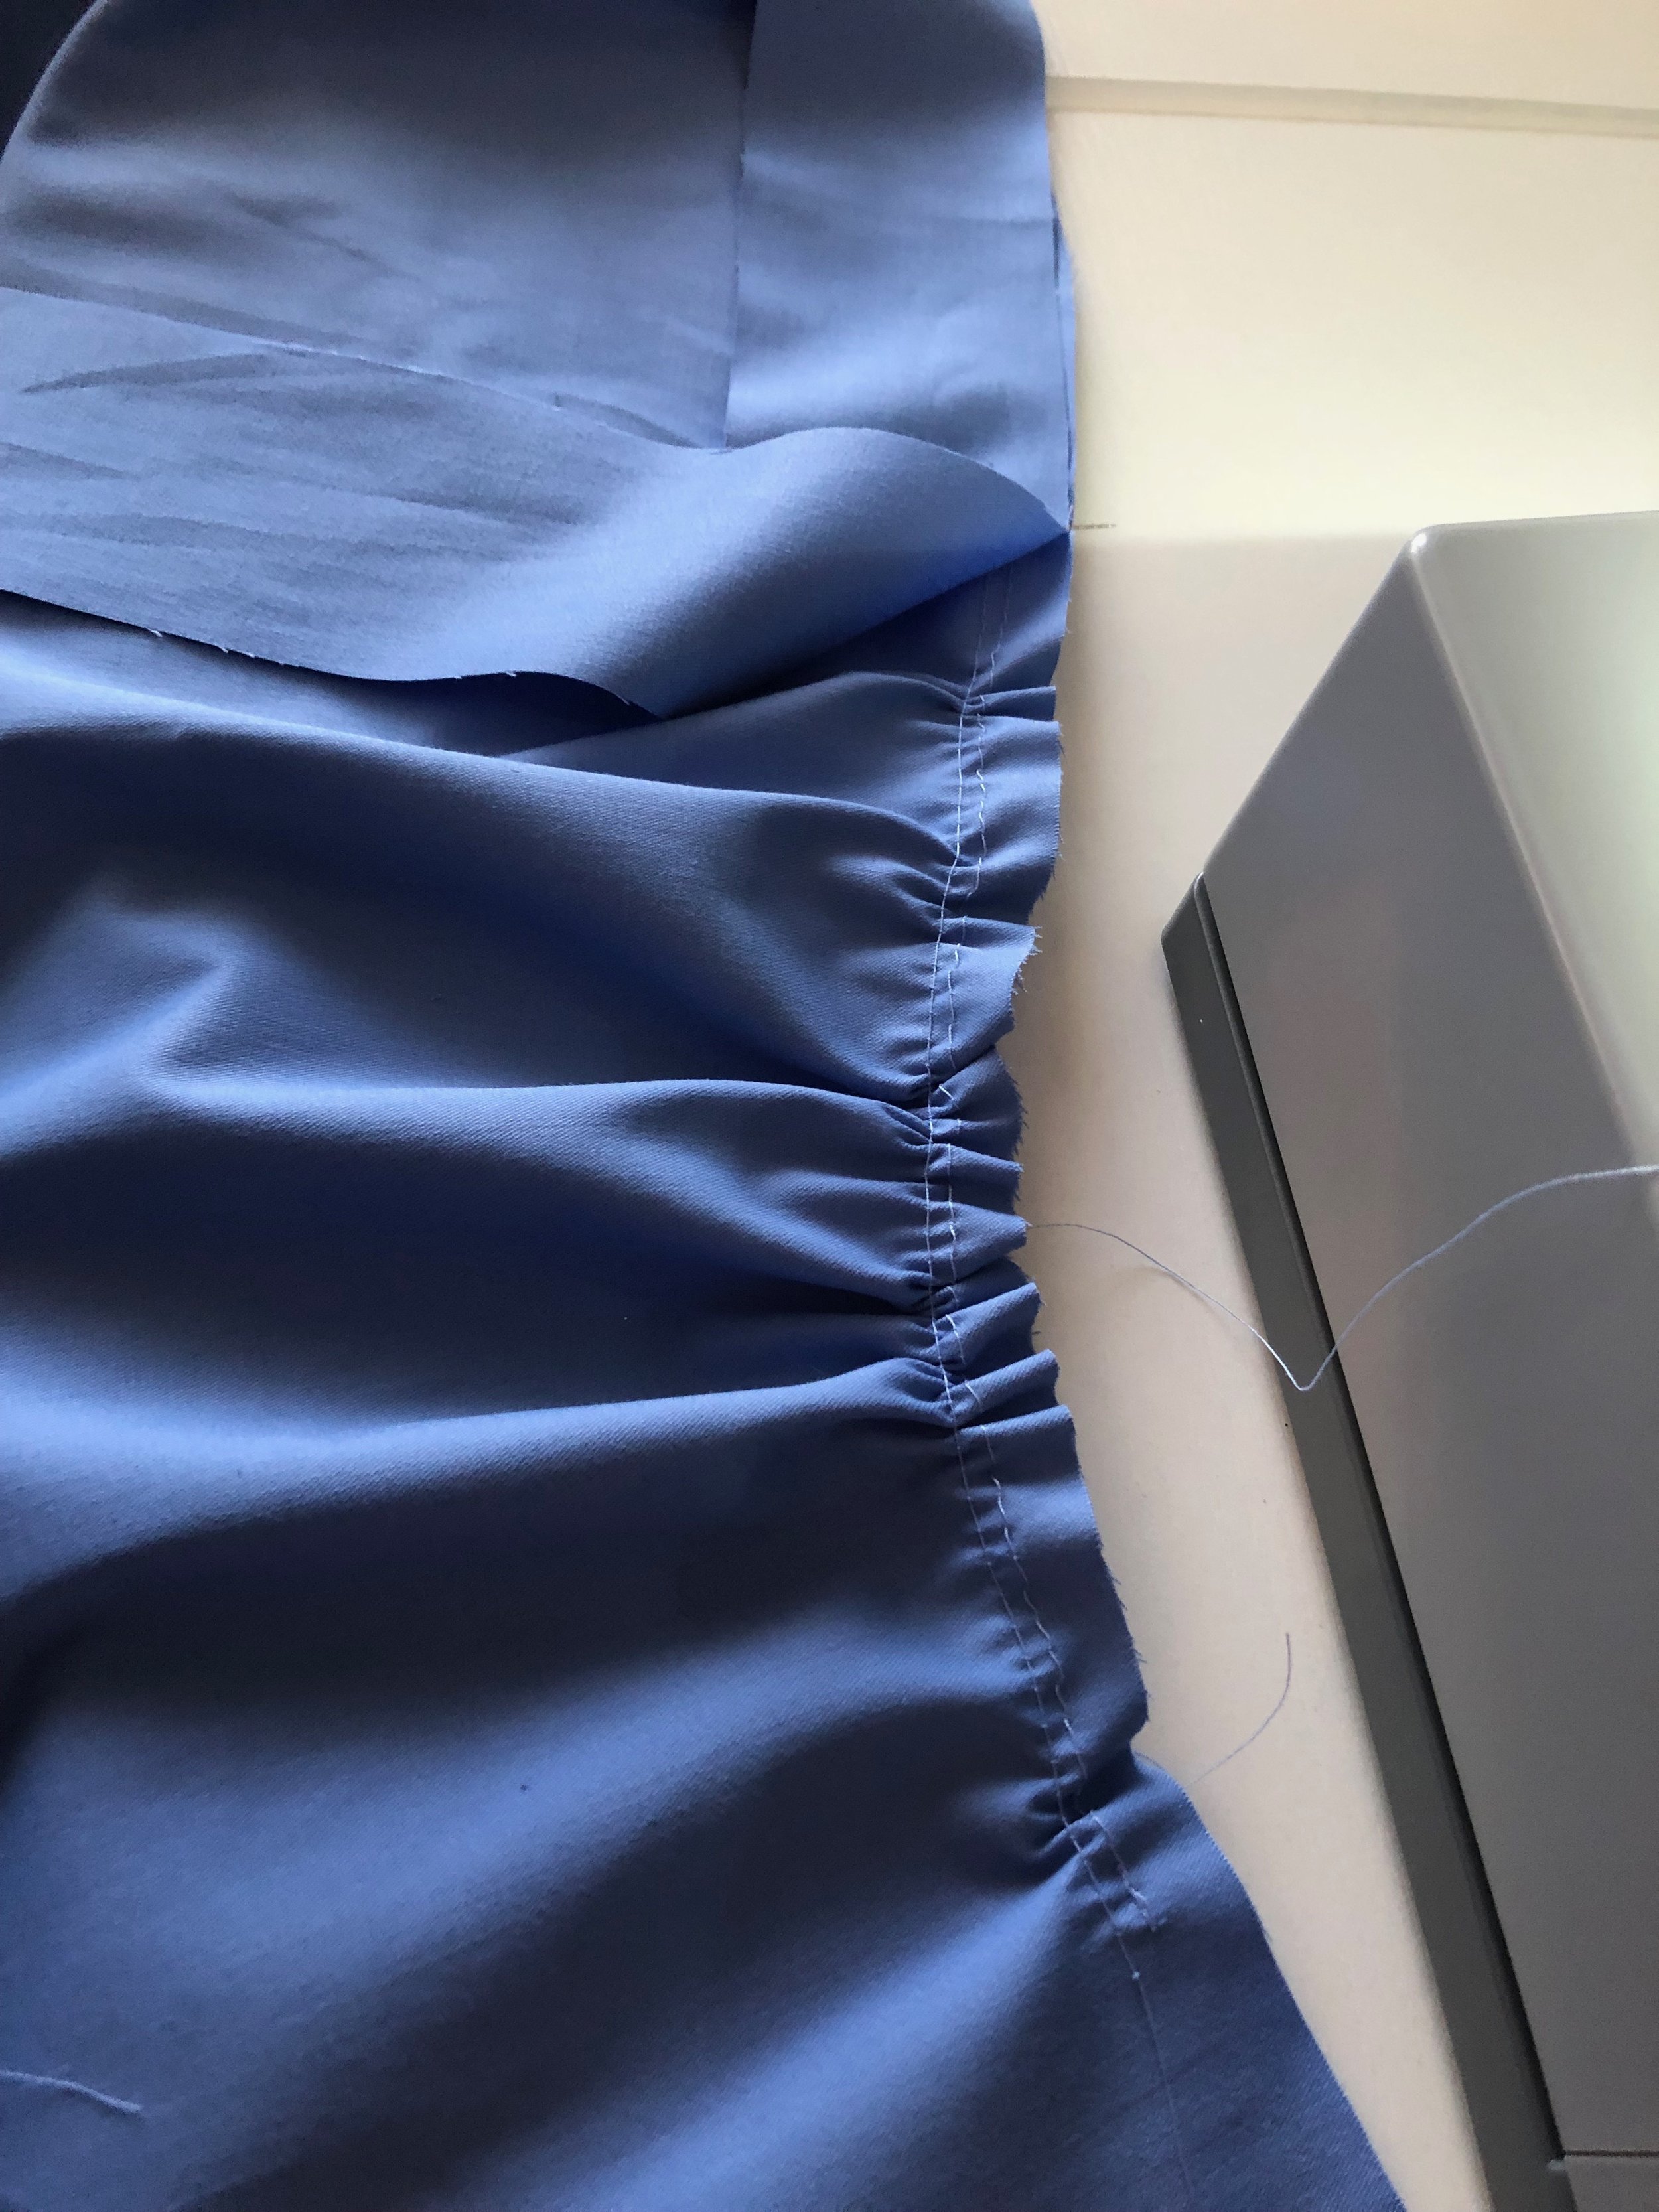
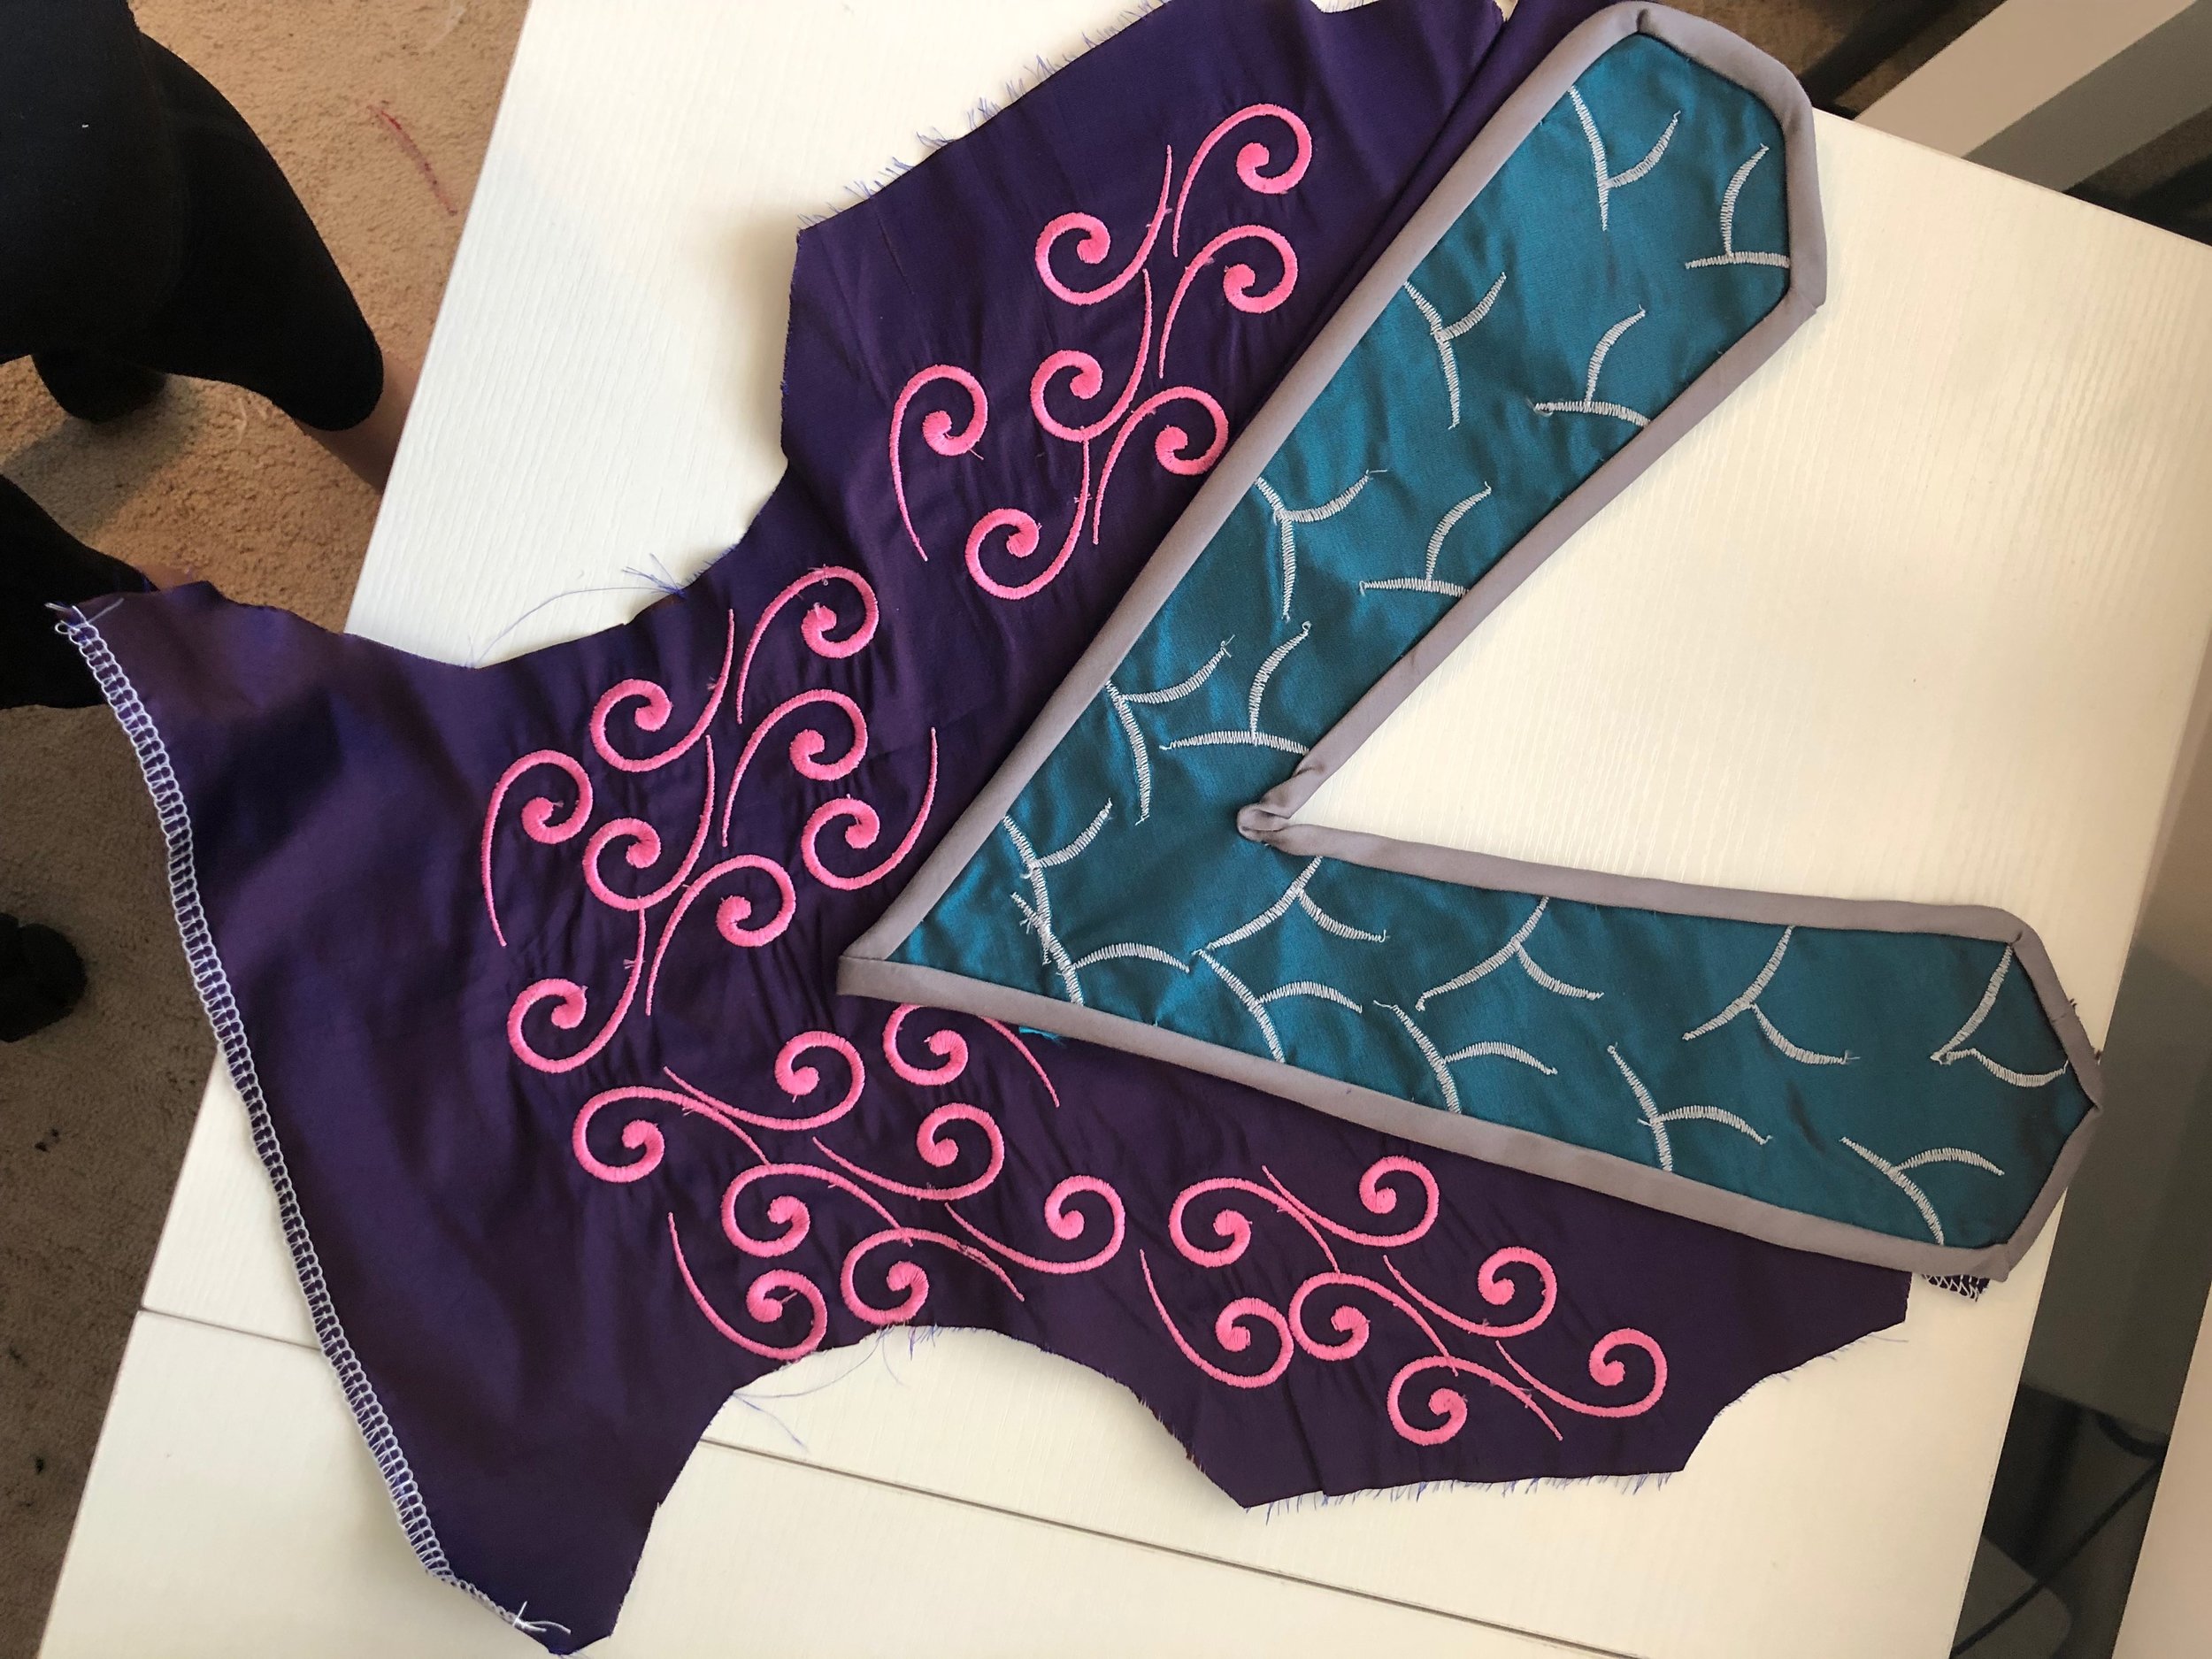
Now it was time to work on the purple shantung and I couldn’t find any embroidery designs in my machine that looked like the image so I kind of did my own thing with it. This is probably my least favorite part of the costume and probably my least favorite thing I have made in a really long time but I chose a swirl design and just repeated it in a fashion that “made sense”. However, I am not very good at my embroidery machine yet and I was incredibly impatient so the design does not line up very well and it really looks horrible in my opinion.

IMG_2944.JPG

But I moved forward and just did what I could to make everything else look better to make up for my mistakes.

I serged all the seams I could since I opted out of lining the bodice because of the see through nature of the art. I really wanted to recreate that but also while staying in my comfort zone. I made sure that the top piece lined up before finishing the garment, I didn’t want to add embellishments to it while being attached to the rest of the piece.

IMG_2945.JPG

I interfaced and “lined” the top taffeta piece and the side taffeta piece for structure and also since I plan to add grommets when the skirts are finished and attached. In the middle of making this piece I decided it would be better as a dress then a top and bottom.

IMG_2946.JPG

Finally it was time to embellish and I couldn’t do that without my assistant Eva to sniff and make sure I was using the good beads.

Once embellishments were done I hand stitched the design piece onto the bodice.

IMG_2962.JPG

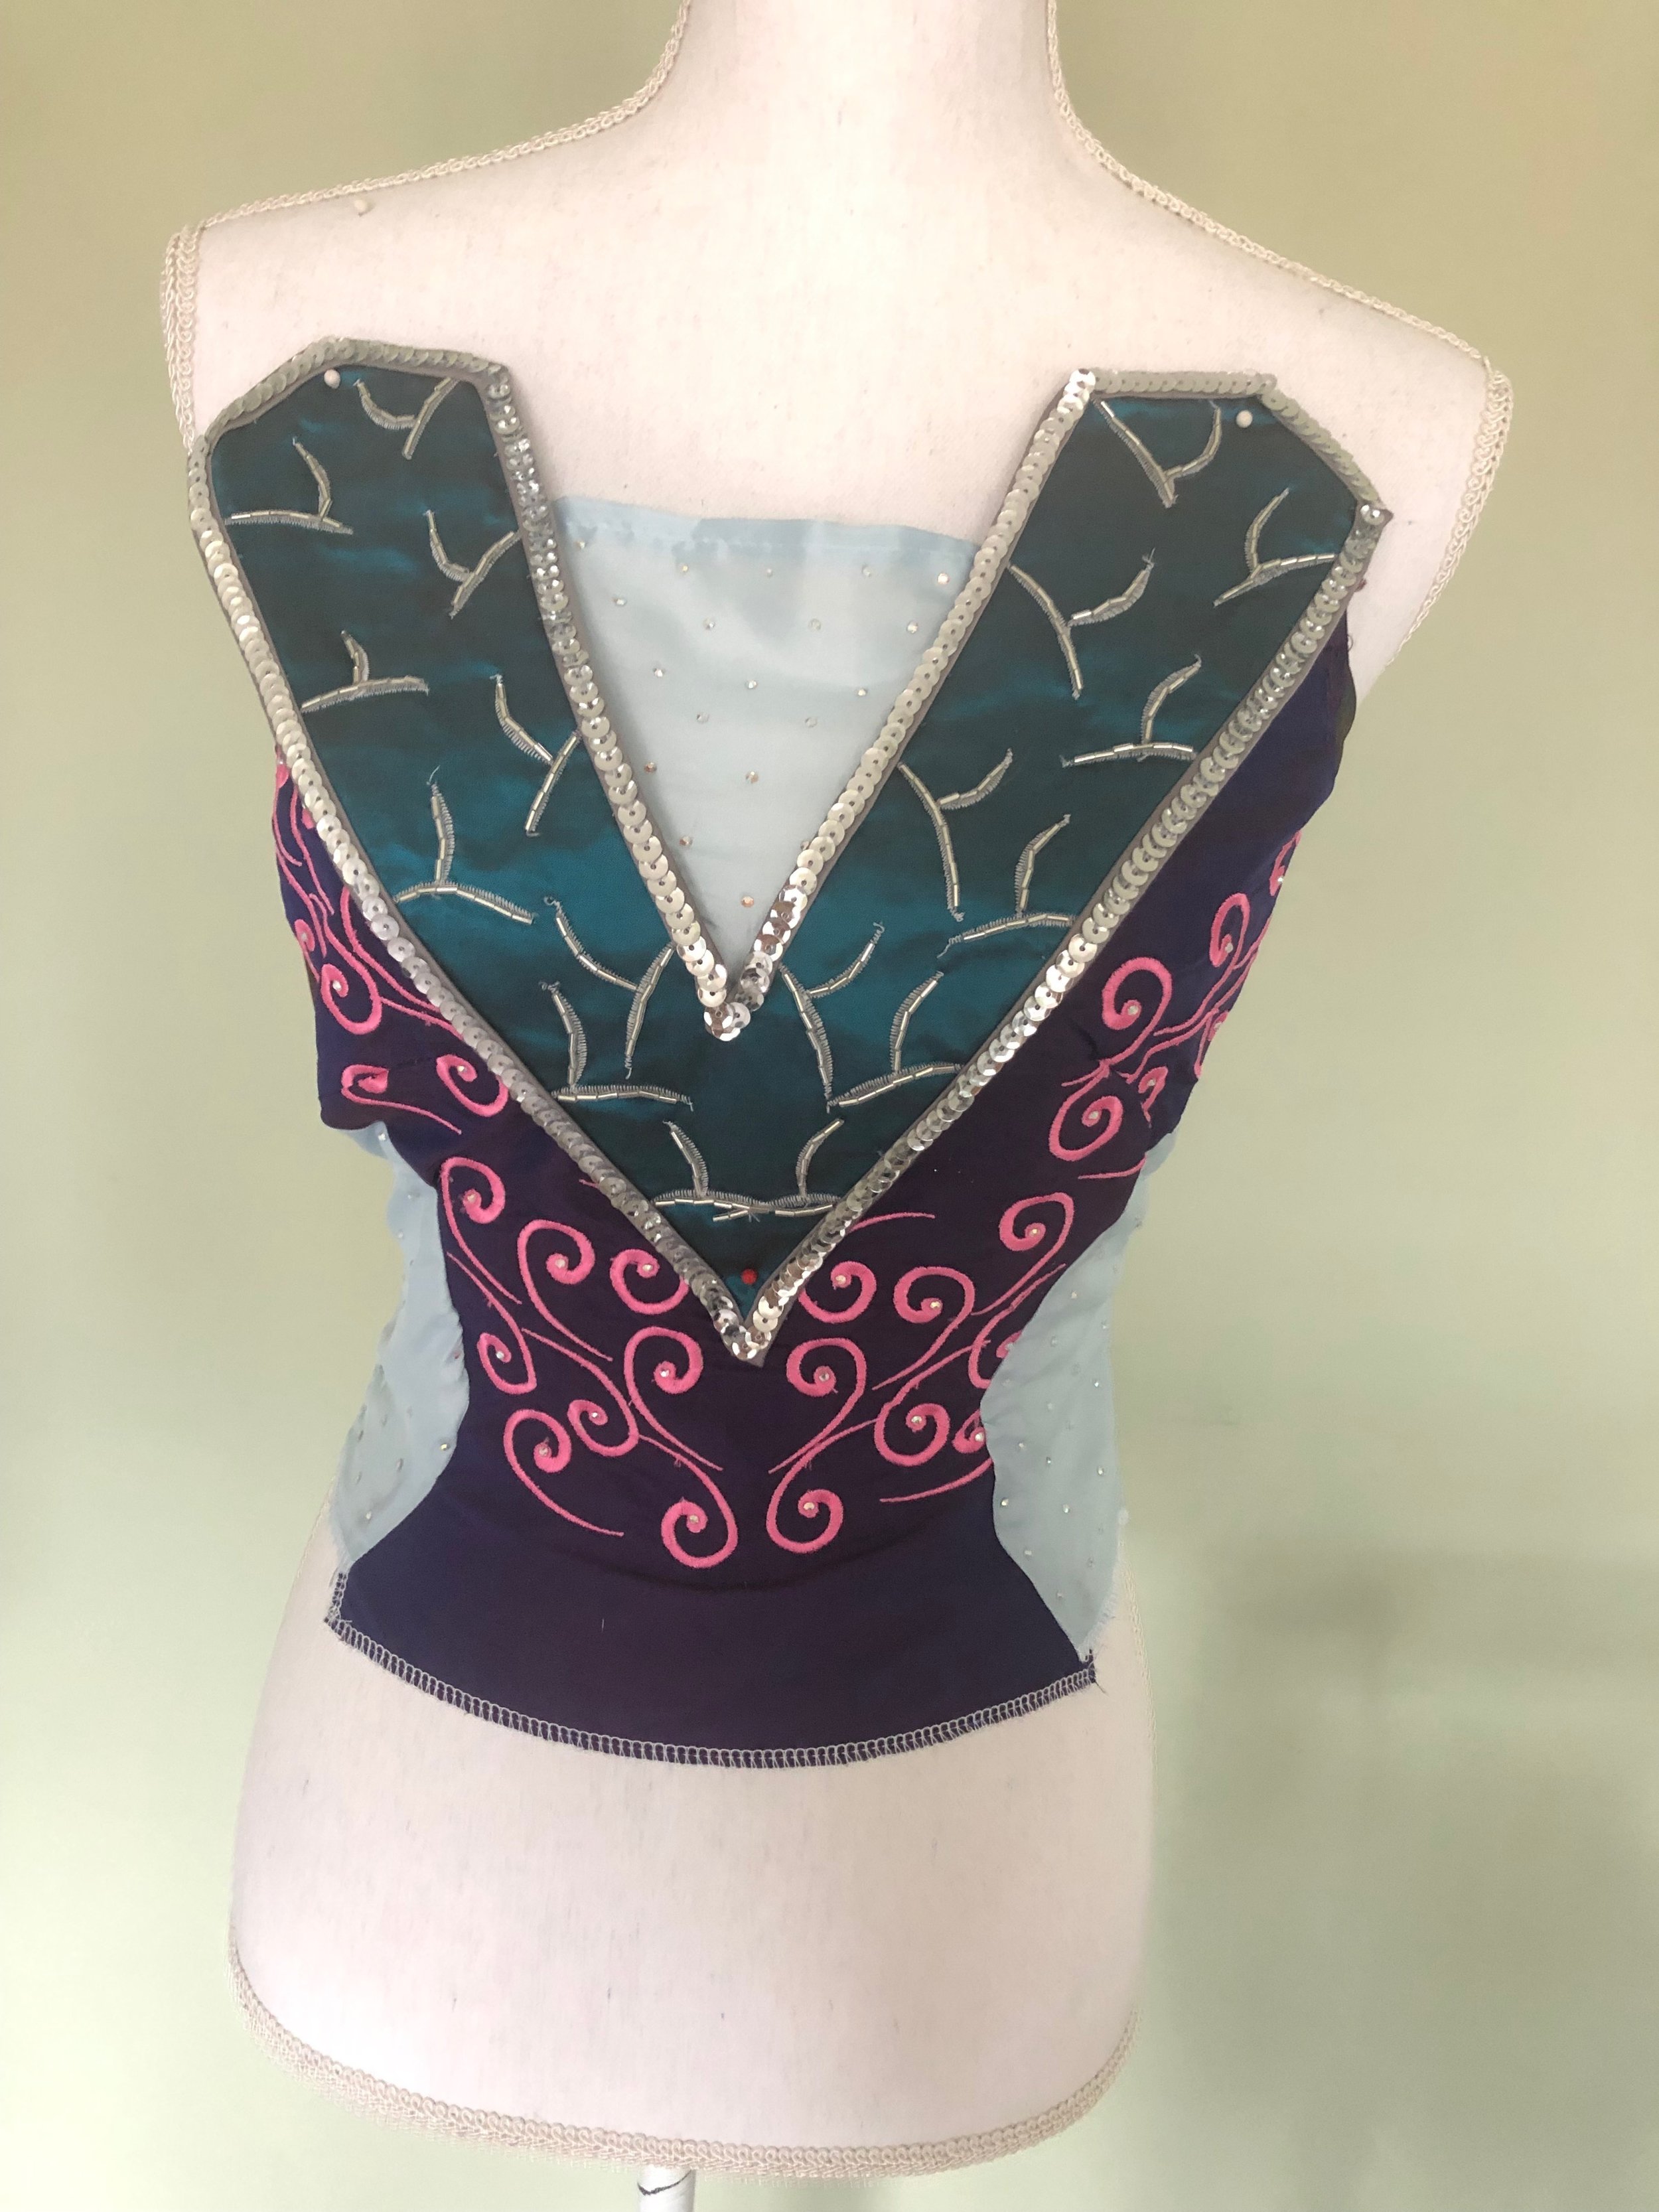
Overall, despite some bad embroidery line up, some bad sewing and lack of boning I think this piece looks pretty good. There will be straps added from the bodice to the necklace, I will most likely talk about those in one of my last blogs about this costume.

The next blog will be about the skirt portions of this costume. It will include the dragon scale underskirt as well as the skirts that get attached to this bodice.

Thank you all for reading, I release blogs every 1st and 3rd Friday of the month and you can catch video content on my Youtube on the 2nd Friday of the month.

If you would like your name in my current project then you can become a Patron for $1 a month you get early access to blogs, WIP and costume tests!

Alice in Wonderland: A 24-Hour Challenge

“We’re all mad here.”

Or at least that’s what I keep telling myself to justify the 24-Hour madness that was our Alice in Wonderland build!

The goal was to create the dress, the chibi, the set, do the photoshoot and edit the photo from the shoot in 24 hours live on Twitch.

We slayed that goal and completed it in 19 Hours ending with this beautiful image by Alexandra Lee Studios.

4571EE.jpg

I didn’t take as many photo’s during the process as I normally do and I cut many corners but let’s just dive right into making this costume.

To start I made a calf length petticoat that I covered in a video here. It was a four layer, three tier petticoat made out of a combination of tulle and organza.

IMG_2621.JPG

The first thing I made was the headband. I made it out of black cotton, interfacing and black elastic. I used this blog and pattern on my Cricut Maker to cut the fabric and interfacing. I personally don’t like hard head bands because they give me a head ache but this one was soft and didn’t annoy me at all.

Also, since I had so many questions during the stream here is the link to the wig.

IMG_2636.JPG

Now it’s time for the dress. I did this in basically two parts, the bodice with sleeves and collar which I used the pattern pictured below and a circle skirt.

simplicity-princess-peach-pattern-8476-envelope-front.jpg

Specifically I used the bodice and sleeves exactly like the pattern suggests and I modified the collar to look more like Alice’s but I also made a split collar so it was two separate pieces.

I made the bodice exactly like the pattern with the intention of over locking the seams but I ran out of white thread for my over lock machine and the black thread was noticeable through the fabric so I had to whip up a lining as well.

IMG_2639.JPG

I made the lining exactly like the bodice and then set it aside to add the sleeves.

This required gathering the top and bottom of the sleeve and adding 5/8 inch elastic at the bottom of the sleeve to keep it fitted on my arm.

IMG_2640.JPG
IMG_2641.JPG

Next I made the collar. I used the inner curve of the “B” pattern collar to create the inner curve of my collar and then I just eye balled the outer edge of it and I thought it worked. Once the pattern piece was made I cut it out 4 times on my fabric and twice on my interfacing (my collar was two separate pieces). I attached it to the bodice and then I was ready to add my circle skirt.

IMG_2645.JPG

Next, I added my circle skirt. I made this using my waist measurement and the length from my waist to the end of my petticoat plus 2.5 inches. I had to cut mine in two pieces halves and I really wanted to add pockets but it just didn’t happen since I thought we were running out of time.

I cut my fabric all the way to the salvage so I didn’t have to worry about the skirt being clean on the inside. For the hem, I marked 1/2 inch and 2 inches from the bottom of the skirt, then I ironed it and hand stitched it down. I probably should have used the bling hem stitch on my new sewing machine but I was on hour 13 and getting tired so I just hand stitched it.

IMG_2649.JPG

From here I stitched the lining in at the neck and back through the zipper, flipped and pressed. From there I hand stitched the arms and bodice where the skirt attaches. Then I applied the zipper. It was supposed to be an invisible zipper but again we were close to 11pm and I still needed to make the apron so I said YOLO.

This is also where I stopped taking photos. So instead of going super into detail about the apron, I will just state the it was draped over the dress out of Quilters Cotton from Joann fabrics. I essentially made two trapezoids that I connected with a 4” by 60” strip of fabric with two 4” by 45” strips that tie at the top.

Now it was time to get into makeup and costume. Alex had spent this time making the chibi and the set as well as drawing all the amazing art for the White Board Wars.

AliceChibi.png

Here’s a few BTS photo’s:

IMG_2673.jpg
IMG_2668.JPG
IMG_2657.JPG

Finally, here’s the clip from when Alex did the before and after.

That’s a wrap on the 24 Hour Challenge.

The next blog will be a series on Stellagosa, I’m not sure if it will be a 3,4 or 5 part series for the costume but see ya in 2 weeks for the first blog on her which will be about sewing the sleeves, necklace, and bodice for her focusing on the detail stitches and what I did using my new Husqvana Viking Topaz 50 Sewing and Embroidery machine.

As always, if you live my content and want to support it further you can do so on ko-fi, patreon, or join me on Twitch Tues, Wed, and Thurs at 12pm EST.

White Christmas, Red Dress pt 3

Welcome to part 3 and the final part of making my White Christmas Red Dress. In this blog I will go over how I made my full dress with the rhinestone details on it.

If you’re interested in learning how I made my petticoat you can find that here or how I made the skirt and cape-let with the fur trim you can read that here.

Full disclosure I did not drape the bodice pattern for this costume, that work was done by Sarah who was Betty to my Judy!

I started by making a mock-up with some of the scraps left over from the skirt and cape-let.

The mock-up fit literally like a glove so I made no adjustments to it and then went ahead to cut it out and make it again but this time with lining and sleeves.

IMG_2151.JPG

I didn’t take any pictures of this process but essentially I sewed the darts in first, then the panels together, then added the sleeves and actually over locked those at the seam in order to keep them clean.

Next I whipped up a quick collar for the neck to make it a turtle neck, I interfaced it and once again serged the edges to keep it clean.

IMG_2163.JPG

For the skirt addition, I just cut out a second circle skirt but 6” shorter and draped it over my current skirt. From there I marked with pins where I wanted to cut the slit and I actually cut it too high for the fur but I just hid that with the fur application. It wasn’t the cleanest way to do it but it worked. Then I over locked the hem to prepare it for the fur.

IMG_2165.JPG

For the fur addition I used the exact same technique described in part two, because I hand stitched the fur down it took about 6 hours to apply but looked lovely once it was done.

IMG_2176.JPG

Finally it was time to apply the invisible zipper. This was my first time ever attempting to do an invisible zipper and I wont lie it was way easier than I had ever imaged. I don’t own an invisible zipper foot but I’m considering buying one for the future.

IMG_2196.JPG

As per usual I over locked my seam before adding the zipper to “keep it clean”. I’m not going to go over step by step how to add an invisible zipper but I’m willing to make a video tutorial if that’s something people want from me in the future. So above is sewing the first side.

Below is sewing the second side.

It was so easy and look how good it turned out.

IMG_2198.JPG

Alright now the sewing was complete! It’s time for rhinestones!

Sarah created a template for us to go off of and a general idea of where the placement should have been.

We used the hot fix tool and 3mm/10ss and 5mm/20ss to make the snowflake design on the dresses. Hot fix is not my favorite method to apply rhinestones but it definitely is a great way to apply stones! I’ll actually be writing an entire blog after this about my favorite choices of rhinestones and techniques so if you like this blog then stay tuned.

IMG_2200.JPG

I applied the stones all over the dress, cape-let and ever on the bodice and sleeves and we were good to go. The red stones were very tricky to see on the red fabric but I knew they were there and that’s all that really matters.

IMG_2203.JPG

That was it, the dress was done and I was ready to for epic amounts of twirling.

49571347_2145927522095643_1044910460161228800_o.jpg

Thank you all for reading my blog.

I’ll be posting blogs every first and third Friday of the month so stay tuned!