Alice in Wonderland: A 24-Hour Challenge

“We’re all mad here.”

Or at least that’s what I keep telling myself to justify the 24-Hour madness that was our Alice in Wonderland build!

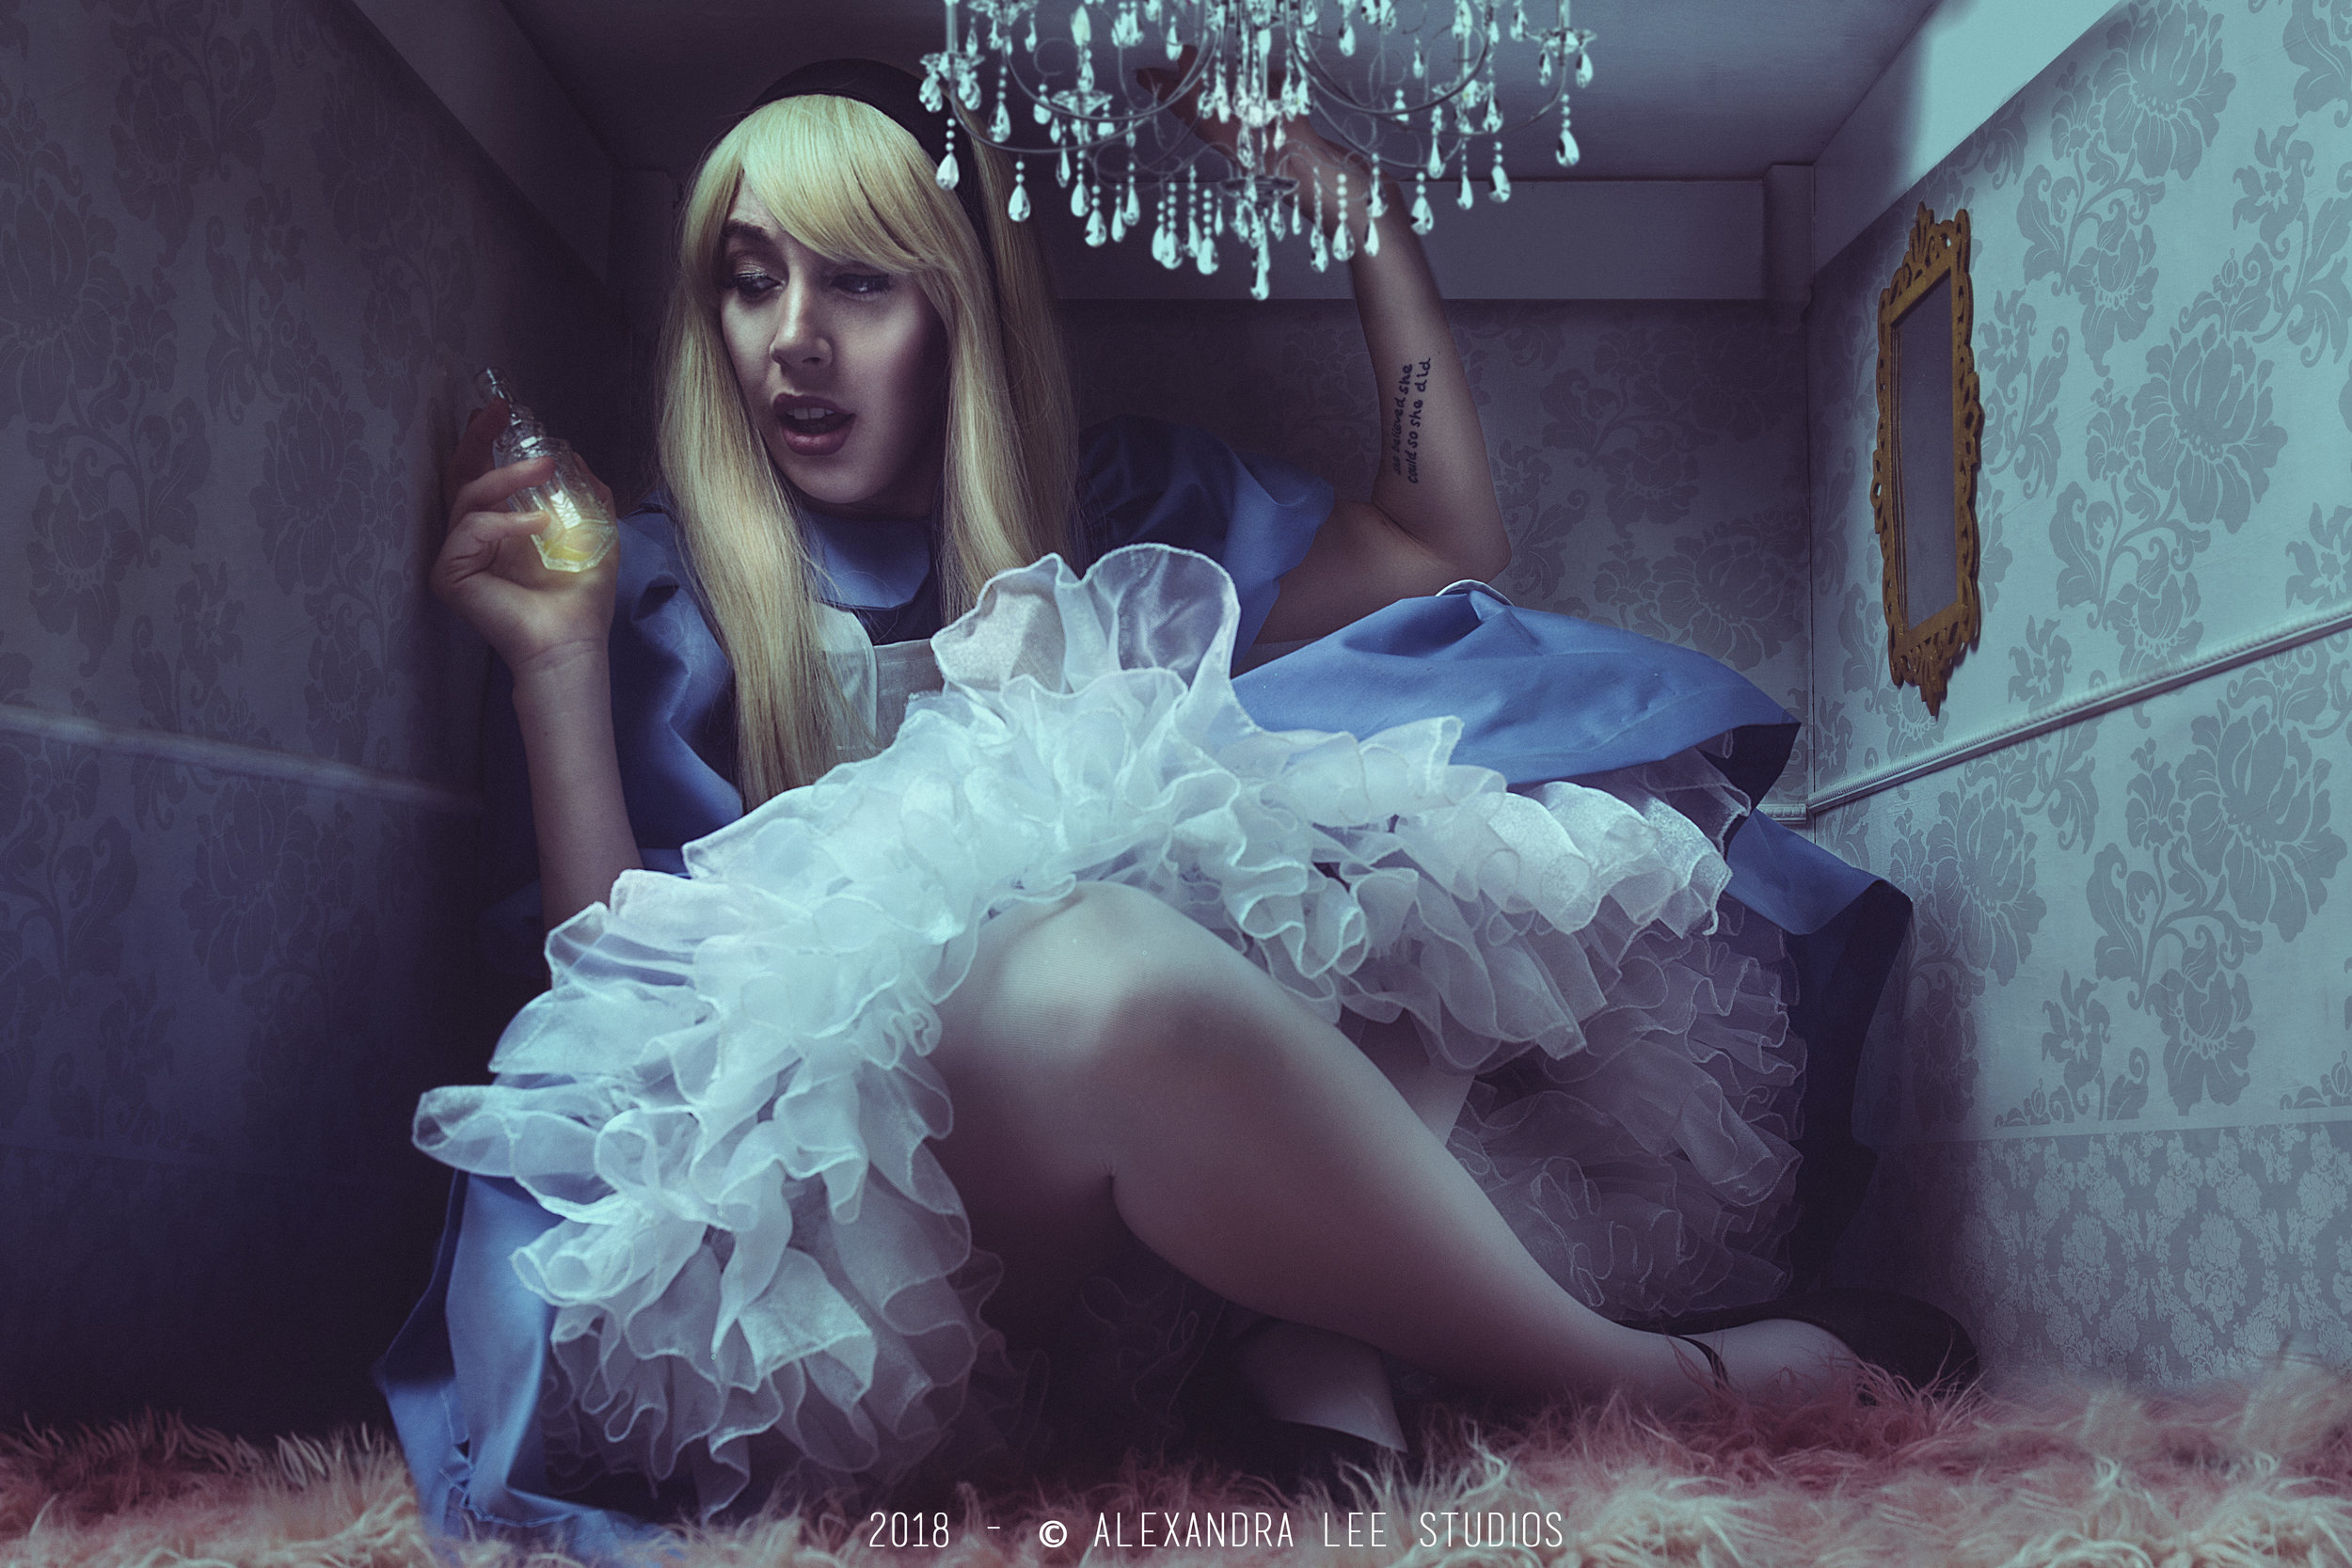
The goal was to create the dress, the chibi, the set, do the photoshoot and edit the photo from the shoot in 24 hours live on Twitch.

We slayed that goal and completed it in 19 Hours ending with this beautiful image by Alexandra Lee Studios.

4571EE.jpg

I didn’t take as many photo’s during the process as I normally do and I cut many corners but let’s just dive right into making this costume.

To start I made a calf length petticoat that I covered in a video here. It was a four layer, three tier petticoat made out of a combination of tulle and organza.

IMG_2621.JPG

The first thing I made was the headband. I made it out of black cotton, interfacing and black elastic. I used this blog and pattern on my Cricut Maker to cut the fabric and interfacing. I personally don’t like hard head bands because they give me a head ache but this one was soft and didn’t annoy me at all.

Also, since I had so many questions during the stream here is the link to the wig.

IMG_2636.JPG

Now it’s time for the dress. I did this in basically two parts, the bodice with sleeves and collar which I used the pattern pictured below and a circle skirt.

simplicity-princess-peach-pattern-8476-envelope-front.jpg

Specifically I used the bodice and sleeves exactly like the pattern suggests and I modified the collar to look more like Alice’s but I also made a split collar so it was two separate pieces.

I made the bodice exactly like the pattern with the intention of over locking the seams but I ran out of white thread for my over lock machine and the black thread was noticeable through the fabric so I had to whip up a lining as well.

IMG_2639.JPG

I made the lining exactly like the bodice and then set it aside to add the sleeves.

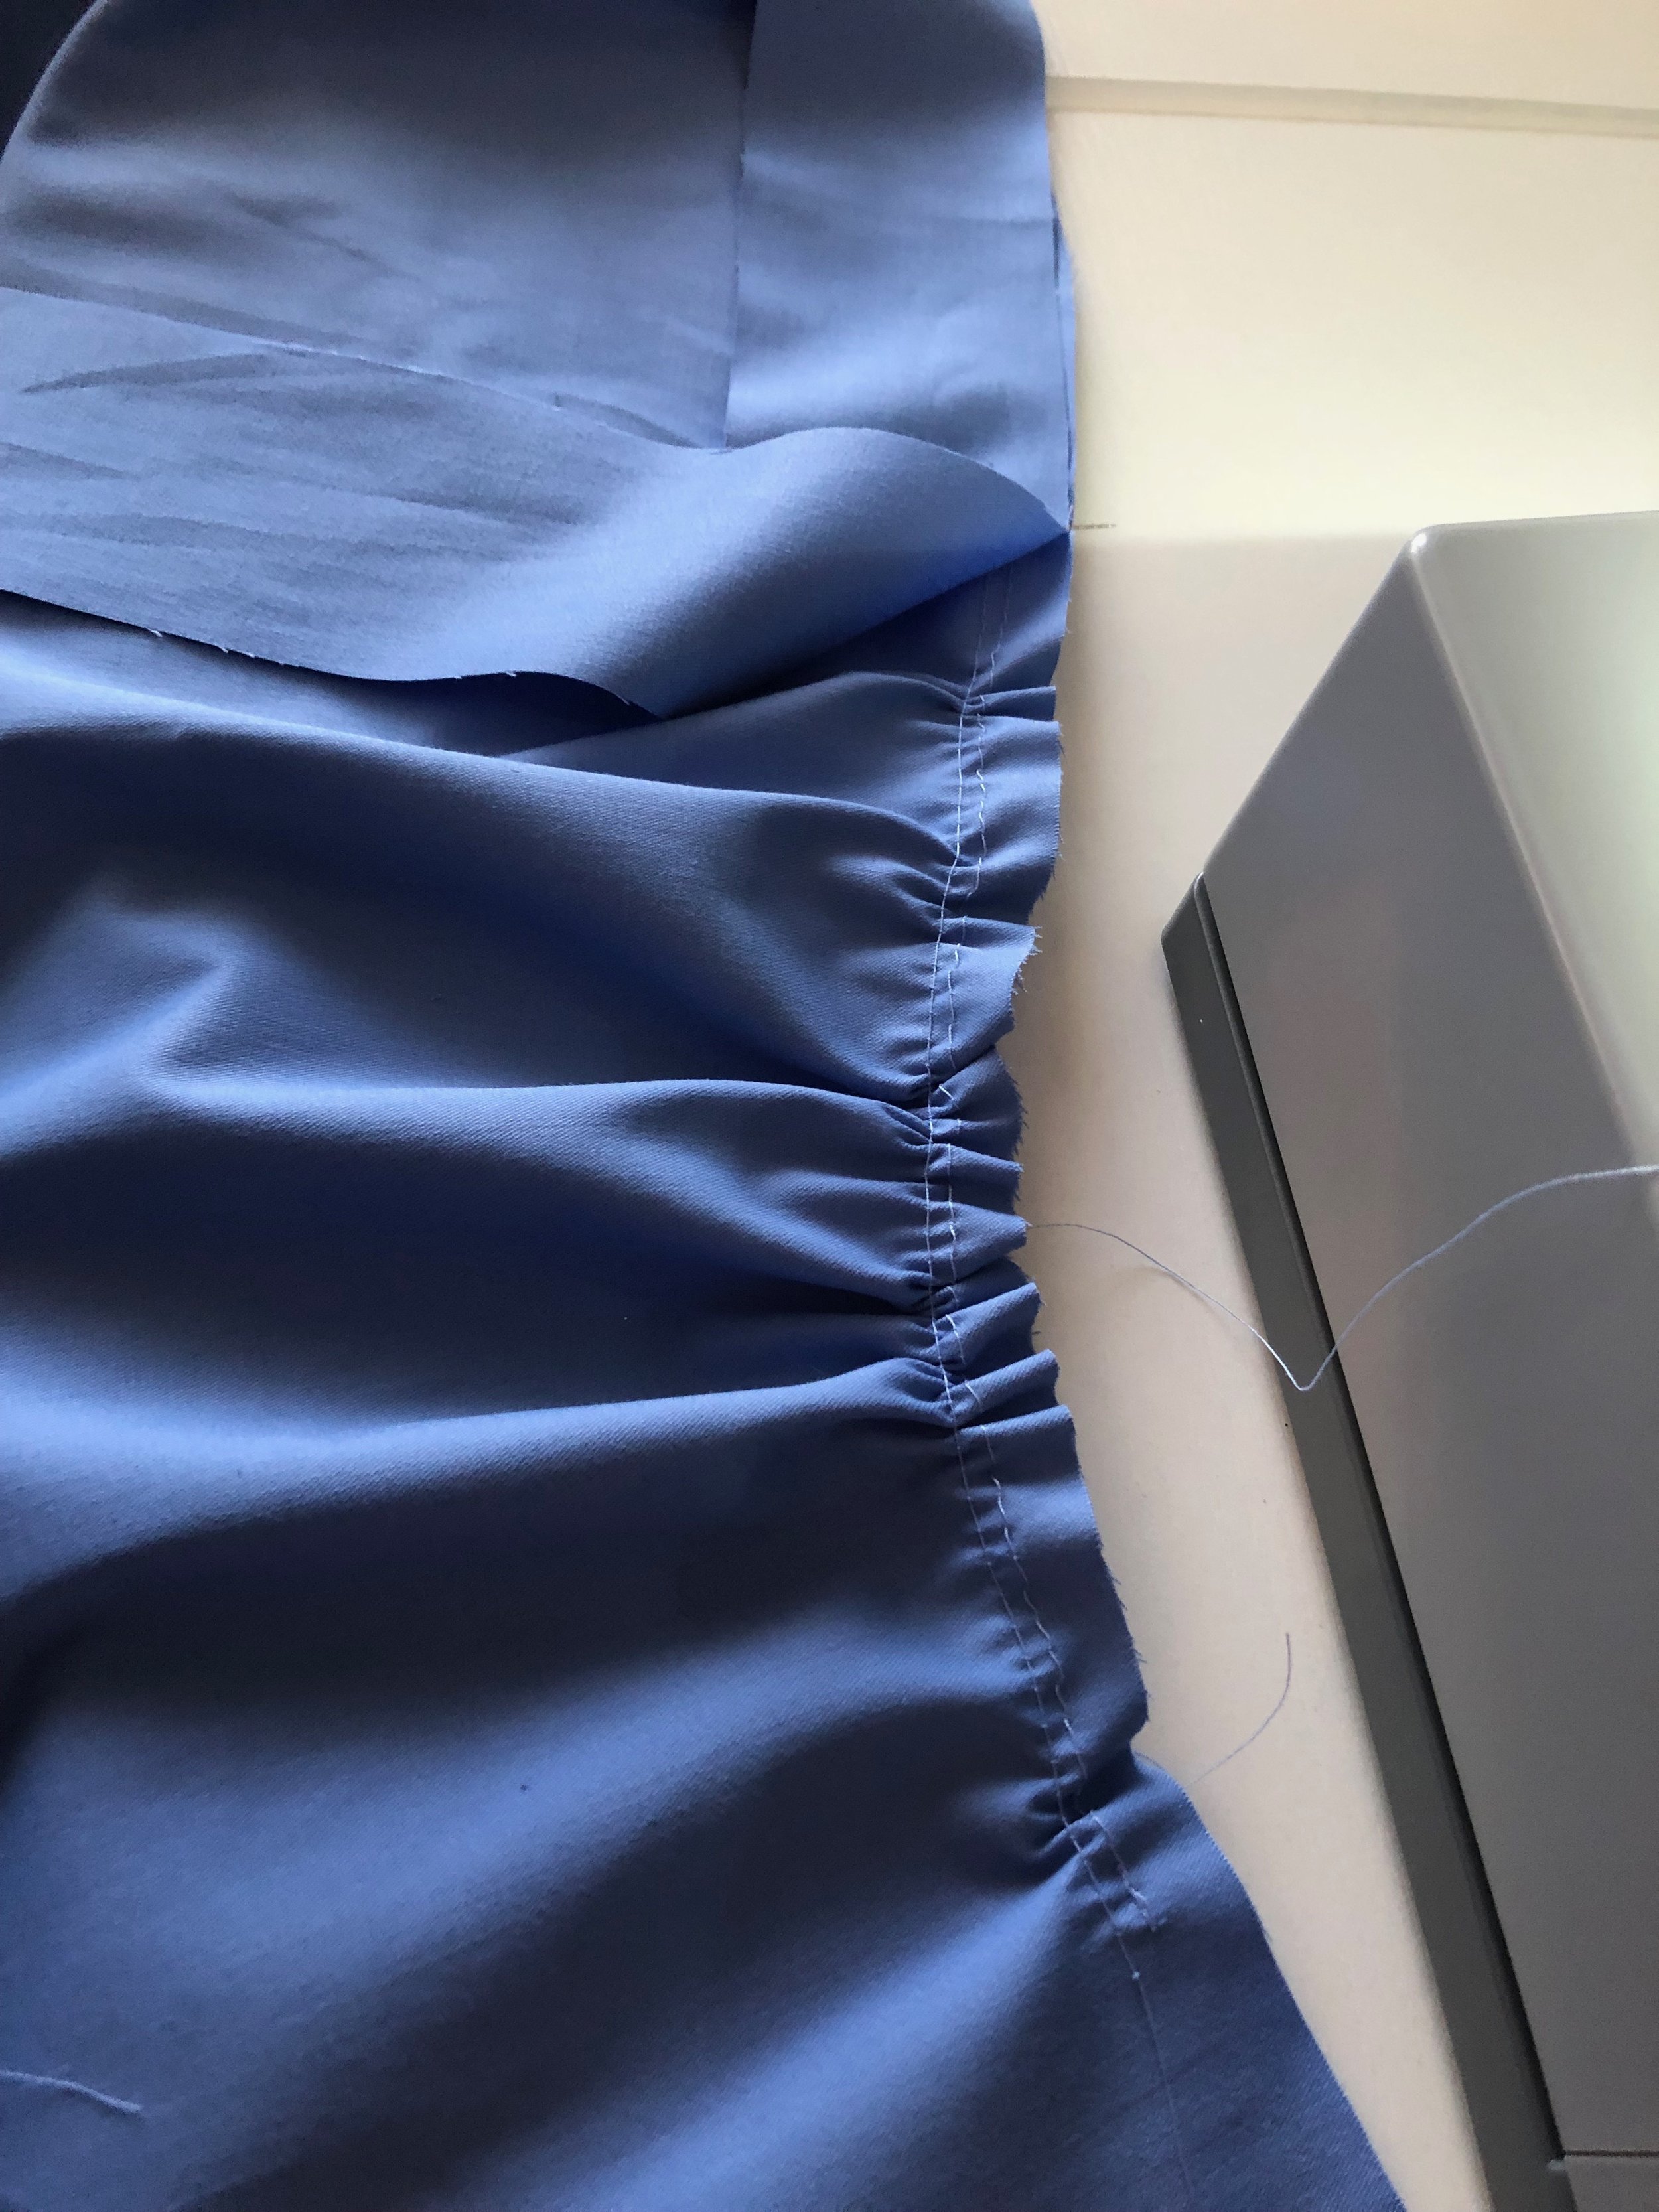
This required gathering the top and bottom of the sleeve and adding 5/8 inch elastic at the bottom of the sleeve to keep it fitted on my arm.

IMG_2640.JPG
IMG_2641.JPG

Next I made the collar. I used the inner curve of the “B” pattern collar to create the inner curve of my collar and then I just eye balled the outer edge of it and I thought it worked. Once the pattern piece was made I cut it out 4 times on my fabric and twice on my interfacing (my collar was two separate pieces). I attached it to the bodice and then I was ready to add my circle skirt.

IMG_2645.JPG

Next, I added my circle skirt. I made this using my waist measurement and the length from my waist to the end of my petticoat plus 2.5 inches. I had to cut mine in two pieces halves and I really wanted to add pockets but it just didn’t happen since I thought we were running out of time.

I cut my fabric all the way to the salvage so I didn’t have to worry about the skirt being clean on the inside. For the hem, I marked 1/2 inch and 2 inches from the bottom of the skirt, then I ironed it and hand stitched it down. I probably should have used the bling hem stitch on my new sewing machine but I was on hour 13 and getting tired so I just hand stitched it.

IMG_2649.JPG

From here I stitched the lining in at the neck and back through the zipper, flipped and pressed. From there I hand stitched the arms and bodice where the skirt attaches. Then I applied the zipper. It was supposed to be an invisible zipper but again we were close to 11pm and I still needed to make the apron so I said YOLO.

This is also where I stopped taking photos. So instead of going super into detail about the apron, I will just state the it was draped over the dress out of Quilters Cotton from Joann fabrics. I essentially made two trapezoids that I connected with a 4” by 60” strip of fabric with two 4” by 45” strips that tie at the top.

Now it was time to get into makeup and costume. Alex had spent this time making the chibi and the set as well as drawing all the amazing art for the White Board Wars.

AliceChibi.png

Here’s a few BTS photo’s:

IMG_2673.jpg
IMG_2668.JPG
IMG_2657.JPG

Finally, here’s the clip from when Alex did the before and after.

That’s a wrap on the 24 Hour Challenge.

The next blog will be a series on Stellagosa, I’m not sure if it will be a 3,4 or 5 part series for the costume but see ya in 2 weeks for the first blog on her which will be about sewing the sleeves, necklace, and bodice for her focusing on the detail stitches and what I did using my new Husqvana Viking Topaz 50 Sewing and Embroidery machine.

As always, if you live my content and want to support it further you can do so on ko-fi, patreon, or join me on Twitch Tues, Wed, and Thurs at 12pm EST.
White Christmas, Red Dress pt 3

Welcome to part 3 and the final part of making my White Christmas Red Dress. In this blog I will go over how I made my full dress with the rhinestone details on it.

If you’re interested in learning how I made my petticoat you can find that here or how I made the skirt and cape-let with the fur trim you can read that here.

Full disclosure I did not drape the bodice pattern for this costume, that work was done by Sarah who was Betty to my Judy!

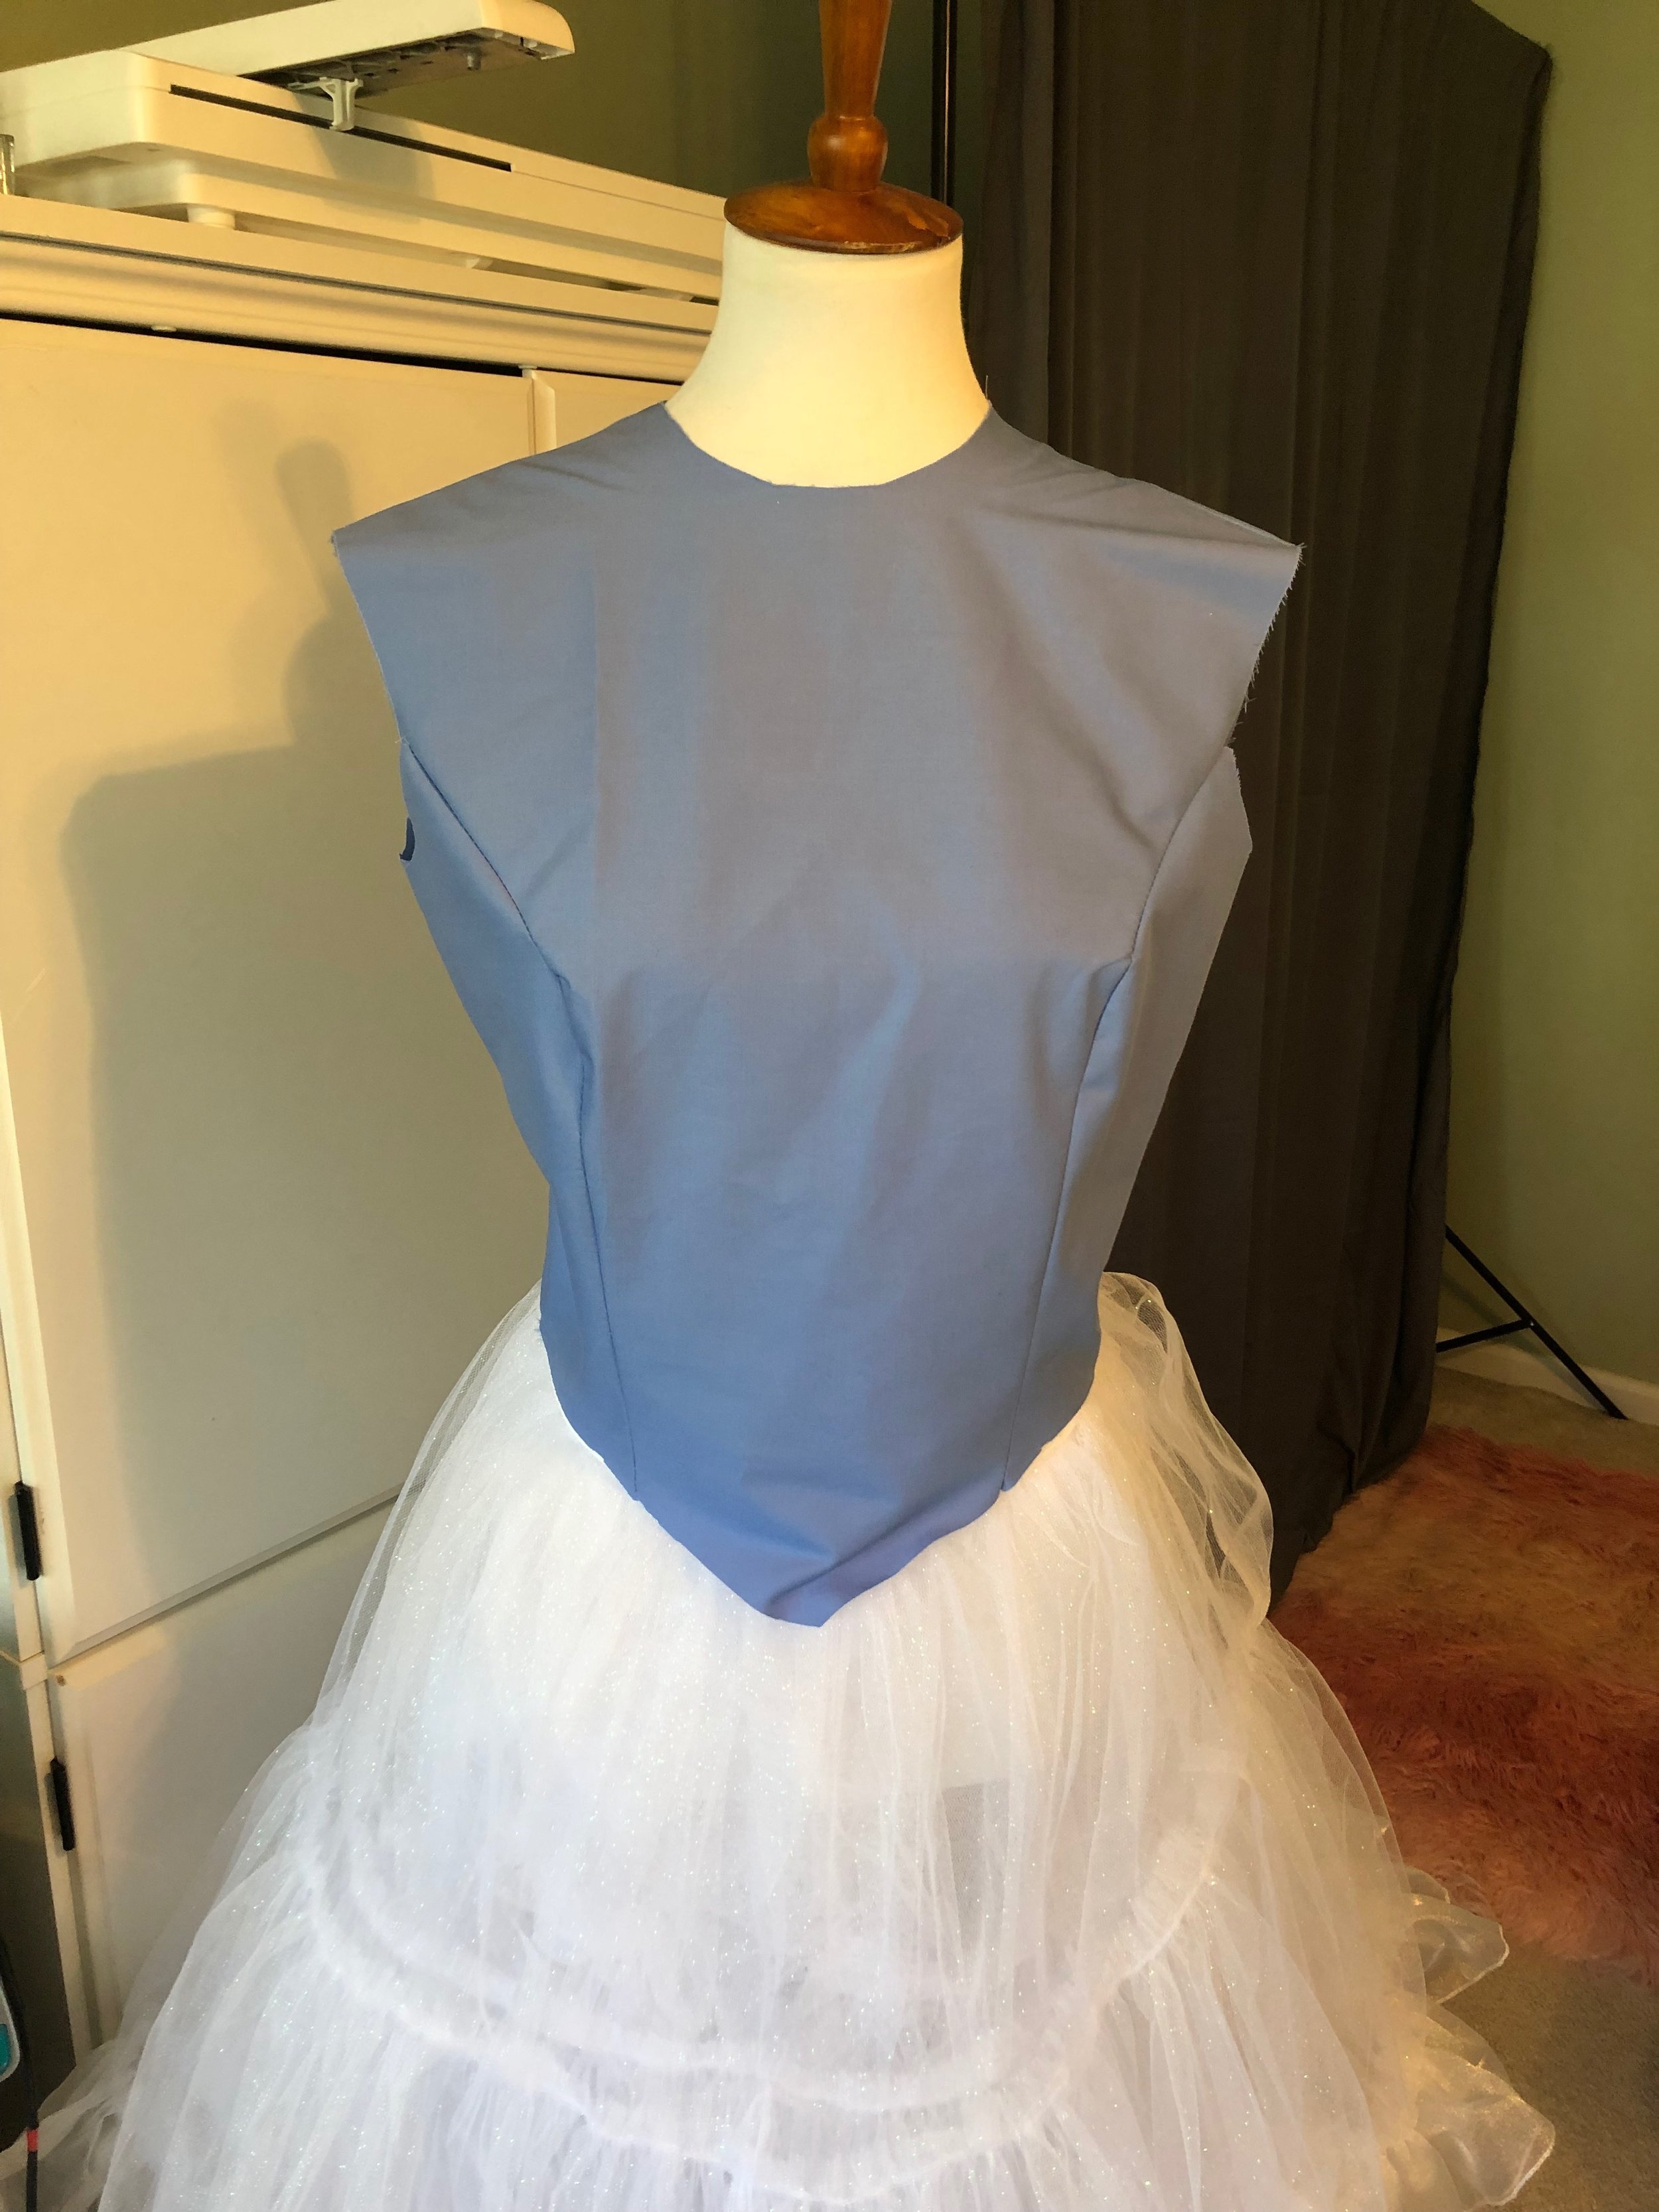
I started by making a mock-up with some of the scraps left over from the skirt and cape-let.

The mock-up fit literally like a glove so I made no adjustments to it and then went ahead to cut it out and make it again but this time with lining and sleeves.

IMG_2151.JPG

I didn’t take any pictures of this process but essentially I sewed the darts in first, then the panels together, then added the sleeves and actually over locked those at the seam in order to keep them clean.

Next I whipped up a quick collar for the neck to make it a turtle neck, I interfaced it and once again serged the edges to keep it clean.

IMG_2163.JPG

For the skirt addition, I just cut out a second circle skirt but 6” shorter and draped it over my current skirt. From there I marked with pins where I wanted to cut the slit and I actually cut it too high for the fur but I just hid that with the fur application. It wasn’t the cleanest way to do it but it worked. Then I over locked the hem to prepare it for the fur.

IMG_2165.JPG

For the fur addition I used the exact same technique described in part two, because I hand stitched the fur down it took about 6 hours to apply but looked lovely once it was done.

IMG_2176.JPG

Finally it was time to apply the invisible zipper. This was my first time ever attempting to do an invisible zipper and I wont lie it was way easier than I had ever imaged. I don’t own an invisible zipper foot but I’m considering buying one for the future.

IMG_2196.JPG

As per usual I over locked my seam before adding the zipper to “keep it clean”. I’m not going to go over step by step how to add an invisible zipper but I’m willing to make a video tutorial if that’s something people want from me in the future. So above is sewing the first side.

Below is sewing the second side.

It was so easy and look how good it turned out.

IMG_2198.JPG

Alright now the sewing was complete! It’s time for rhinestones!

Sarah created a template for us to go off of and a general idea of where the placement should have been.

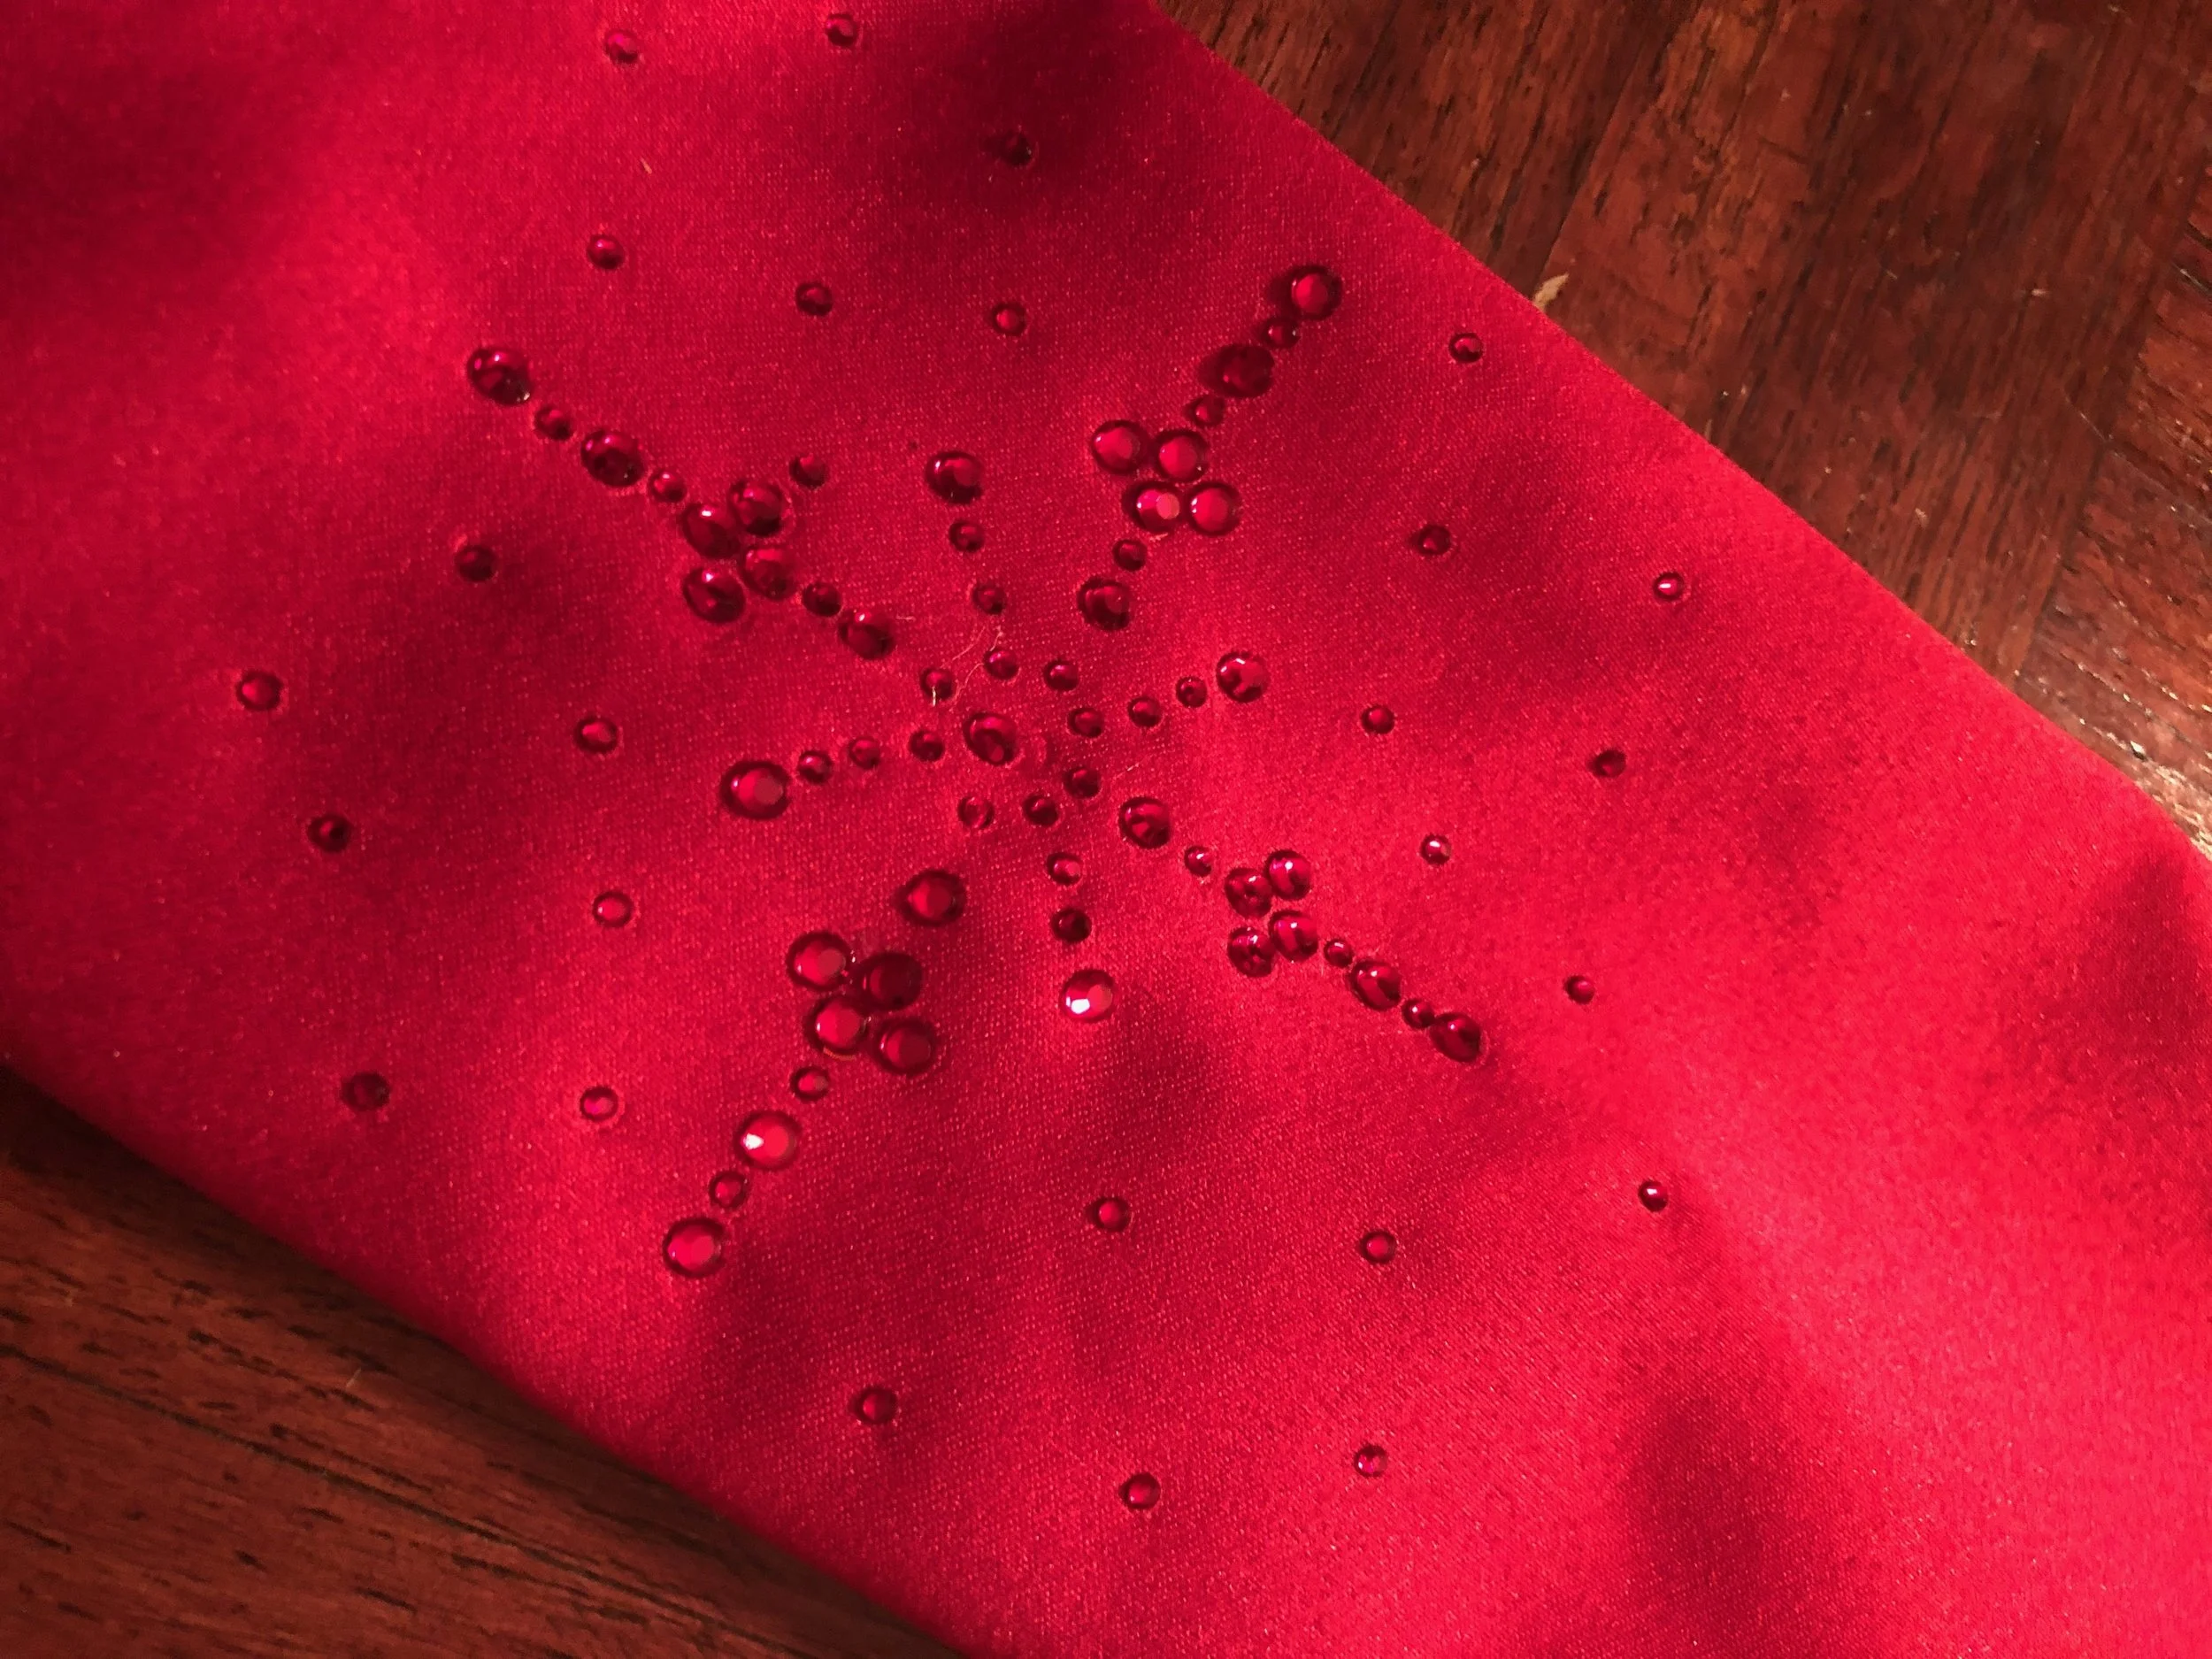
We used the hot fix tool and 3mm/10ss and 5mm/20ss to make the snowflake design on the dresses. Hot fix is not my favorite method to apply rhinestones but it definitely is a great way to apply stones! I’ll actually be writing an entire blog after this about my favorite choices of rhinestones and techniques so if you like this blog then stay tuned.

IMG_2200.JPG

I applied the stones all over the dress, cape-let and ever on the bodice and sleeves and we were good to go. The red stones were very tricky to see on the red fabric but I knew they were there and that’s all that really matters.

IMG_2203.JPG

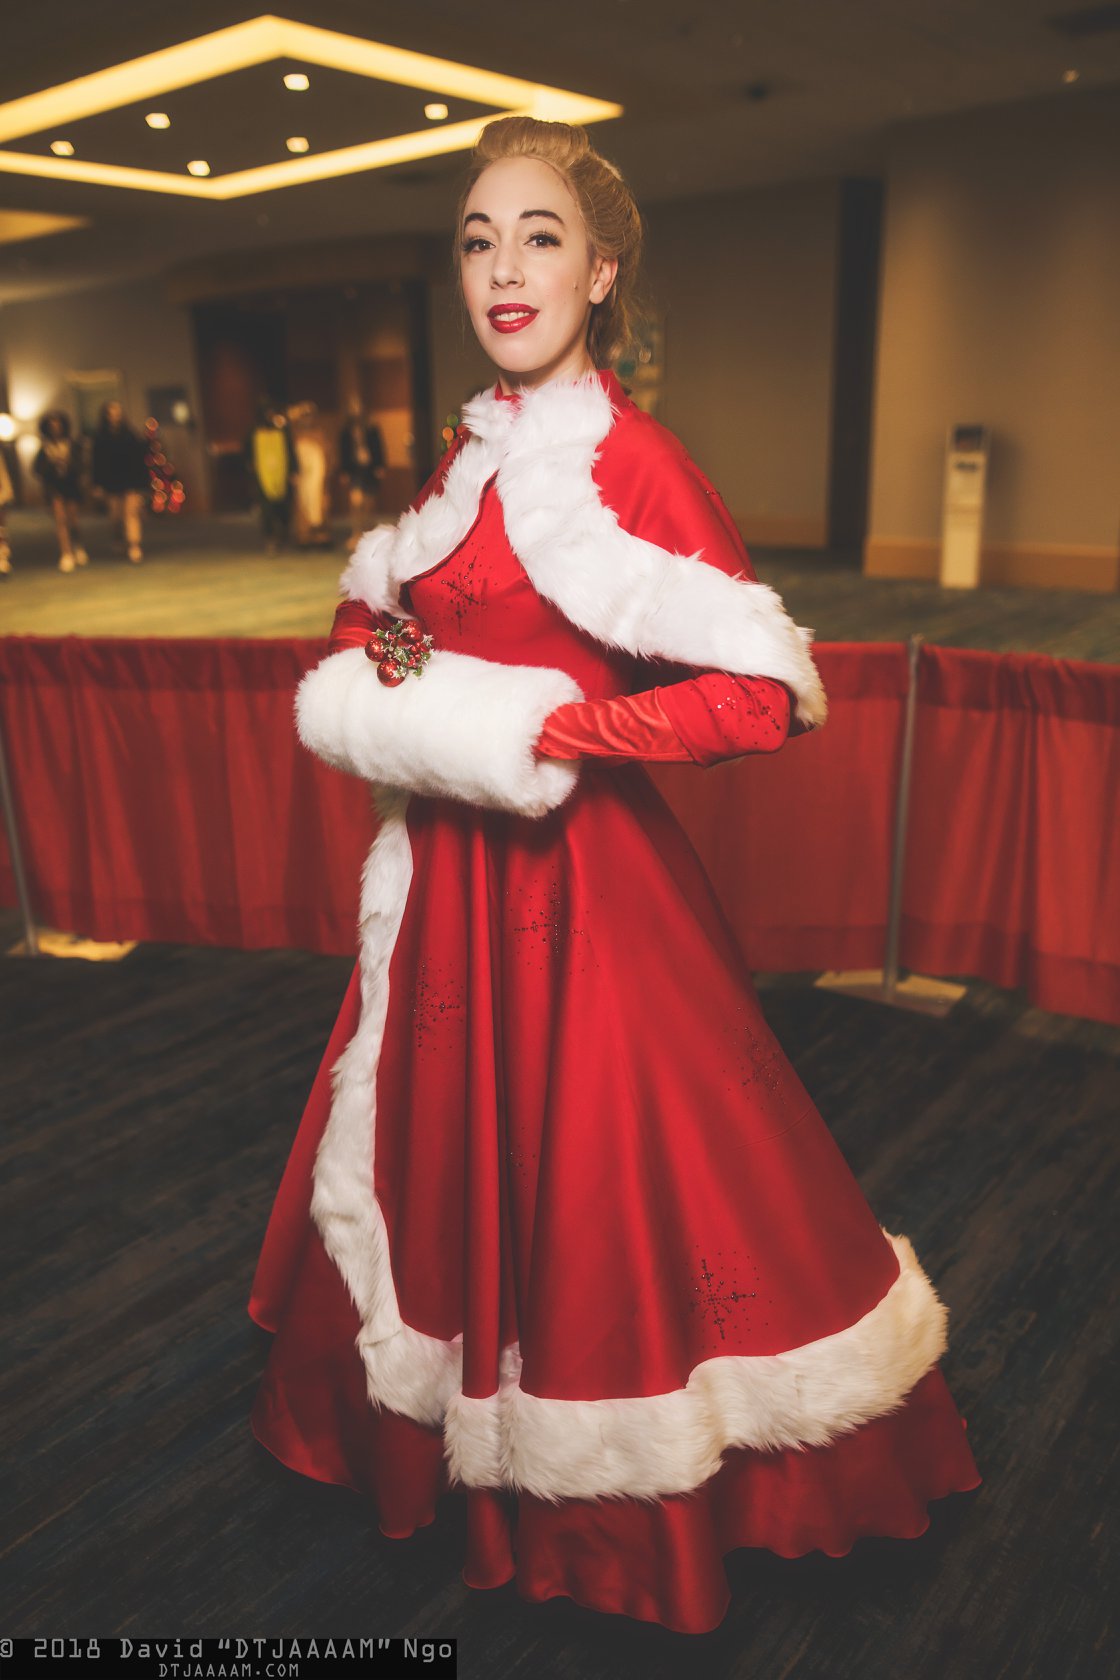
That was it, the dress was done and I was ready to for epic amounts of twirling.

49571347_2145927522095643_1044910460161228800_o.jpg

Thank you all for reading my blog.

I’ll be posting blogs every first and third Friday of the month so stay tuned!

Rhinestone Royalty

2018 was the year of the rhinestone for me and if you thought that was going to change in 2019 then guess again. Over the last few months I’ve had several questions about where I buy my rhinestones, how to apply them, etc and I have been planning this blog since the beginning of the year. However, after sharing my most recent batch of stones on Instagram last night I realized that this write-up can’t wait until March.

So, in this write-up I will break down the types/brands of stones, quality, adhesives, price and how long it takes for the stones to get to you and to apply them. If you just want links to where I have bought mine, scroll to the bottom and pick and choose whichever works best for you. Full disclosure all amazon links are affiliate links, so I do make a commission if you purchase from them.

Getting that sweet sweet sparkle.

IMG_2572.JPG

A common misconception about rhinestones is that you need Swarovski Crystals to get the best sparkle but that’s just false. Pictured above are Bohemian, Swarovski and the cheap eBay stones. Can you guess which is which? Probably not unless you look at the facet of the stone and these stones range in price from $1.40 to $55.60 per 10 gross (1440 crystals).

So, there’s really no need to drop over $100 o Swarovski Crystals (like I did initially on Sakizou) for cosplay. Now don’t get me wrong, there is a time and place for Swarovski but I just don’t think they are necessary for cosplay.

With that being said all the crystals I will link at the end of the blog meet my quality standard and that standard is, if I’m walking on a stage or in a well light room will I turn into a disco ball?

Personally in quality I look for sparkle, I look for how reflective the stones are and overall how much impact they will have when walking around. I prefer not to use filters when I post rhinestones, so you will never see that fake like sparkle where there is no stone. There is absolutely nothing wrong with those filters, I love seeing them used by others I just personally stay away from them.

IMG_2574.jpg

Don’t be afraid of colors! They are awesome and can really add dimension to a costume. I prefer to use color when I am trying to create a design on a gown or to highlight a design that is already in a gown.

Here’s my White Christmas red dress with the snowflake design I added in rhinestones:

IMG_2203.JPG

Then this is how I took the flames on my Jafar costume and used rhinestones to accent pieces of it:

IMG_2550.jpg

You can also use colored rhinestones to create extra sparkle, I used Black AB rhinestones on my Sakizou dress to add extra sparkle and it was awesome:

IMG_0972.jpg

AB rhinestones have an iridescent coating to give extra shimmer, named after the Aurora Borealis. They are typically half coated and AB 2x are fully coated. I almost always buy massive amounts of AB crystals because you can use them on everything. On both Belle and Sakizou there were over 10k each.

Does size matter?

IMG_2573.jpg

Yes!

Okay, maybe because it all depends on what you’re using them for.

If you’re using them as a means to lightly cover an entire piece of clothing, like I did with Sakizou’s skirts, then I would recommend smaller but closer together.

If you want to create a cascading effect that draws attention to certain areas of a costume or just emphasize a silhouette then I suggest using multiple sizes.

If you want to make a design then multiple sizes is the way to go.

I personally have 3 different size AB Crystals in my stash at all times. I use small stones (3mm) when I am covering a sleeve or skirt. I use small and medium (2mm, 3mm or 4mm) when I am creating a design. I will typically use larger ones (5mm and 6mm) when I just want a pop of sparkle but don’t need it to cover an entire piece.

But honestly, the best part about crystals is you can use them whatever the heckin way you want to!

Finally, I’ve been using this chart to help with sizing since every website seems to use one of these two ways of sizing and I always forget which ss corresponds with which mm.

Chart from Creative Crystal

Chart from Creative Crystal

How to apply crystals.

IMG_2576.JPG

There’s two basic methods I use to apply crystals.

The first and most commonly used on my stream is the Hotfix tool. Now this is a good method of adding rhinestones, its affordable, you can get rhinestones for this on Amazon Prime and they apply quickly.

BUT, they have been known to fall off if you don’t allow the glue to completely warm up AND it can take longer if you are using large stones.

I use this method on stream all the time and I have very little issues with it but I have also learned from experience that this is probably not the say all end all to applying crystals.

You can purchase the tool here.

The best rhinestones I have found for this tool are here.

Please for the love of god DO NOT purchase the stones that come with 1 gross of 15 different colors, I have bought 2 of those kits and they are trash. I also have heard that the rhinestones that come in a kit with the tool are also trash. Save yourself the frustration and buy the tool and then the Threadart stones separately.

I have purchased 10k AB rhinestones for $40 and the one issue I had with those was that each batch seemed to be slightly different quality. By that I mean the adhesive for some are better than others and how well the tool picks up the stone varies.

Also note that for hotfix you need electricity and if you’re planning to rhinestone on your 12 hour car ride to Katsucon then you’re out of luck.

Ultimately, hotfix is not the cheapest method of stone/application but its the quickest method to get to you.

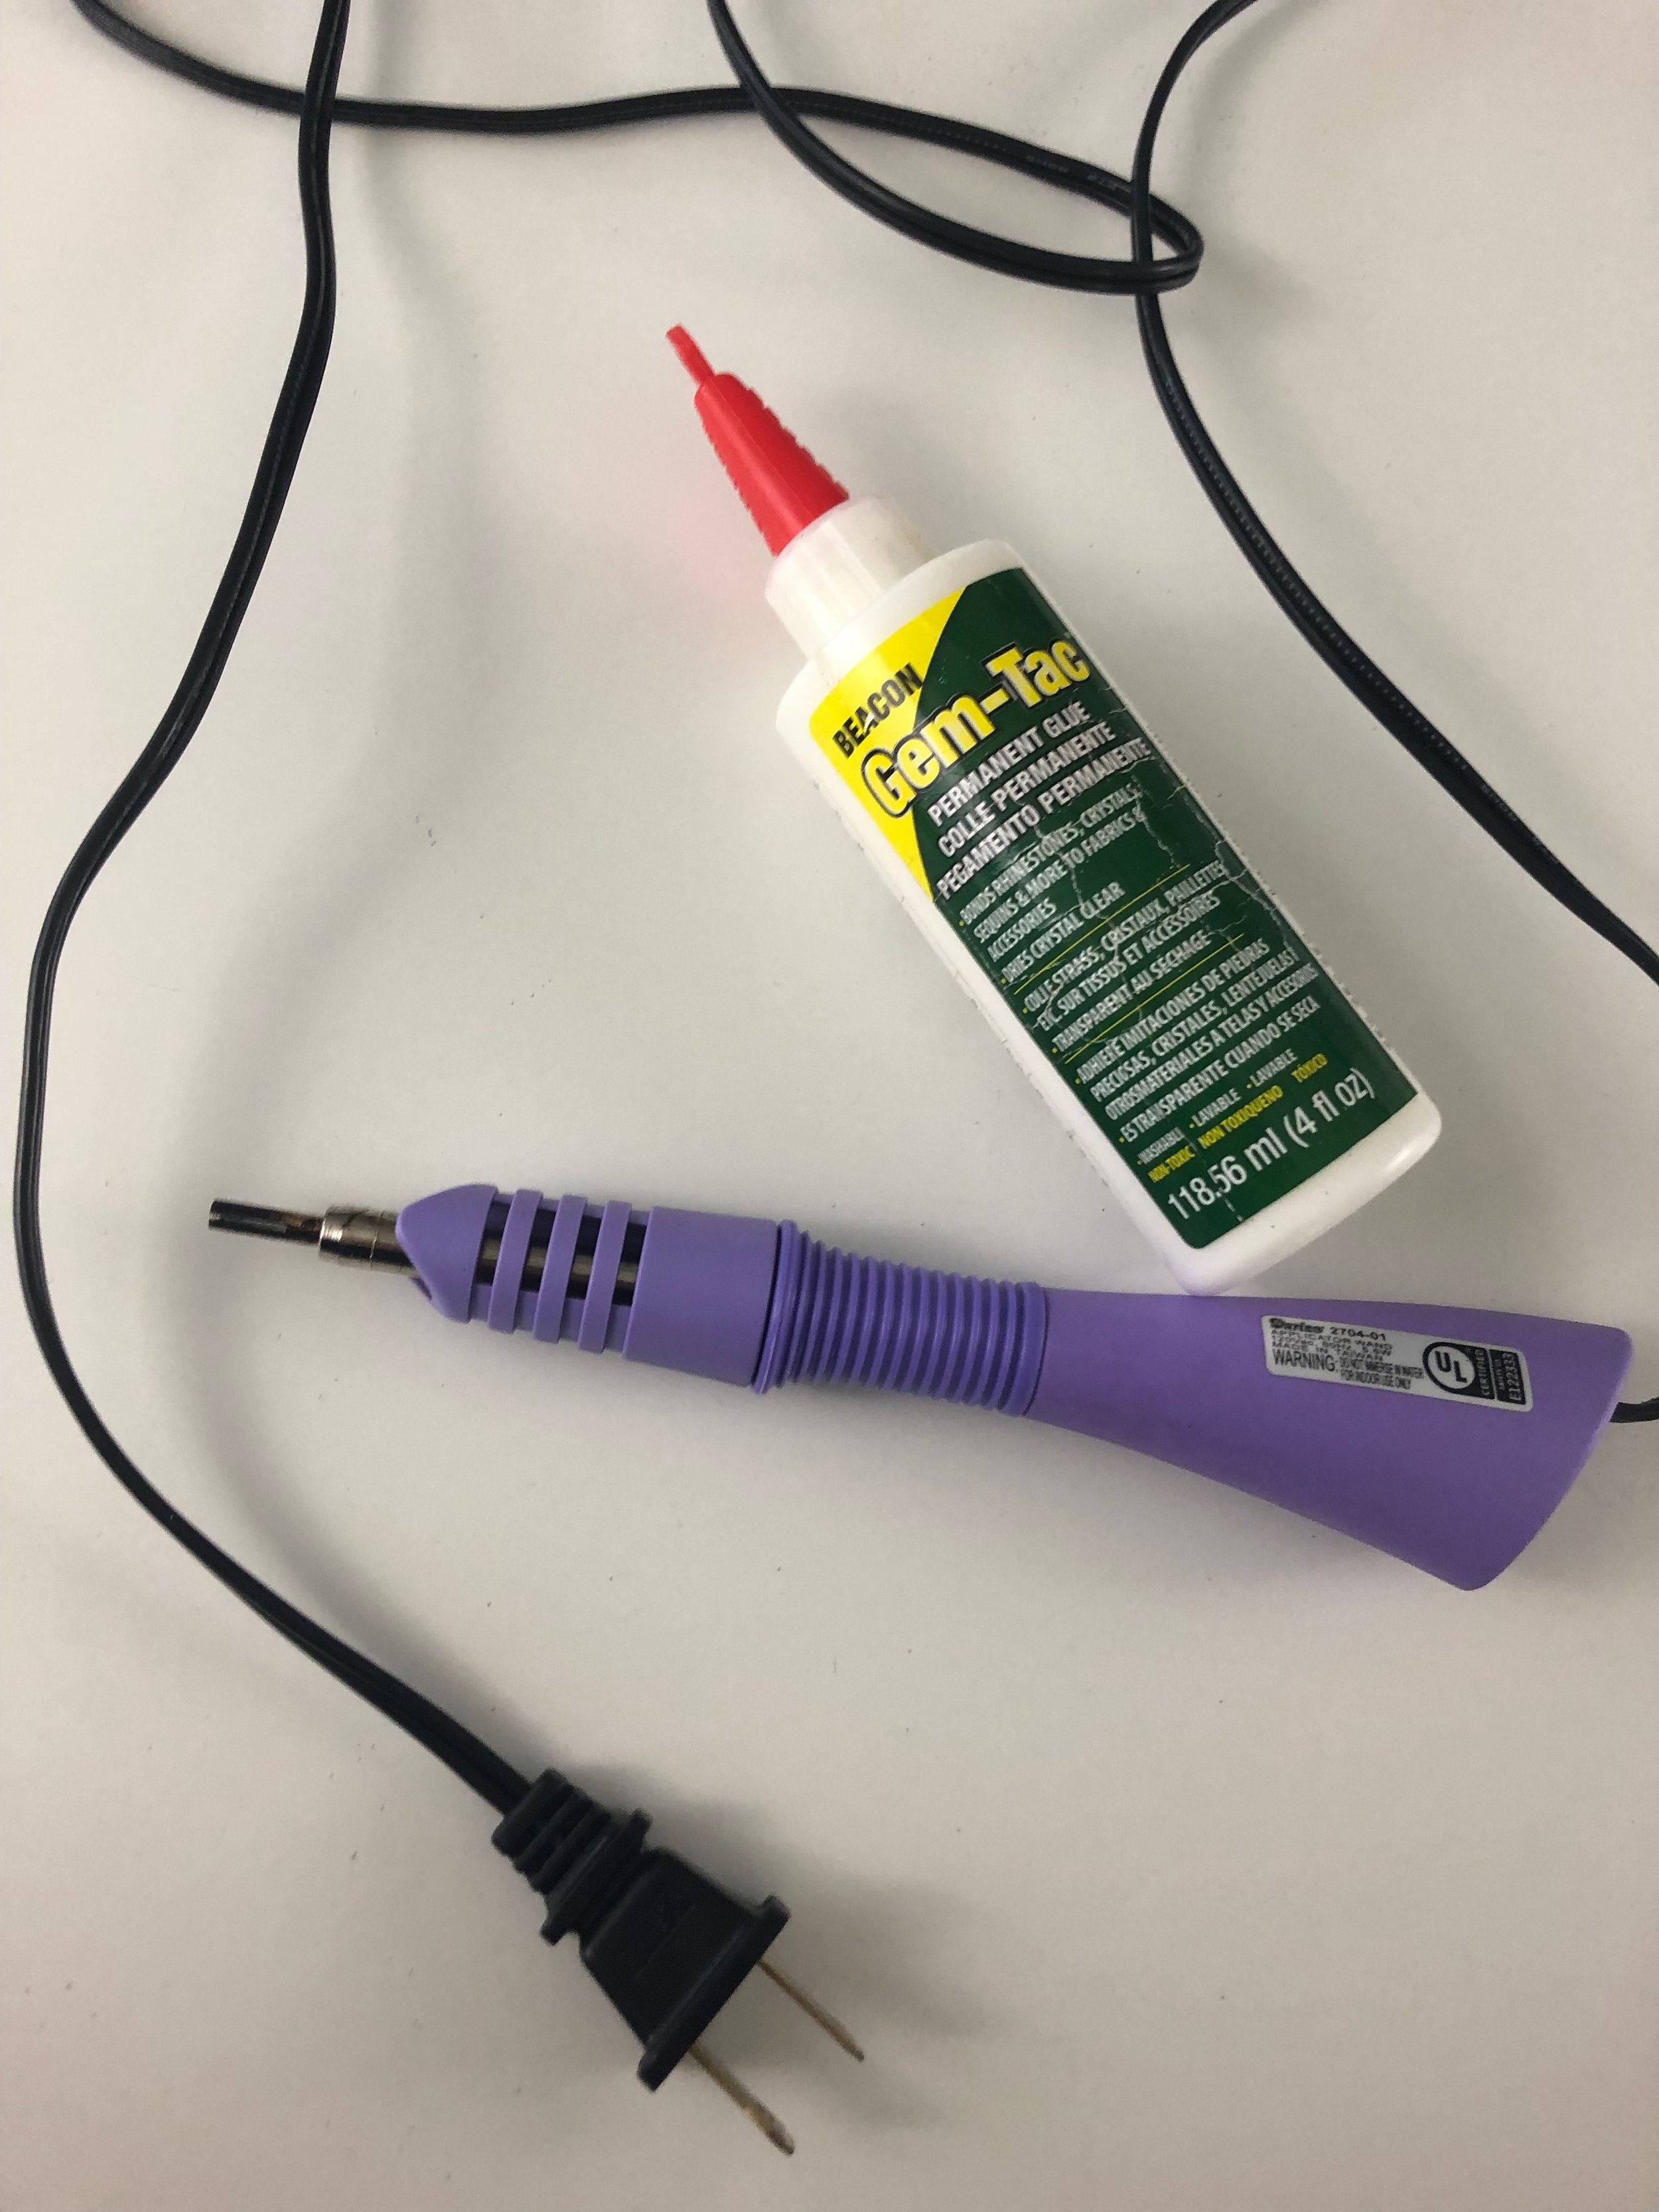
Now, lets talk about gem-tac. I know people have done blogs stating E6000 is king and only use that but here’s the tea, E6000 used on 4k-5k-20k stones per costume will kill you. Also, it doesn’t actually adhere to a wide variety of fabrics. I used it on all my Lady Gaga rhinestone covered costumes and on ALL of them I have lost lots of stones.

So you can buy gem-tac here. 1oz covered about 2k crystals and that’s while streaming where I had quite a bit of glue waste due to talking and having it dry. The cure time is probably 30 minutes, probably less and even though its white, it dries clear. I used it on silk dupioni and had ZERO problems with it distorting my fabric. Also, note that this can be used with literally EVERY stone you purchase, you can even use it with your hotfix stones.

Now, applying stones with gem-tac can be tedious although we are talking about applying stones so I guess that’s just tedious all together. My advice is to use toothpicks or those cheap chopsticks you get at take out places to dot your fabric with glue and then tweezers to pick up and place the stones. These tweezers are really good for both beads and rhinestones.

Don’t Break the bank on crystals, unless you want to I guess.

Now it’s time to discuss the best price rhinestones for the best quality. This is where I will start giving you links to where I buy my crystals but please note that some of these can take upward of 2 months to get to you. So plan accordingly.

Let’s start with my favorite stones to date, these are the ones a lot of you probably saw on Instagram last night. My friend Eveille Cosplay sent me this link and she really deserves all the credit for this find, so go follow her.

Ebay

I bought, 4mm gold, 4mm dark purple, 4mm light green, 4mm purple, 4mm Iridescent A/B, 4mm Emerald green, 4mm blue, 4mm peacock blue, 4mm light blue, 4mm black and 6mm iridescent A/B stones for about $25 and it took 2.5 weeks to get to me. Those stones are my absolute favorite and I plan to buy one of every color after I finish this blog.

My second choice would be hot-fix but ONLY because I can get it all on Amazon Prime and the price per gross is the second cheapest. So if you want the links to all that jump back to ‘How to apply‘ and just note that all those links are affiliate links so if you purchase there you just feed into my rhinestone addiction and I appreciate you.

My next favorite option would be from Beads Factory. They are not very cheap UNLESS you get them on hella sale like I did on black Friday. I purchased Bohemian Crystals for 70% off and the quality is just a step up from the eBay option and IMO are just as good as Swarovski. You can also purchase Swarovski and Perciosa from Beads Factory. I have not used Perciosa but I’ve had it recommended a dozen times so if you try them out let me know.

Finally, I bought my Swarovski from Fire Mountain Gems. I buy a ton of beads from them but keep in mind to pre-plan because every unit you buy can make the entire total go down. I typically only like to purchase from them when I know I need 50 units or more total (you can mix and match between items and that rocks) because it will save money in the long run.

There are TONS of other places to get crystals but these are the places I have purchased from, I am not listing any I have not purchased because well I don’t want to screw anyone over so if you purchase elsewhere leave a comment with a link.

If this guide was helpful to you at all and you’re feeling extra generous please consider buying me a coffee. Everyone that does so will get their name inside my Stellagosa costume that I am starting on Tuesday.

If you can’t help out I totally get it because those precious doll hairs could be used to purchase crystals BUT sharing this blog helps too and using my Amazon Affiliate link is also a way to help.

Last but not least, PLEASE PLEASE PLEASE tag me on IG, FB or Twitter if you use any of these suggested crystals or if you just want to share your work with me.

Thank you to all of my Patrons and Twitch supporters, you guys make it possible for me to grow not only as an artist but as a human. I love you all.

Packing For Cosplay Video

I’ve received so many questions about how I traveled to Twitch-con with Sakizou so here’s the video. I’m sorry the video is slightly blurred, I’m learning how to use my camera that I bought over a year ago and it never occurred to me that how it looks on the back of the cam is not how it will translate on my monitors so I am working on that for future videos. Well I’ve already fixed the problem for future videos lol but here it is, if you like it let me know by subscribing to my YouTube channel. I will try to update my blog for every video I post but there’s always a chance I will forget.

Road to Twitchcon and why I am retiring from cosplay competition.

“Sometimes life gives us a million reasons to want to give up, but we stick around.” Lady Gaga

I started 2018 pretty focused on one thing, creating something that the world would deem better than Rococo Belle. It all started in March of 2016 when I debuted Rococo Belle after 6 tiresome months of lessons learned and discovering a love for sewing I never knew I had.

13177140_10154277014533729_8889753154390917310_n.jpg

I competed three time in three different states, winning Masters class in all three competitions. To some, this would be called “sandbagging” a term used in the cosplay community when someone wins a major award with a costume and then competes in it again, whether they win or not. To me, this was the entire reason I spent 6 months on one costume, to compete and win.

Something happens to you when you win, you go from thinking about all the fun little costumes you can make with your friends to thinking about your next competition piece. You start asking yourself, how can I be better than that? What can I make that is better or that will win me a bigger award. It’s maddening the things you think when you’ve won a few times and you want to do better than yourself next time.

Next time, I tried to be better. I did more work, tried more techniques, but it just wasn’t enough. I wouldn’t call Anne Boleyn a flop since I made it into The Crown Championship which I failed at three times prior. She also got me to Twitchcon 2017 which is an amazing feat but what I put myself through to get onto that stage was mentally and physically unhealthy.

Anne Boleyn taught me a lot about things I need to work on and much later it taught me how strong I was. After losing five times in Anne Boleyn I had hit burn out, not only from this costume but from working on streaming, Patreon, oh and not mention making 25 Sith costumes a month for customers over on Etsy.

By the end of 2017 I was so burnt out that it caused me to have break down after break down, I was in such a slump and the only thing that was really motivating me to go forward was making a Belle dress not for competition. I needed a break, bad, and Belle was my outlet and guess what it worked, kind of?! I was brought back from burn out and I was finally motivated to start my Twitchcon Cosplay Contest Entry for 2018.

Art by Sakizou

Art by Sakizou

It was late February and I had hit my donation goal over on Twitch so I was able to actually start making this costume.

Remember when I said I was over my burn out? Well I lied, I wasn’t, not even close.

Things were going slow on Sakizou, I hit road block after road block and distracted myself with projects I didn’t have the time for.

One night in early May, I was having some serious doubts, not just about my costumes, about my friendships, my business, where I was going in the world. I was so afraid to continue working on things and continue making art because I was afraid I would fail.

I was so afraid of failure and how it would affect my relationships that I spoke the unspeakable words, “I wish I was dead.” The sentence came out and a flood of images of what life would be like if I was not around came to me. I thought about how happy everyone would be not having to hear me talk about cosplay and about being better than Rococo Belle and how I peaked only two and half years into my career. In that moment, that night I honestly believed the world would be better without me. I fell asleep believing that idea.

I woke up the next morning, it was my first ever subathon. I was tired, I wasn’t even sure if I had it in me to hit start streaming, but I did. I didn’t tell anyone what I had said the night before, I’ve actually never told anyone until right now. But something happened that day, my community came together to celebrate sewing, our stream, the shenanigans that are my life sometimes. That day didn’t change me completely, it didn’t make that sentence go away but it did push me forward and it did give me the strength I needed to fight the voice of fear.

By the end of May I was back to working on Sakizou, here and there I would put in hours but I had already lost 6 weeks and I was already going to lose more time to get commissions done. So, instead of dedicating all the little time I had on Sakizou I decided to get a dog.

35058224_10155580941509849_759981217348059136_n.jpg

Her name is Eva and Eva is essentially what brought me back from the darkest place I had ever been. I fought with myself in this dark space for a month and I honestly thought it was going to be an ongoing battler forever. I was wrong.

So now here we are Mid/late June and I am finally on track! I am working 6 hours a day on Sakizou, filling my etsy orders and spending my time with my doggo!

This lasted through July and finally in August I was home free. Working 12-16 hours a day on Sakizou, my life was 100% focused on my goal of creating something better than Rococo Belle.

I can’t tell you how many times from August until October 25th that I thought I would not be able to finish this costume. I had so much work to do and no clue how I was going to do it all, it got to the point where Toby (Renee Cosplay) was actually making my meals for me. I took two 30 minute breaks a day from Dragoncon until the Monday before Twitchcon. All while dealing with the mind games from other contestants; the drama that should not have been; and of course making 22 Sith costumes in October because Halloween.

43765049_10155870611404849_1331835544212078592_n.jpg

The Monday before Twitchcon I had finally finished, I felt like I shouldn’t have been done. I thought, “If I’m already finished I must not want this enough.” So I spent the two days I had creating documentation, making sure everything on my costume was exactly how I wanted it and ultimately preparing for another failure. Okay, I didn’t think I was going to fail but I did not think I was going to win either.

SPOILER ALERT! I WON…it all! I took Best in Show, I ugly cried on stage, it was flipping great and I did create a costume that was leaps and bounds better than Rococo Belle.

So, “Why am I retiring?” one might ask.

I do not want to put myself through the pressure of making something better than Sakizou. Instead, my time is better spent helping those of you who want to be up on that stage next year.

There is too much talent out in the world that has yet to be seen on a stage like Twitchcons Cosplay Contest. My goal from here on out is to help those who need encouragement, who need tips and tricks of the craft, who might be lost and need a grounding point. I want to be all the things that others were for me on my journey to being a champion.

It’s your turn!

So now, go follow my stream. Become a member of our community and allow us to help you make your dreams come true.